Index

Introduction
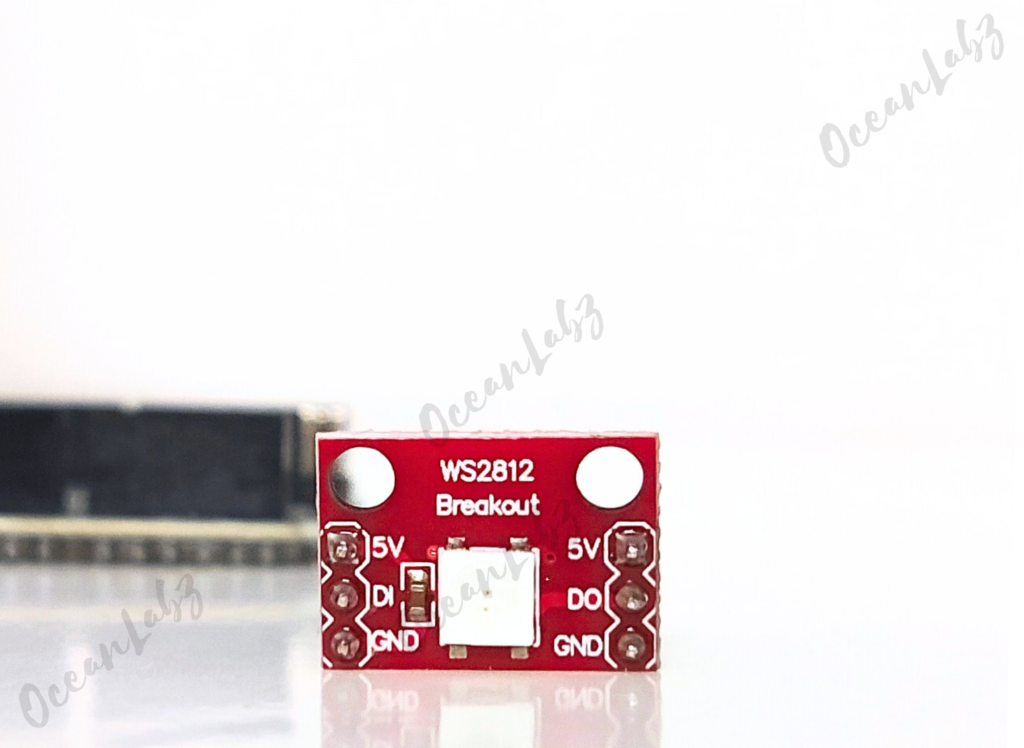
The WS2812 breakout board features individually addressable RGB LEDs, allowing you to create stunning lighting effects and animations. With a simple connection to an Arduino, you can control the color and brightness of each LED independently, making it ideal for various projects, from decorative lighting to interactive displays.
Required Components
- Arduino UNO R3 SMD
- WS2812 breakout board (with WS2812B LEDs)
- Jumper wires
- Breadboard (optional)
- Power supply (if using multiple LEDs)
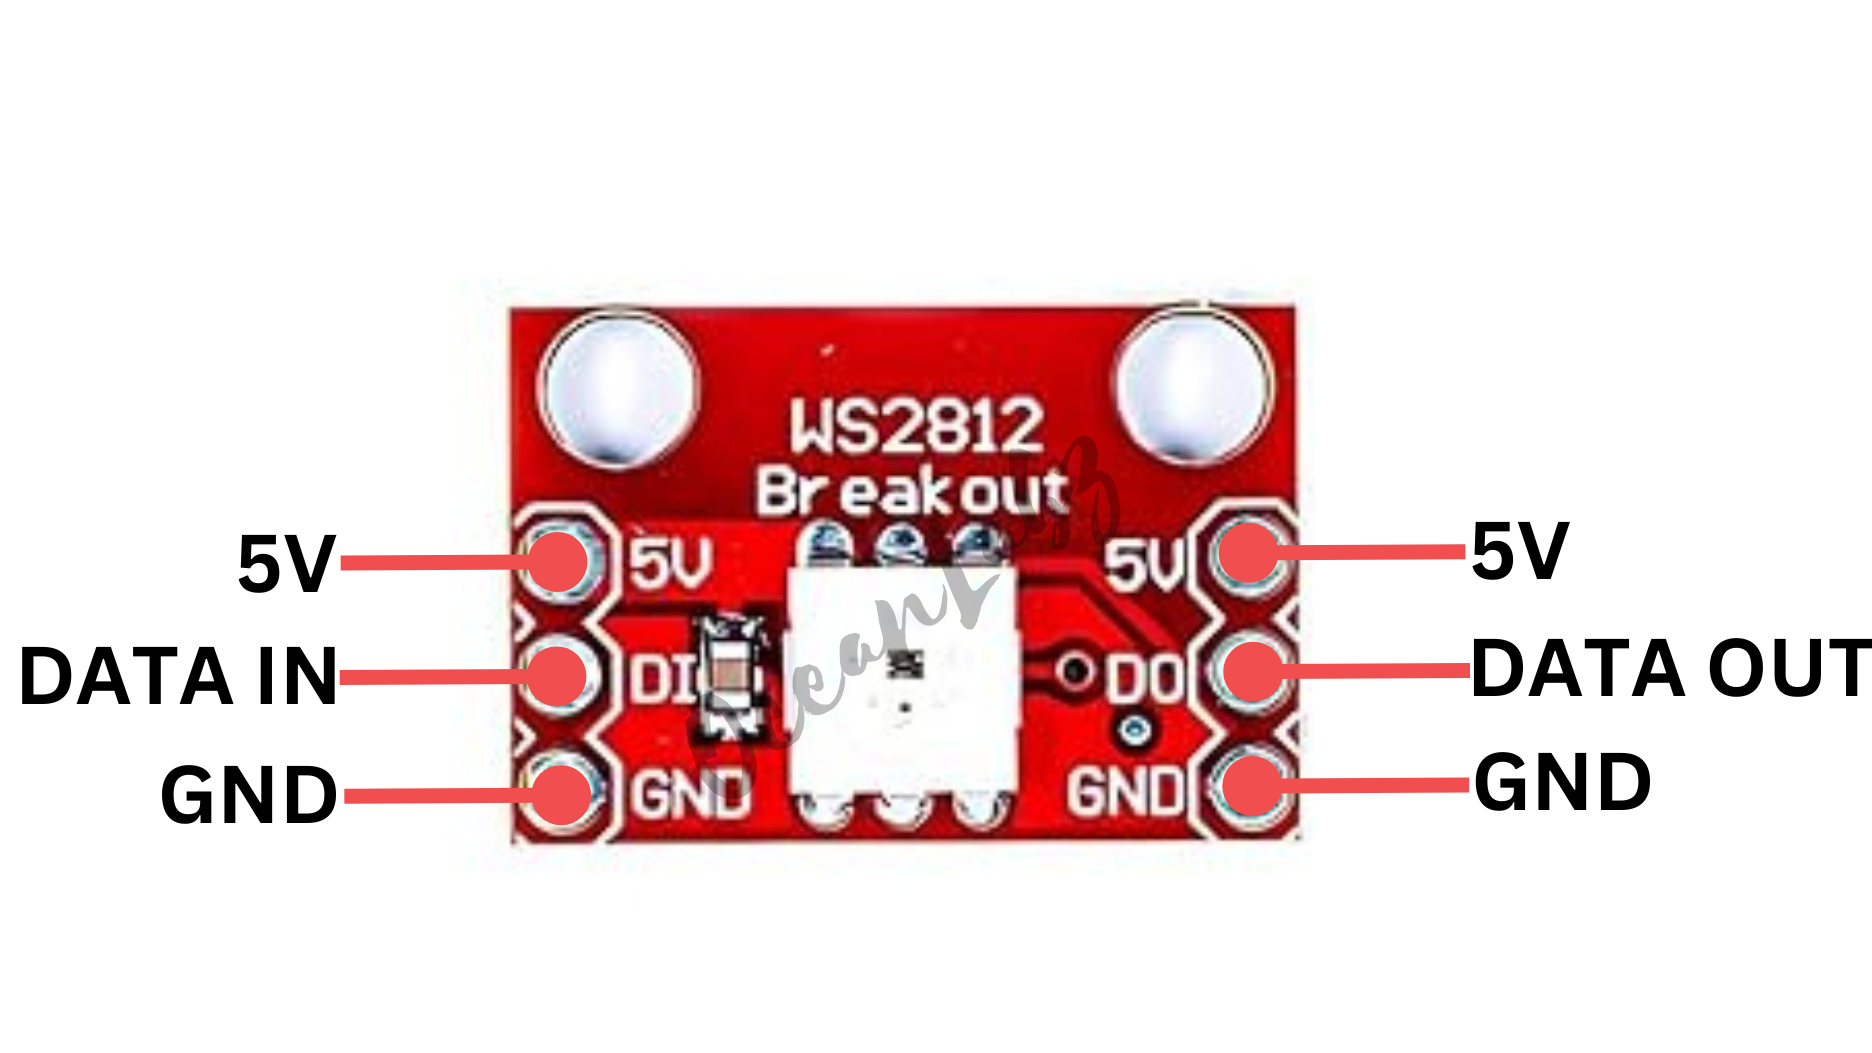
Pinout

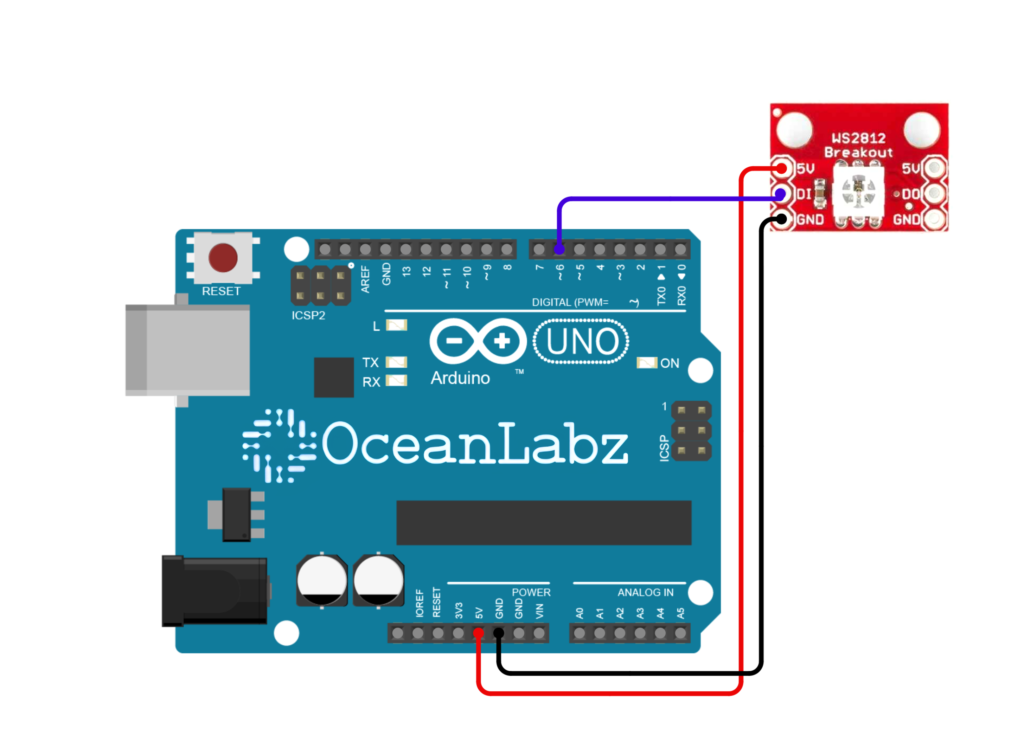
Circuit Diagram / Wiring
- WS2812 5V → 5V (Arduino)
- WS2812 GND → GND (Arduino)
- WS2812 DI (Data IN) → Pin D6 (Arduino)

Note: If using many WS2812 LEDs, consider using an external power supply to avoid drawing too much current from the Arduino.
Arduino Code / Programming
To control the WS2812 breakout board, you will need the Adafruit NeoPixel library. Install it via the Arduino Library Manager.
#include <Adafruit_NeoPixel.h>

#define PIN            6   // Pin connected to the WS2812 LED
#define NUM_LEDS       1   // Number of LEDs
#define DELAY_TIME     10  // Delay for Rainbow effect
#define BREATH_SPEED   10  // Speed for breathing effect

Adafruit_NeoPixel strip(NUM_LEDS, PIN, NEO_GRB + NEO_KHZ800);

// Array of colors for cycling through
uint32_t colors[] = {
  strip.Color(255, 0, 0),   // Red
  strip.Color(0, 255, 0),   // Green
  strip.Color(0, 0, 255),   // Blue
  strip.Color(255, 255, 0), // Yellow
  strip.Color(0, 255, 255), // Cyan
  strip.Color(255, 0, 255)  // Magenta
};

void setup() {
  strip.begin();
  strip.show();  // Initialize all pixels to 'off'
}

void loop() {
  // Run Rainbow Cycle effect
  rainbowCycle();

  // Run Color Wipe effect
  for (int i = 0; i < 6; i++) {
    colorWipe(colors[i], 50);  // Cycle through colors with 50ms delay
    delay(1000);               // Wait 1 second between colors
  }

  // Run Array-based Color Cycle effect
  for (int i = 0; i < 6; i++) {
    strip.setPixelColor(0, colors[i]);  // Set the LED to the current color
    strip.show();
    delay(1000);  // Wait for 1 second
  }

  // Run Breathing effect
  breathingEffect(strip.Color(255, 0, 0), BREATH_SPEED);  // Red breathing effect
  breathingEffect(strip.Color(0, 255, 0), BREATH_SPEED);  // Green breathing effect
  breathingEffect(strip.Color(0, 0, 255), BREATH_SPEED);  // Blue breathing effect
  breathingEffect(strip.Color(255, 255, 0), BREATH_SPEED);  // Yellow breathing effect
}

// Function: Rainbow Cycle Effect
void rainbowCycle() {
  for (int hue = 0; hue < 256; hue++) {
    strip.setPixelColor(0, strip.ColorHSV(hue * 65536L / 256));
    strip.show();
    delay(DELAY_TIME);
  }
}

// Function: Color Wipe Effect
void colorWipe(uint32_t color, int wait) {
  for (int i = 0; i < NUM_LEDS; i++) {
    strip.setPixelColor(i, color); // Set each LED to the chosen color
    strip.show();
    delay(wait);  // Adjust speed of the effect
  }
}

// Function: Breathing Effect
void breathingEffect(uint32_t color, int breathSpeed) {
  // Fade In (from 0 to max brightness)
  for (int brightness = 0; brightness <= 255; brightness++) {
    strip.setPixelColor(0, color);  // Set the color of the LED
    strip.setBrightness(brightness);  // Set brightness level
    strip.show();  // Update the LED
    delay(breathSpeed);  // Wait before the next brightness step
  }

  // Fade Out (from max brightness back to 0)
  for (int brightness = 255; brightness >= 0; brightness--) {
    strip.setPixelColor(0, color);  // Set the color of the LED
    strip.setBrightness(brightness);  // Set brightness level
    strip.show();  // Update the LED
    delay(breathSpeed);  // Wait before the next brightness step
  }
}
Explanation of the Code
- Rainbow Cycle: Gradually cycles through all colors of the rainbow.
- Color Wipe: Lights up the LED one color at a time from a list of predefined colors (Red, Green, Blue, etc.).
- Breathing Effect: Fades the LED in and out, simulating breathing, for each color in the list.
Testing and Troubleshooting
- Check Connections: Ensure all wiring is correct and secure.
- Power Supply: If the strip is not lighting up or flickering, make sure the power supply is adequate.
- Library Installation: Verify that the Adafruit NeoPixel library is properly installed.


