Index
ESP32 Web Server with BME680 – Weather Station (Arduino IDE)
This tutorial demonstrates the construction of a web server weather station using the ESP32, which showcases sensor data obtained from the BME680 environmental sensor. The sensor readings include gas (air quality), temperature, humidity, and pressure. The web server automatically updates the readings using Server-Sent Events (SSE). Programming of the ESP32 will be conducted using the Arduino IDE.
BME680 Environmental Sensor Overview
- The BME680 is a versatile environmental sensor that integrates gas, temperature, humidity, and pressure sensors.
- Its gas sensor can detect a wide range of gases, including volatile organic compounds (VOCs), making it suitable for indoor air quality monitoring.
Gas Sensing Principle
- The BME680 employs a MOX (Metal-oxide) sensor to detect VOCs in the air.
- The sensor provides a qualitative assessment of VOC concentration by measuring changes in resistance.
- Higher VOC concentrations result in lower resistance, while lower concentrations lead to higher resistance.
Air Quality Monitoring
- By analyzing resistance changes in the MOX sensor, the BME680 provides insights into the overall air quality.
- It offers a rough estimate of VOC levels, aiding in indoor air quality control efforts.
To complete this tutorial, you’ll need the following parts:
Parts Required:
- BME680 sensor module
- ESP32 development board (choose from the best ESP32 development boards)
- Breadboard
- Jumper wires
Ensure you have all these components before proceeding with the tutorial.
For wiring the BME680 to the ESP32 using the default I2C pins, follow these connections:
- BME680 Module:
- Connect the VCC pin to the 3.3V output on the ESP32.
- Connect the GND pin to the ground.
- Wire the SCL pin to the SCL pin on the ESP32 (usually pin D22).
- Wire the SDA pin to the SDA pin on the ESP32 (usually pin D21).
Ensure that the connections are made correctly to establish communication between the ESP32 and the BME680 sensor using the I2C protocol.
Installing the BME680 Library
To interface with the BME680 sensor module and obtain readings, you’ll need to install the Adafruit_BME680 library in your Arduino IDE. Here’s how:
- Open Arduino IDE: Launch your Arduino IDE software.
- Access Library Manager: Navigate to Sketch > Include Library > Manage Libraries. This will open the Library Manager.
- Search for Library: In the search box of the Library Manager, type “adafruit bme680” (without quotes) and hit Enter.
- Install Library: Locate the Adafruit_BME680 library in the search results and click the “Install” button next to it.
Once the installation is complete, you’ll be able to use the Adafruit_BME680 library in your Arduino sketches to interface with the BME680 sensor module.
Add screen shot of libraray fronm Arduino ide
Installing the Adafruit_Sensor Library
To complement the functionality of the BME680 library, you’ll also need to install the Adafruit_Sensor library in your Arduino IDE. Here’s how to do it:
- Open Arduino IDE: Launch your Arduino IDE software.
- Access Library Manager: Navigate to Sketch > Include Library > Manage Libraries.
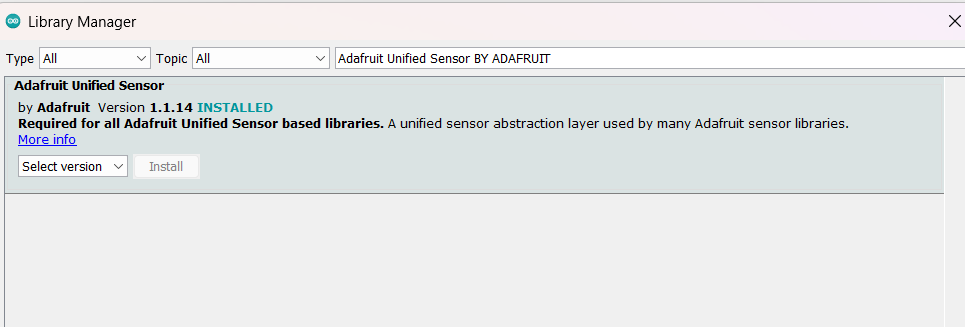
- Search for Library: In the search box of the Library Manager, type “Adafruit Unified Sensor” (without quotes) and press Enter.
- Locate and Install: Scroll through the search results to find the “Adafruit Unified Sensor” library. Once located, click the “Install” button next to it.
Once the installation is complete, you’ll have the Adafruit_Sensor library ready to be used alongside the BME680 library for interfacing with the BME680 sensor module in your Arduino sketches.

Installing the ESPAsyncWebServer Library
Since the ESPAsyncWebServer library isn’t available directly through the Arduino IDE Library Manager, you’ll need to install it manually:
- Download the Library: Click here to download the library. This will save a .zip folder to your computer.
- Extract the Library: Find the downloaded .zip folder and extract its contents. You’ll get a folder named “ESPAsyncWebServer-master”.
- Rename the Folder: Change the folder’s name from “ESPAsyncWebServer-master” to just “ESPAsyncWebServer”.
- Move the Library: Move the renamed “ESPAsyncWebServer” folder to your Arduino IDE’s libraries folder. The location varies:
- Windows: Usually found in C:\Users\YourUsername\Documents\Arduino\libraries.
- Mac: Typically located in ~/Documents/Arduino/libraries.
- Linux: Commonly found in ~/Arduino/libraries.
- Alternative Method: If you prefer, you can also add the library directly from the Arduino IDE by going to Sketch > Include Library > Add .zip Library and selecting the downloaded .zip file.
Once you’ve completed these steps, the ESPAsyncWebServer library will be installed and ready for use in your Arduino IDE, allowing you to create asynchronous web servers for your ESP32 projects with ease.