Index
C++ Get Started
To start using C++, you need two things:
- A text editor, like Notepad, to write C++ code
- A compiler, like GCC, to translate the C++ code into a language that the computer will understand
There are many text editors and compilers to choose from. In this tutorial, we will use an IDE (see below).
Install IDE
An Integrated Development Environment (IDE) serves as a comprehensive tool for editing and compiling code seamlessly in one interface.
Commonly used IDEs for C++ development include Code::Blocks, Eclipse, and Visual Studio. These IDEs are freely available and offer features for editing, debugging, and compiling C++ code.
While web-based IDEs are an option, they typically have limitations in functionality compared to standalone applications.
For our tutorial, we’ll be using Code::Blocks, which we consider an excellent starting point for beginners.
To get started, you can download the latest version of Code::Blocks from the official website at http://www.codeblocks.org/. Simply download and run the mingw-setup.exe file, which will install both the text editor and a compiler, providing you with a complete development environment for writing and compiling C++ code.
C++ Quickstart
Let’s create our first C++ file.
Open Codeblocks and go to File > New > Empty File.
Write the following C++ code and save the file as myfirstprogram.cpp (File > Save File as):
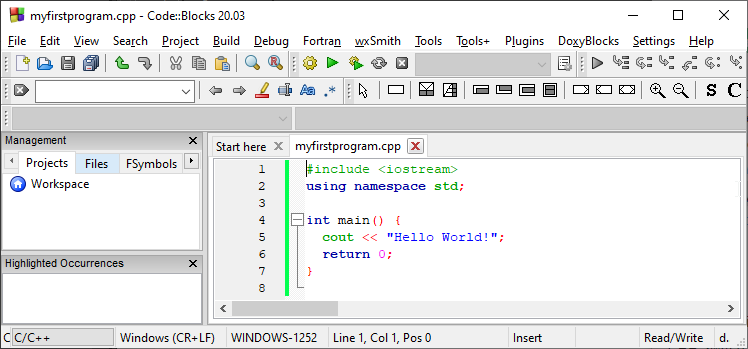
myfirstprogram.cpp
#include <iostream>
using namespace std;

int main() {
  cout << "Hello World!";
  return 0;
}
Don’t worry if you don’t understand the code above – we will discuss it in detail in later chapters. For now, focus on how to run the code.
In Codeblocks, it should look like this:
Then, go to Build > Build and Run to run (execute) the program. The result will look something to this:
Hello World!
Congratulations! You have now written and executed your first C++ program.

