Index
Introduction

The MS5607 is a digital altimeter module manufactured by Measurement Specialties (TE Connectivity) designed for accurate pressure and temperature measurements, primarily used in altimeter and barometer applications
Working Principle
MS5607 altimeter module measures atmospheric pressure and temperature to calculate altitude using built-in sensors and digital signal processing. It communicates altitude data digitally to a microcontroller via I2C or SPI interface, making it ideal for applications such as altimeters, variometers, weather stations, and altitude control systems. The module’s accuracy, small size, and low power consumption contribute to its effectiveness in altitude-related applications.
Application
- Altimeters: Measuring altitude in aviation and outdoor equipment.
- Variometers: Monitoring rate of climb/descent in paragliding and hang gliding.
- Weather Stations: Measuring barometric pressure for weather monitoring.
- Altitude Control: Implementing altitude hold in drones and UAVs.
- Industrial Sensors: Monitoring altitude in industrial applications.
- Environmental Monitoring: Studying atmospheric pressure changes for environmental research.
Technical Specifications
- Power Requirements: 3.3 to 6.5 VDC.
- Current Consumption: ~1.74 mA @ 3.3 VDC.
- Communication Interface: I2C (up to 400 kHz) or SPI (20 MHz)
- Dimensions: 0.85 X 0.80 in (2.16 X 2.03 cm)
Pinout

- VCC – Power Supply (3.3V to 5V)
- GND – Ground
- SDA – I2C Data Line
- SCL – I2C Clock Line
- CSB – Chip Select (for SPI, pull low)
- SDO – I2C Address Select (for selecting between different I2C addresses, typically connected to GND or VCC)
- PS – Pressure Sensor (typically a connection point for interfacing with pressure-related circuitry)
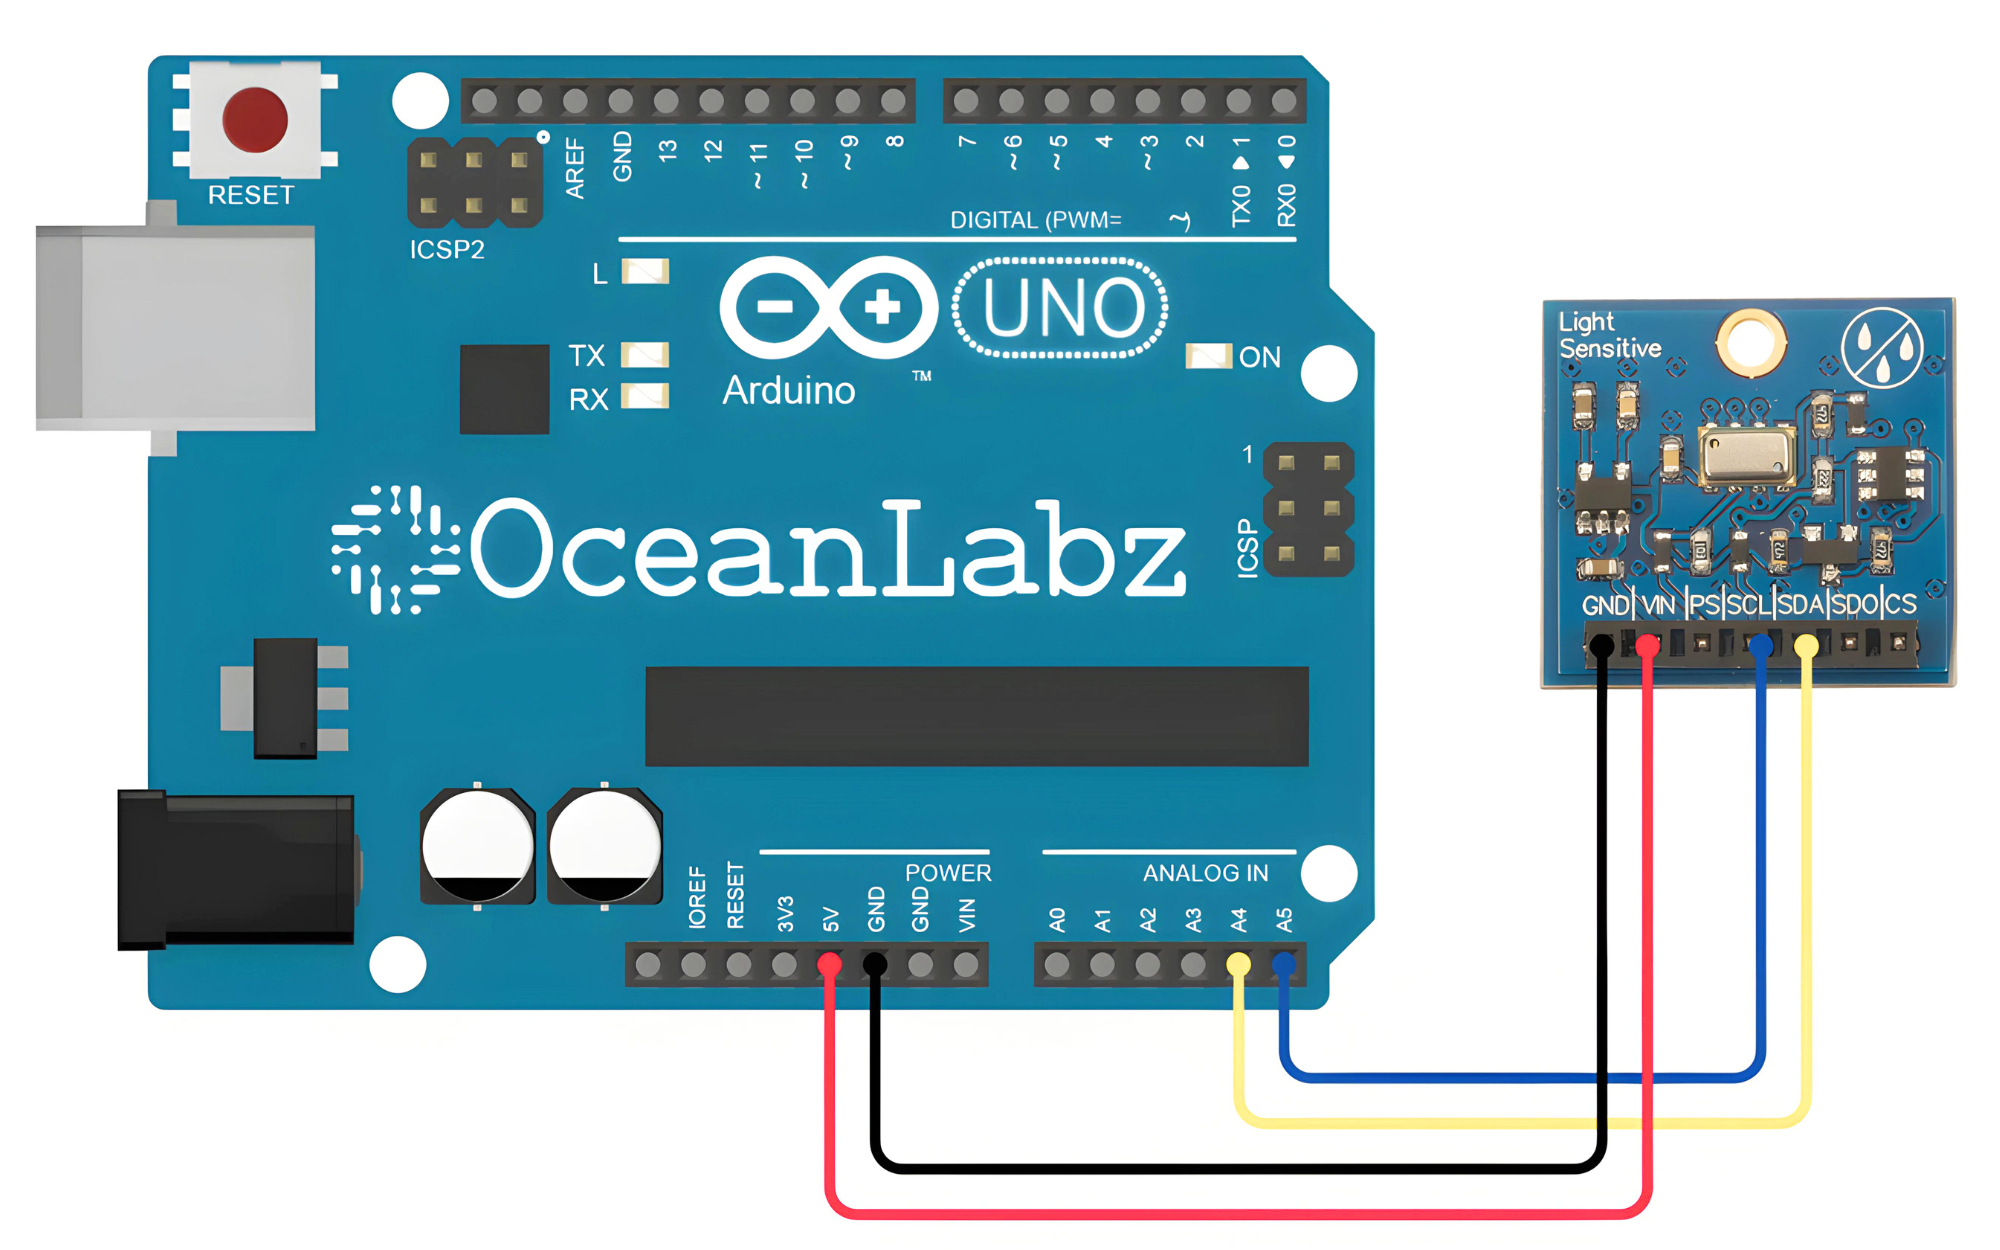
Circuit Diagram
| Altimeter Pin | Arduino Pin |
| VCC | 5 V |
| GND | GND |
| SDA | Analog A4 |
| SCL | Analog A5 |
Programming With Arduino
Step 1: Open your first sketch
- Open the Arduino IDE.
- Copy and paste the provided code into a new sketch in the Arduino IDE:
- The Wire library is included by default with the Arduino IDE, so you do not need to install it separately.
#include <Wire.h>  // Include Wire library for I2C communication

#define MS5607_ADDRESS 0x76  // I2C address of MS5607 altimeter module

void setup() {
  Serial.begin(9600);  // Initialize serial communication
  Wire.begin();  // Initialize I2C communication
}

void loop() {
  // Request pressure measurement
  Wire.beginTransmission(MS5607_ADDRESS);
  Wire.write(0x48);  // Send command for D1 (pressure) conversion
  Wire.endTransmission();

  delay(30);  // Wait for conversion (adjust delay based on module specifications)

  // Read pressure measurement
  Wire.beginTransmission(MS5607_ADDRESS);
  Wire.write(0x00);  // Send command to read ADC result
  Wire.endTransmission(false);

  Wire.requestFrom(MS5607_ADDRESS, 3);  // Request 3 bytes of data
  byte pressureData[3];
  if (Wire.available() >= 3) {
    pressureData[0] = Wire.read();
    pressureData[1] = Wire.read();
    pressureData[2] = Wire.read();
  }

  // Calculate pressure value
  uint32_t D1 = ((uint32_t)pressureData[0] << 16) | ((uint32_t)pressureData[1] << 8) | pressureData[2];

  // Request temperature measurement
  Wire.beginTransmission(MS5607_ADDRESS);
  Wire.write(0x58);  // Send command for D2 (temperature) conversion
  Wire.endTransmission();

  delay(30);  // Wait for conversion (adjust delay based on module specifications)

  // Read temperature measurement
  Wire.beginTransmission(MS5607_ADDRESS);
  Wire.write(0x00);  // Send command to read ADC result
  Wire.endTransmission(false);

  Wire.requestFrom(MS5607_ADDRESS, 3);  // Request 3 bytes of data
  byte temperatureData[3];
  if (Wire.available() >= 3) {
    temperatureData[0] = Wire.read();
    temperatureData[1] = Wire.read();
    temperatureData[2] = Wire.read();
  }

  // Calculate temperature value
  uint32_t D2 = ((uint32_t)temperatureData[0] << 16) | ((uint32_t)temperatureData[1] << 8) | temperatureData[2];

  // Calculate compensated pressure and temperature
  int32_t dT = D2 - (uint32_t)0x4000;
  int32_t TEMP = 2000 + dT * 5 / 131072;
  int64_t OFF = (uint32_t)7025 * (uint32_t)32768 + ((int64_t)dT * (uint32_t)3072) / (uint32_t)16;
  int64_t SENS = (uint32_t)1100 * (uint32_t)32768 + ((int64_t)dT * (uint32_t)2816) / (uint32_t)16;
  int32_t P = ((D1 * SENS) / (uint32_t)2097152 - OFF) / (uint32_t)8192;

  // Output pressure and temperature readings
  Serial.print("Pressure (mbar): ");
  Serial.println(P);
  Serial.print("Temperature (°C): ");
  Serial.println(TEMP / 100.0);

  delay(1000);  // Delay before next reading
}
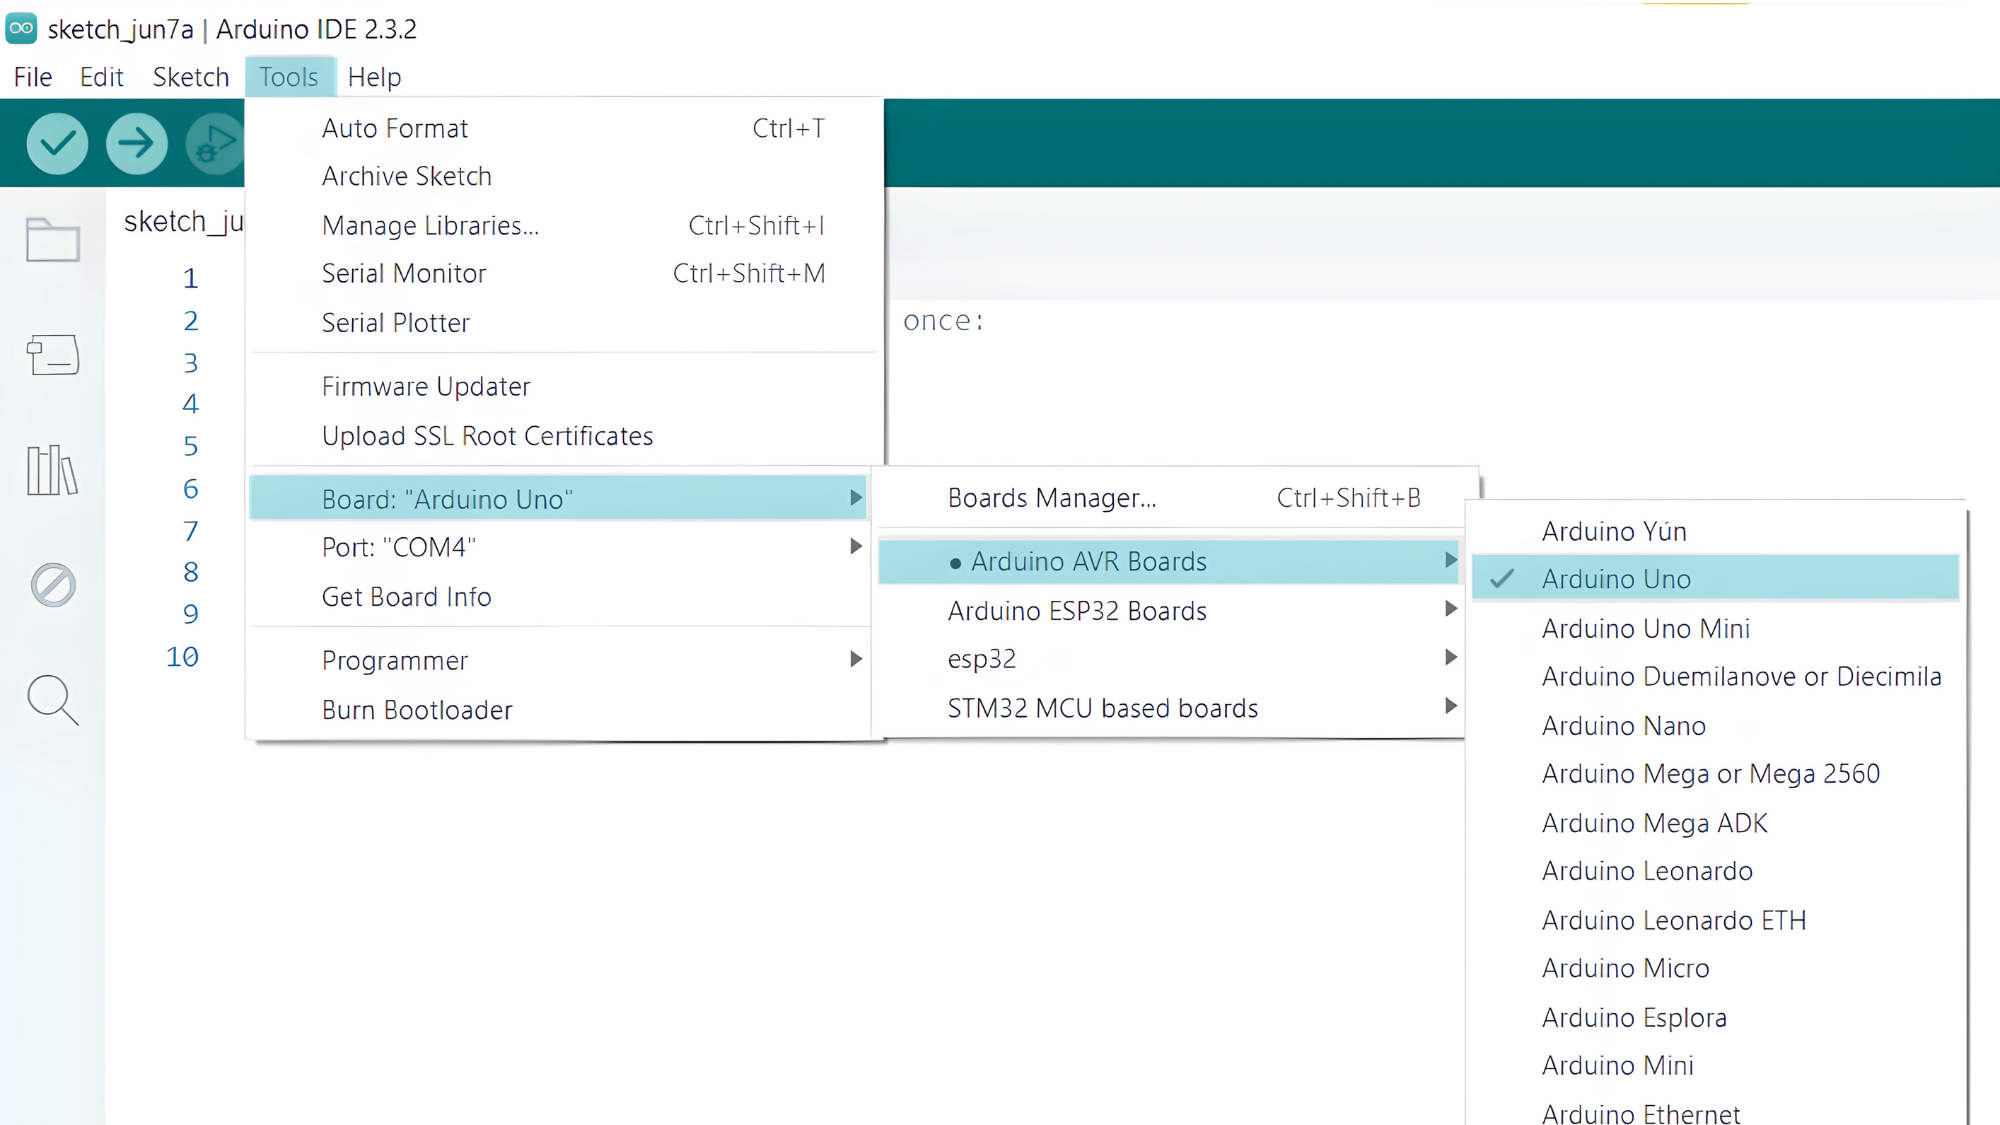
Step 2: Select your board type and port
- Go to Tools > Board and select your Arduino board (e.g., Arduino Uno).
- Go to Tools > Port and select the port to which your Arduino is connected.
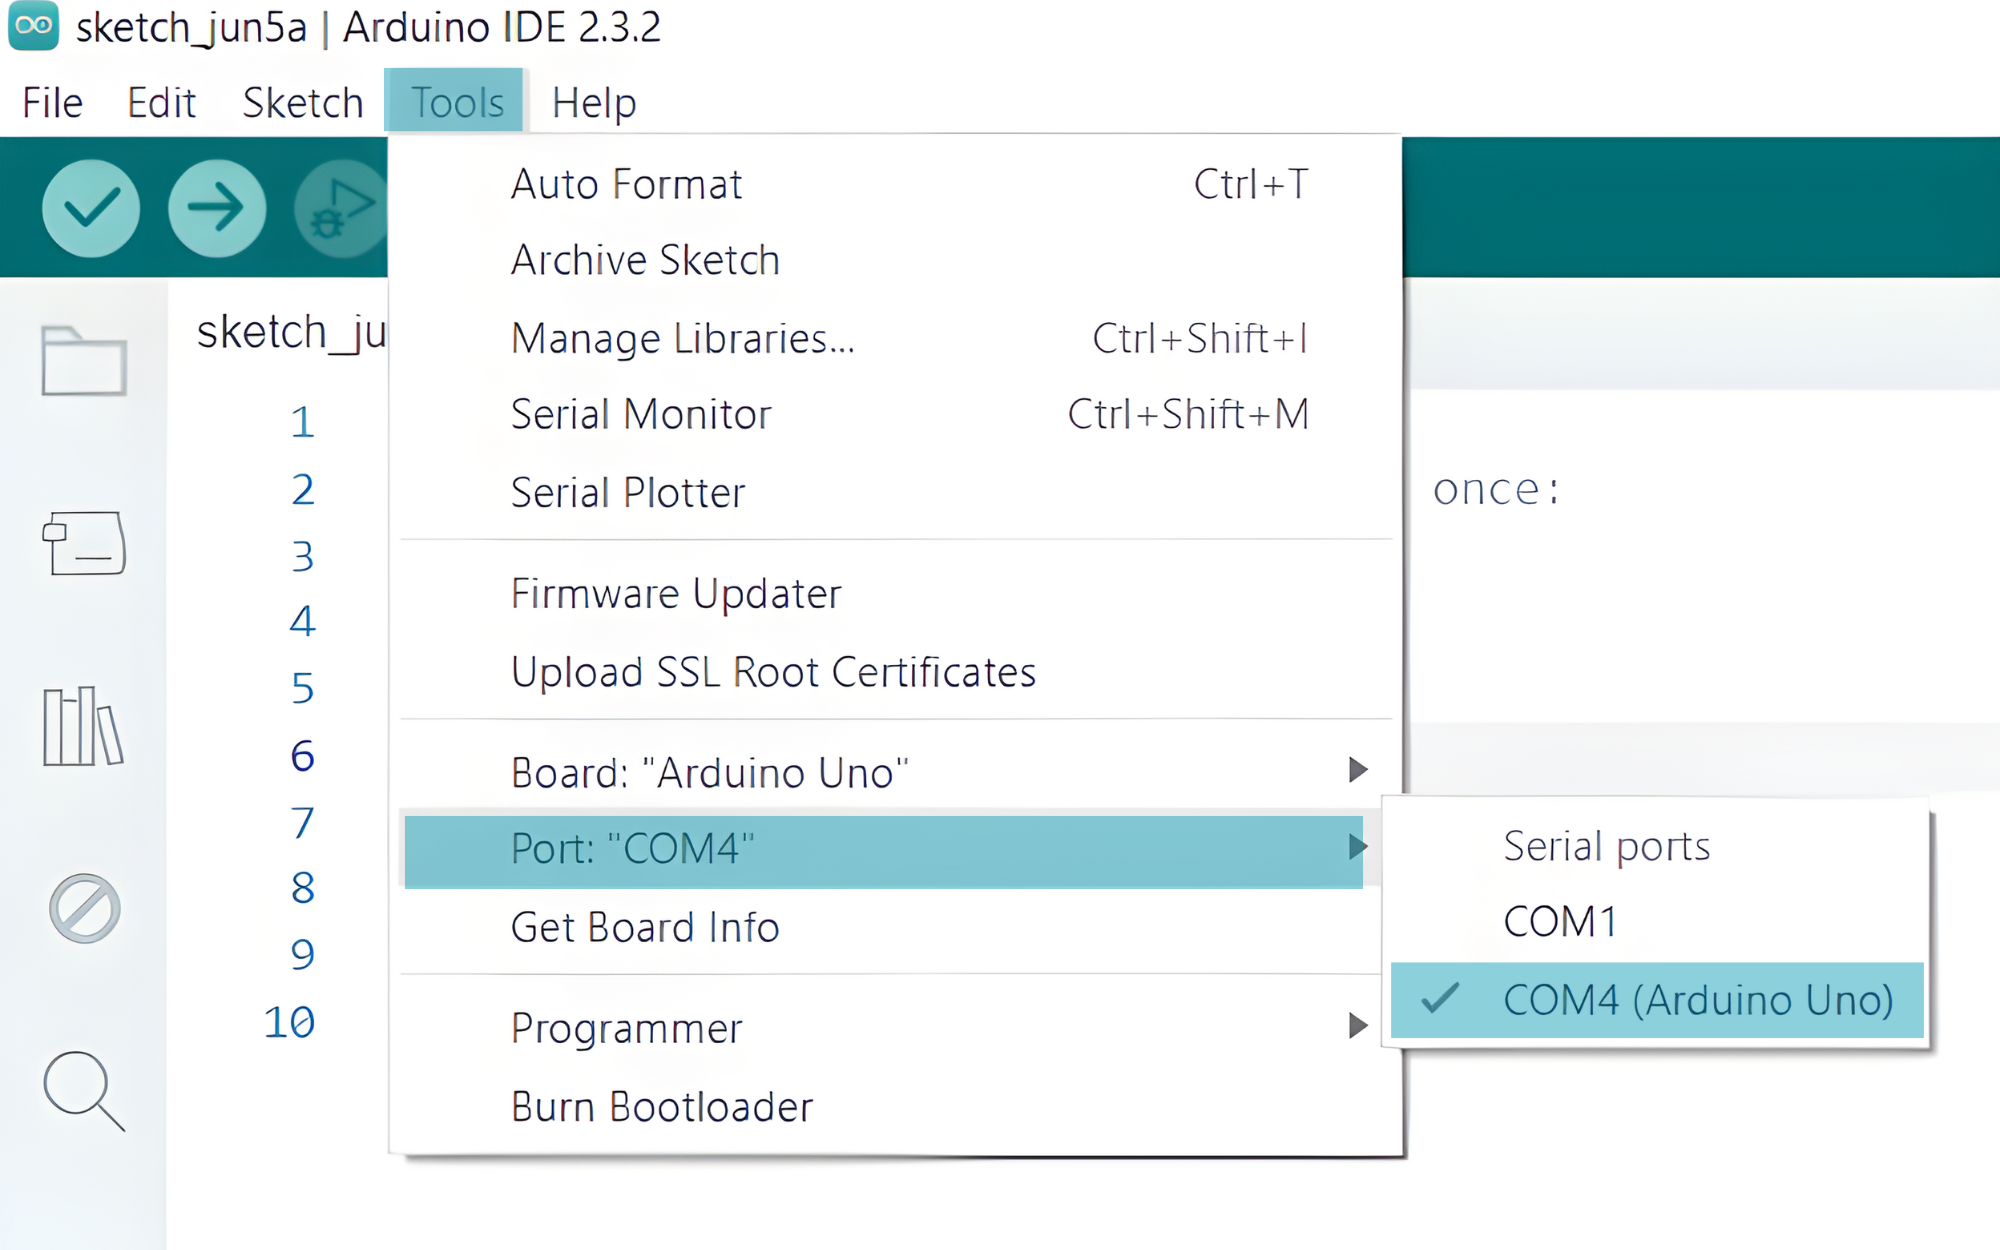
- Verify and upload the code to your Arduino board.
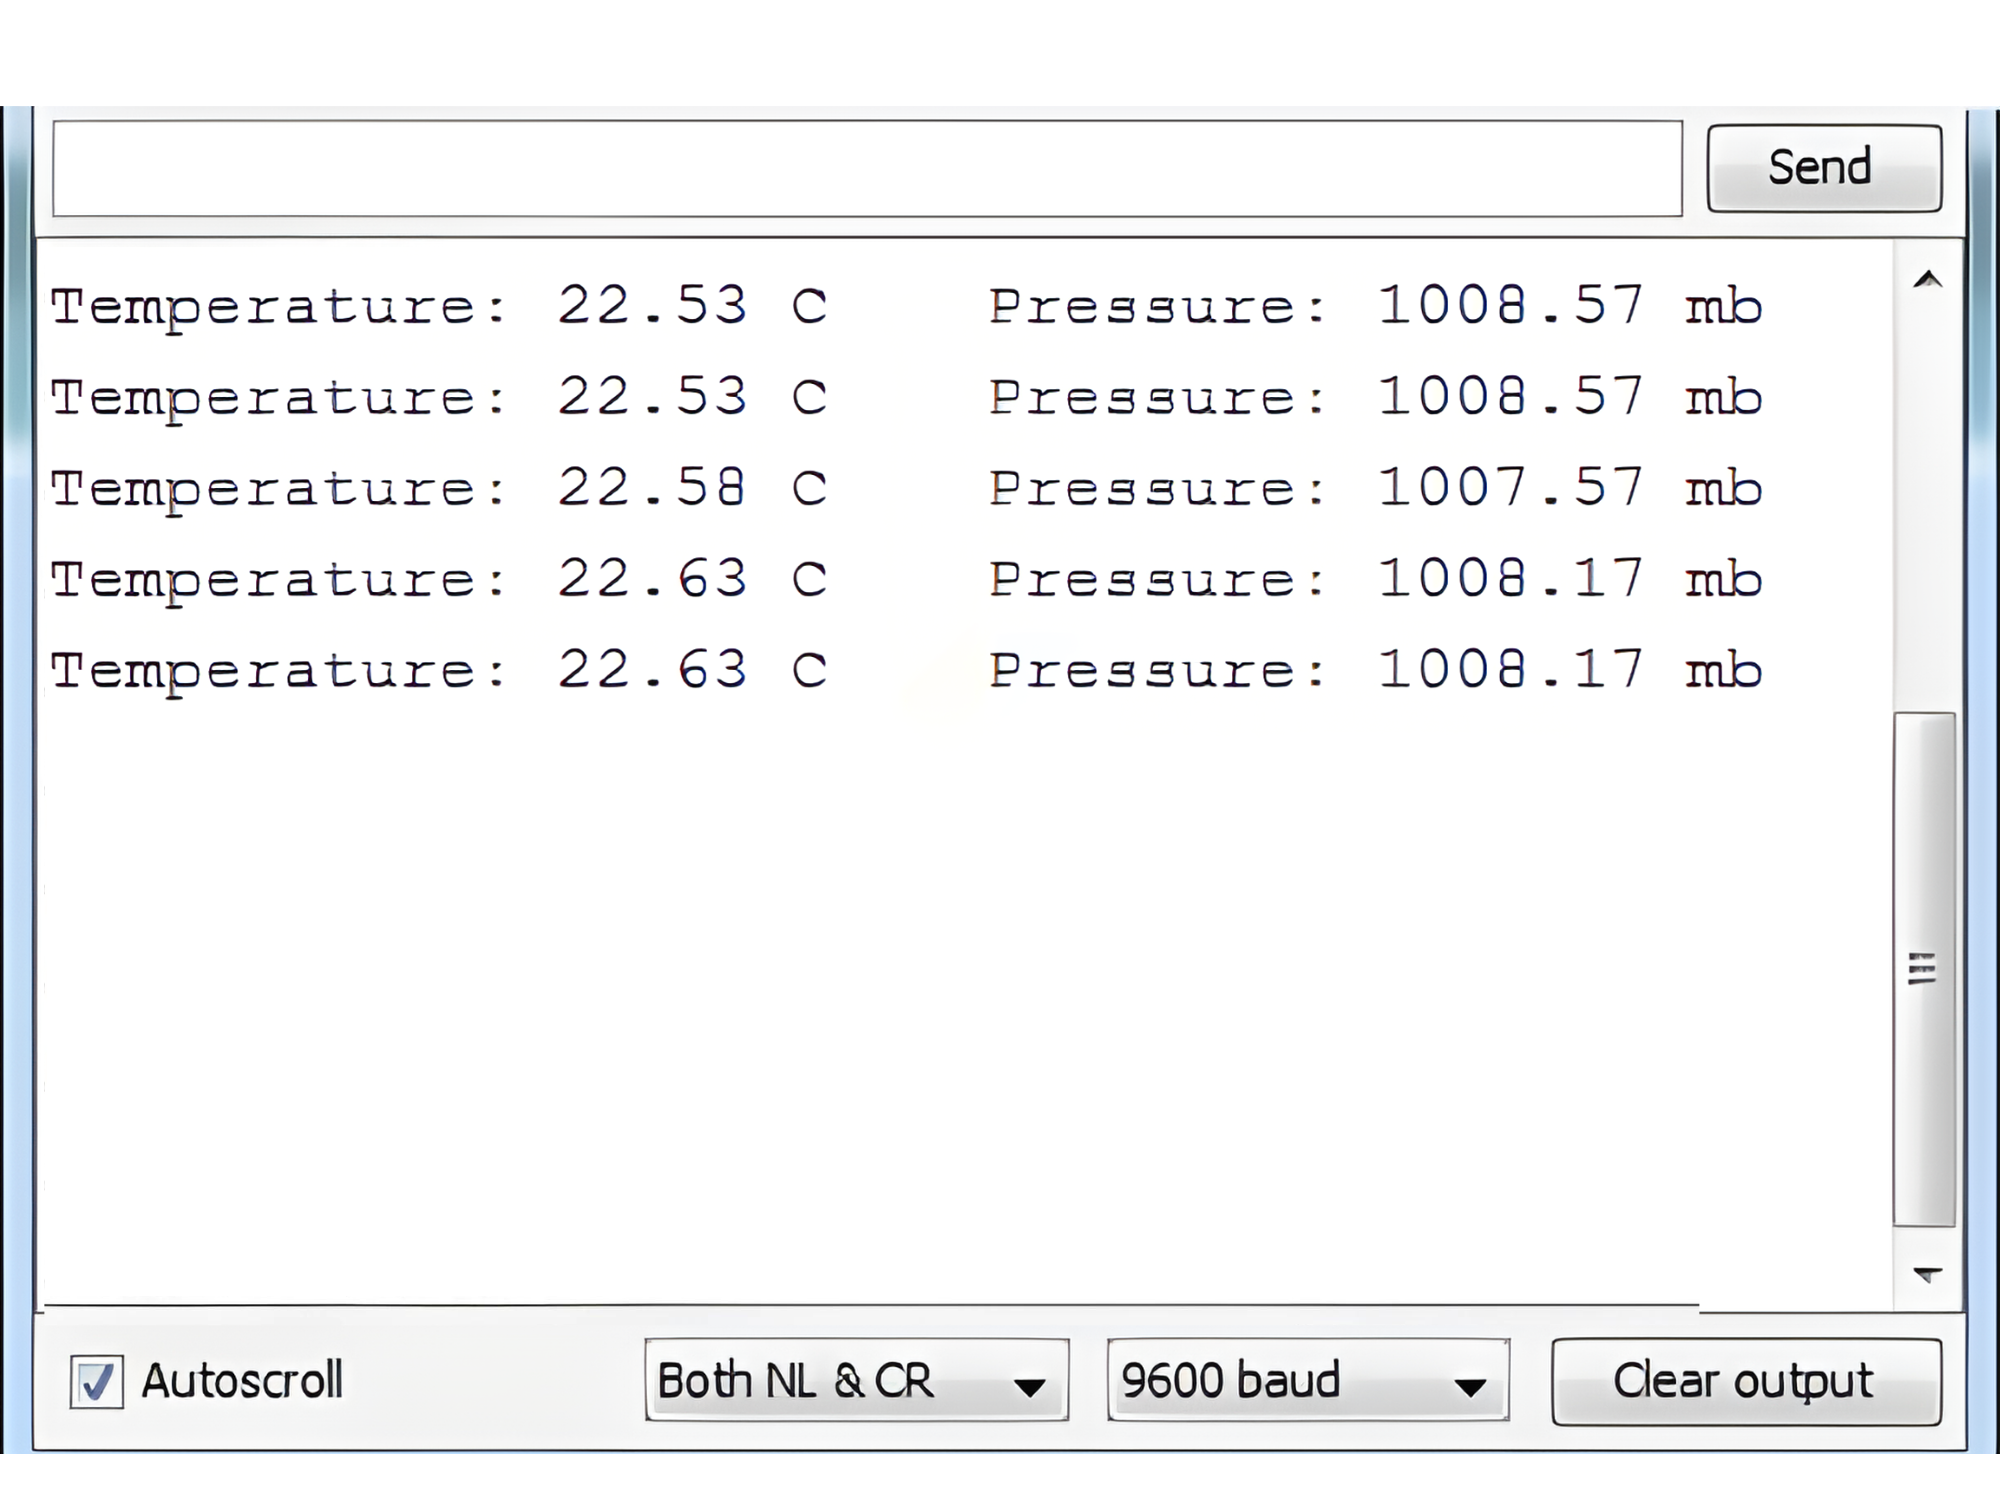
Step 3: Open Serial Monitor:
- Once the code is uploaded successfully, open the Serial Monitor in the Arduino IDE.
- Set the baud rate to 9600 baud.