Index
Introduction
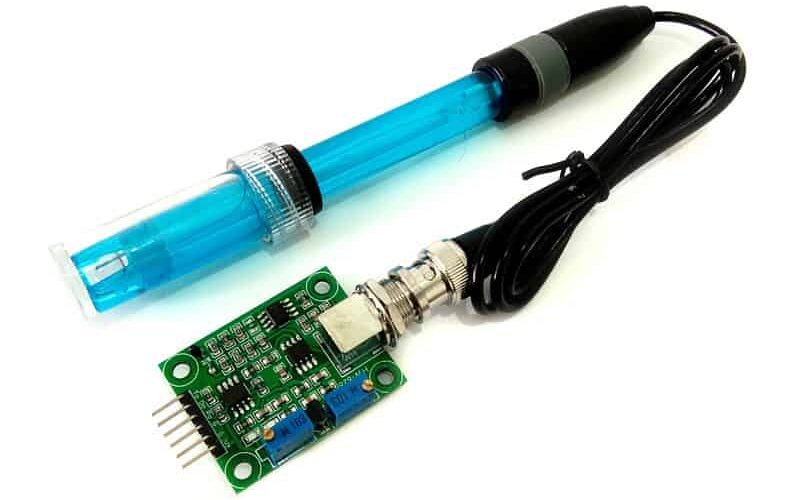
A pH sensor is a device used to measure the acidity or alkalinity of a solution. It consists of a pH-sensitive glass electrode that generates a voltage signal based on hydrogen ion concentration in the solution. This signal is converted into pH values. Key components include the pH-sensitive glass membrane, reference electrode, internal filling solution, and junction. pH sensors are widely used in environmental monitoring, industrial processes, and laboratory analysis for pH measurement and control.
Hardware Overviwe
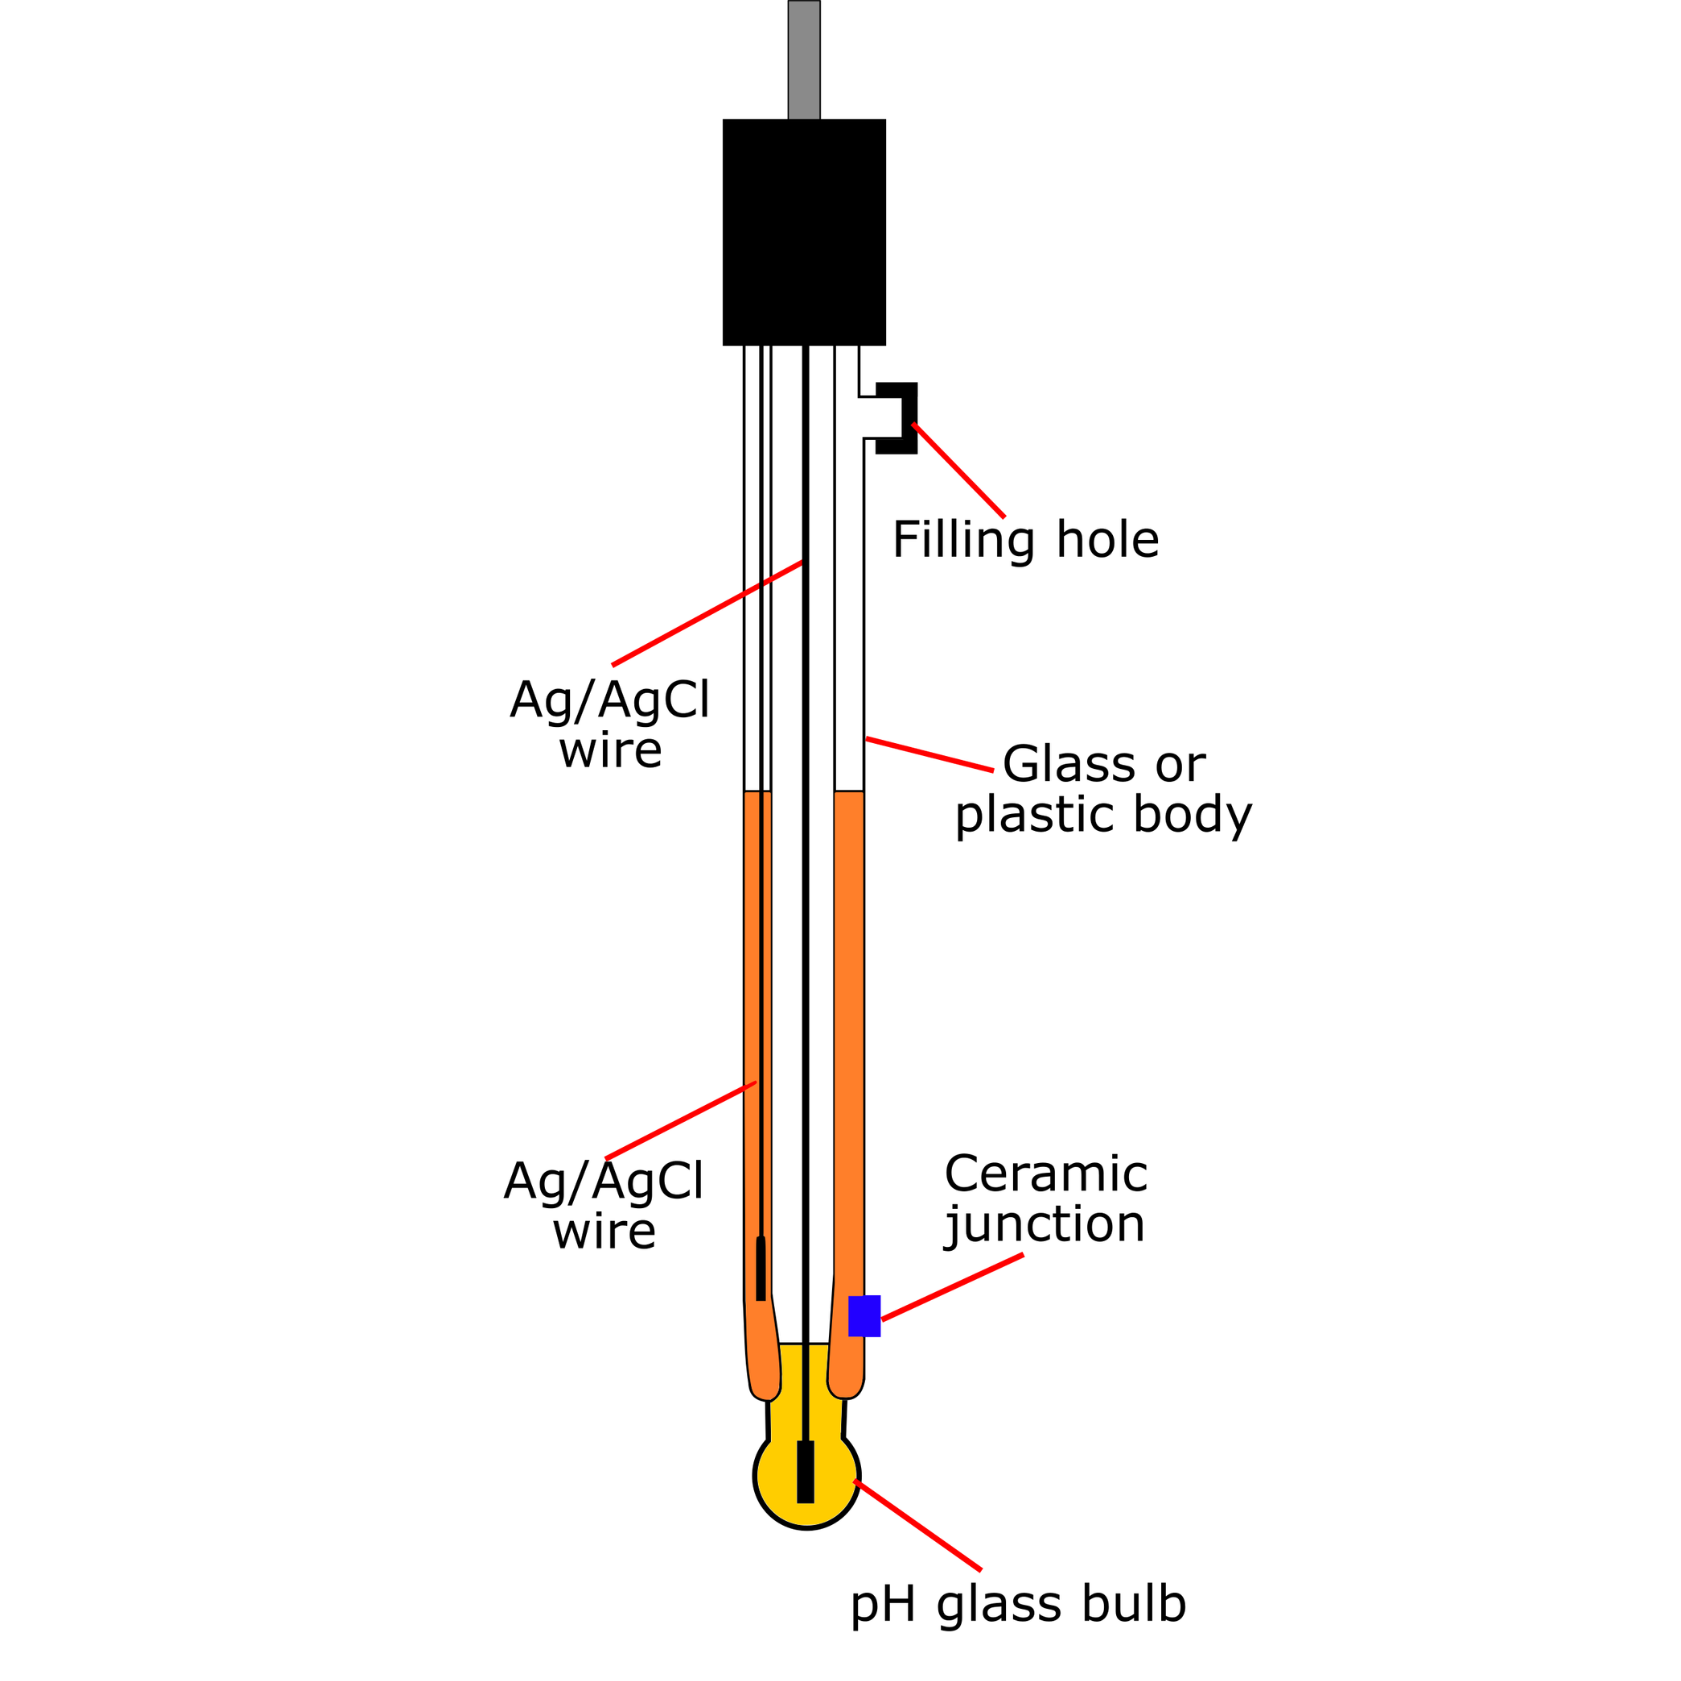
PH Glass Bulb: The glass bulb of a pH sensor measures pH by interacting with hydrogen ions in a solution, providing sensitivity and accuracy for pH measurements.
Ceramic junction:The ceramic junction in a pH sensor facilitates ion exchange between the internal reference solution and the sample, protecting the sensor while ensuring accurate pH measurements.
AgCl wire:The AgCl wire in a pH sensor acts as the reference electrode, ensuring stable and reliable pH measurements by providing a consistent reference potential.
Glass or plastic body:The pH sensor body can be glass or plastic. Glass offers durability and chemical resistance, ideal for industrial use. Plastic is lightweight and cost-effective, suitable for portable or disposable applications.
Filling hole:The filling hole in a pH sensor allows for maintenance and calibration by providing access to the internal filling solution, ensuring accurate pH measurements over time.

Analog Reading Offset: An analog reading offset for a pH sensor involves adjusting the sensor’s output to correct for any inherent bias or error, ensuring accurate pH measurements. This adjustment compensates for factors like manufacturing differences or electrode aging, improving measurement precision.
PH Limit Setting: Adjusting the potentiometer on a pH sensor sets upper and lower pH thresholds. This calibration ensures that when pH levels surpass these limits, actions like alarms are triggered. Regular maintenance and calibration are necessary for accurate pH limit setting.
Ph sensor connector:The pH sensor connector is the link between the pH sensor and the pH meter or electronic device. It ensures a secure electrical connection, facilitating accurate pH measurements.
Working Principle
When the pH sensor is immersed in a solution, hydrogen ions (H⁺) in the solution interact with the pH-sensitive glass membrane of the electrode. The glass membrane selectively allows H⁺ ions to pass through based on the solution’s pH level. This interaction generates a voltage potential across the glass membrane.
Simultaneously, a reference electrode provides a stable voltage reference. The voltage difference between the pH-sensitive electrode and the reference electrode is measured. This voltage difference is directly related to the pH of the solution.
By comparing this voltage difference to calibration curves stored in the pH meter, the pH value of the solution is determined. This allows accurate measurement of the acidity or alkalinity of the solution based on its hydrogen ion concentration.
Application
- Water Quality Monitoring
- Industrial Processes
- Aquariums and Hydroponics
- Laboratory Analysis
- Swimming Pools and Spas
- Medical and Biological Research
Technical Specifications
- Measurement Range: Typically pH 0 to pH 14
- Output Type: Analog voltage output
- Accuracy: High accuracy in pH measurement
- Sensitivity: High sensitivity to pH changes
- Calibration: Supports calibration for accurate readings
- Durability: Designed with durable materials for long-term use
- Integration: Compatible with microcontrollers like Arduino
Pinout
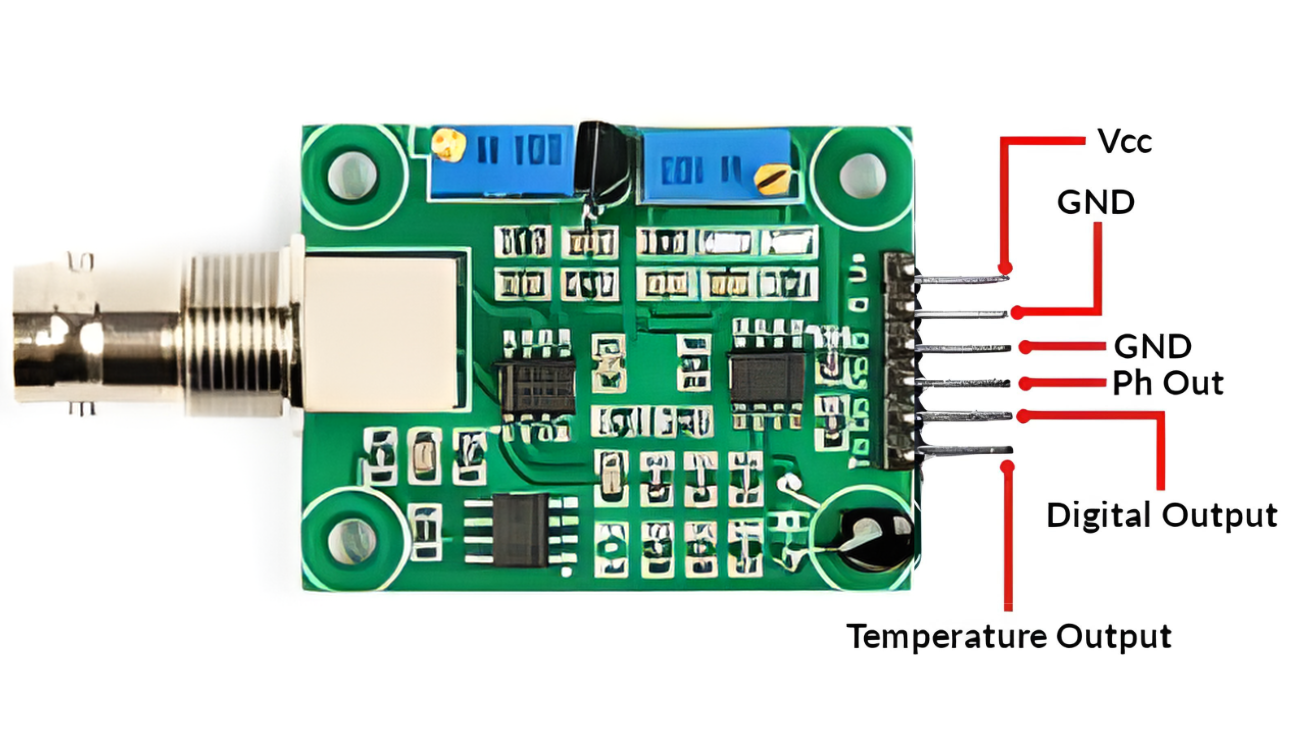
- TO – Temperature Out
- DO – Digital Out Trigger (3.3V)
- PO – 0-5V Analog Out for PH
- GND – Ground
- VCC – 5VDC Input Power
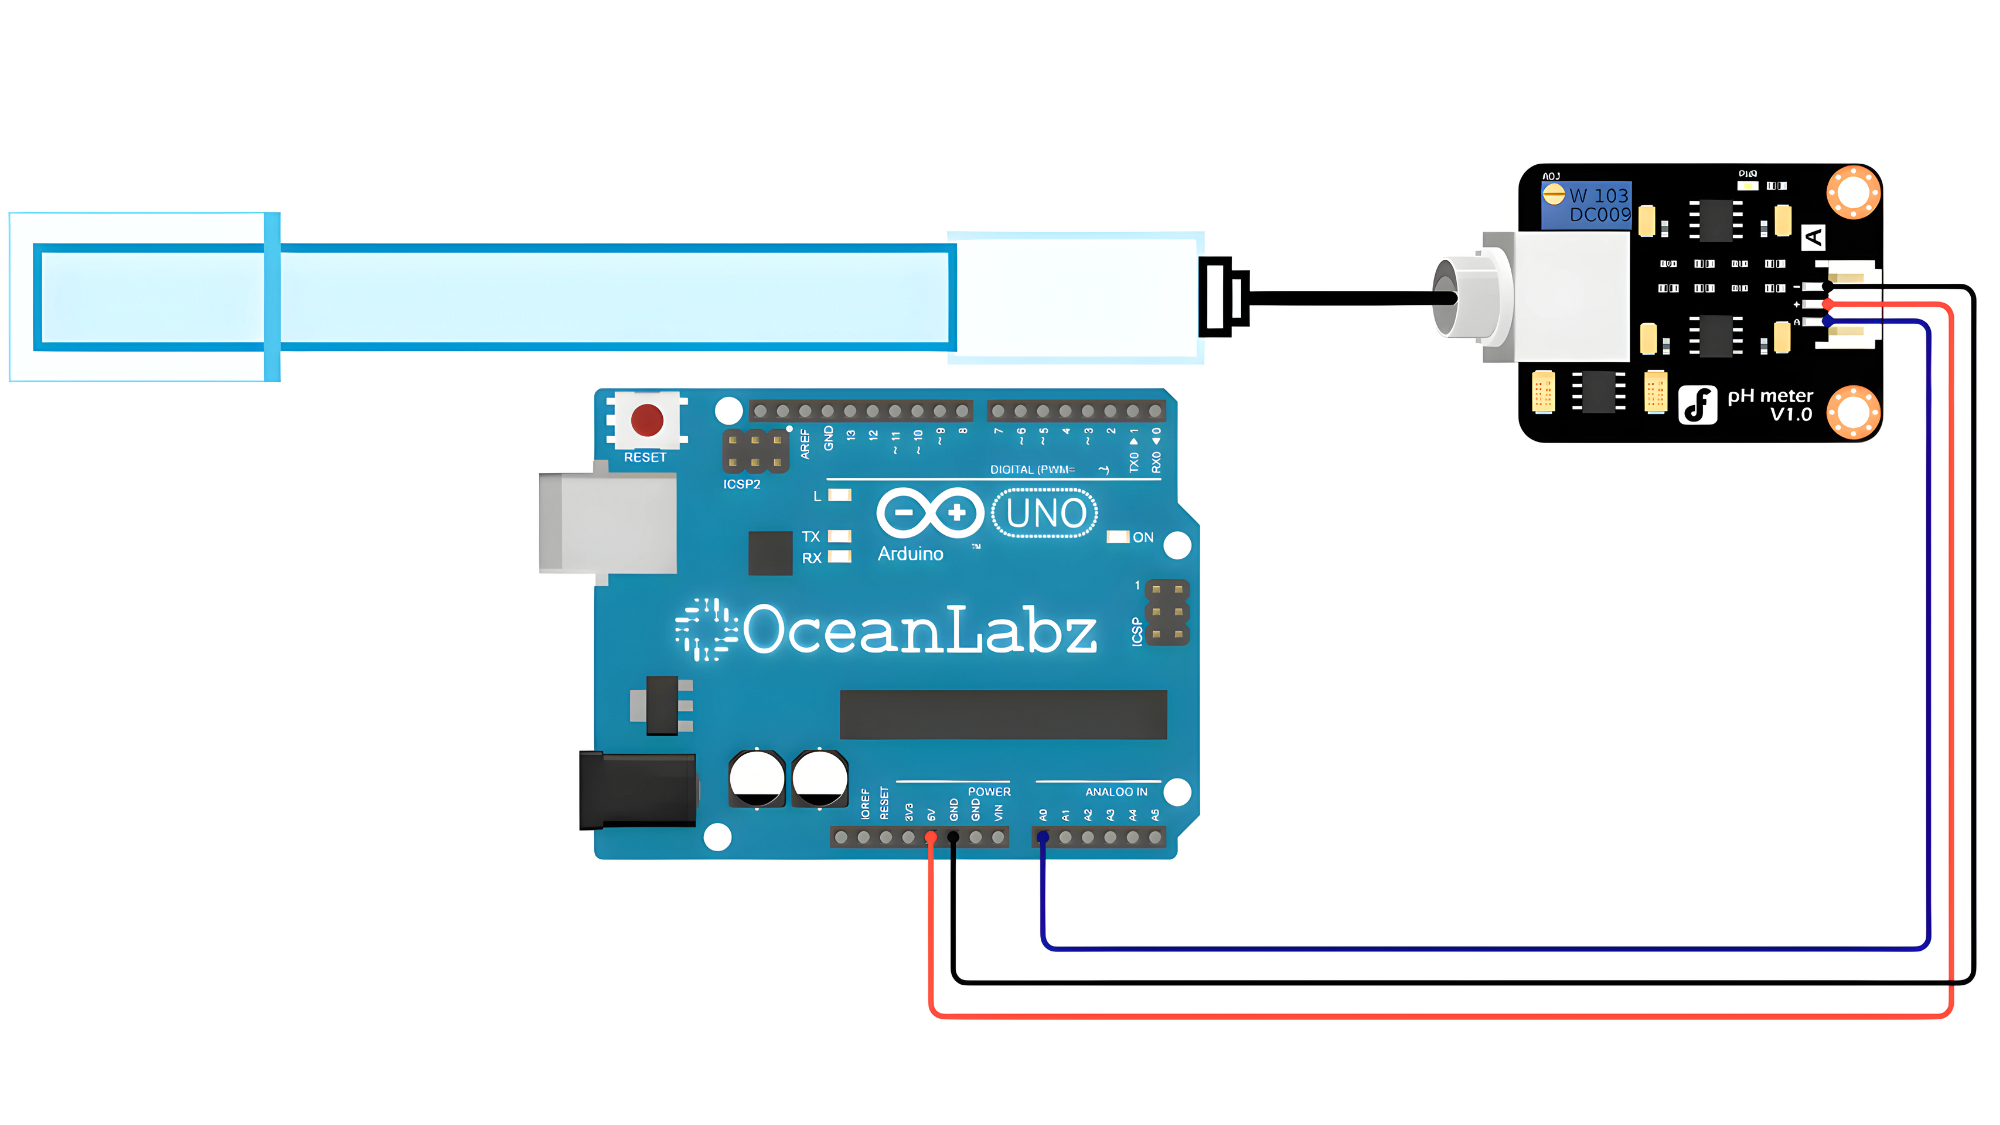
Circuit Diagram
| PH-Sensor Pin | Arduino Pin |
| VCC | 5 V |
| GND | GND |
| PO | Analog A0 |
Programming With Arduino
Step 1: Open your first sketch
- Open the Arduino IDE.
- Copy and paste the provided code into a new sketch in the Arduino IDE:
// Define analog pin connected to the pH sensor amplifier output
const int pHSensorPin = A0;  // Assuming pH sensor is connected to analog pin A0

void setup() {
  Serial.begin(9600);  // Initialize serial communication
}

void loop() {
  // Read analog value from pH sensor
  int sensorValue = analogRead(pHSensorPin);

  // Convert analog value to pH value (adjust calibration based on sensor characteristics)
  float pHValue = map(sensorValue, 0, 1023, 0, 14);  // Assuming pH sensor range is 0-14 pH

  // Print pH value to serial monitor
  Serial.print("pH Value: ");
  Serial.println(pHValue);

  delay(1000);  // Delay for stability, adjust as needed
}
Step 2: Select your board type and port
- Go to Tools > Board and select your Arduino board (e.g., Arduino Uno).
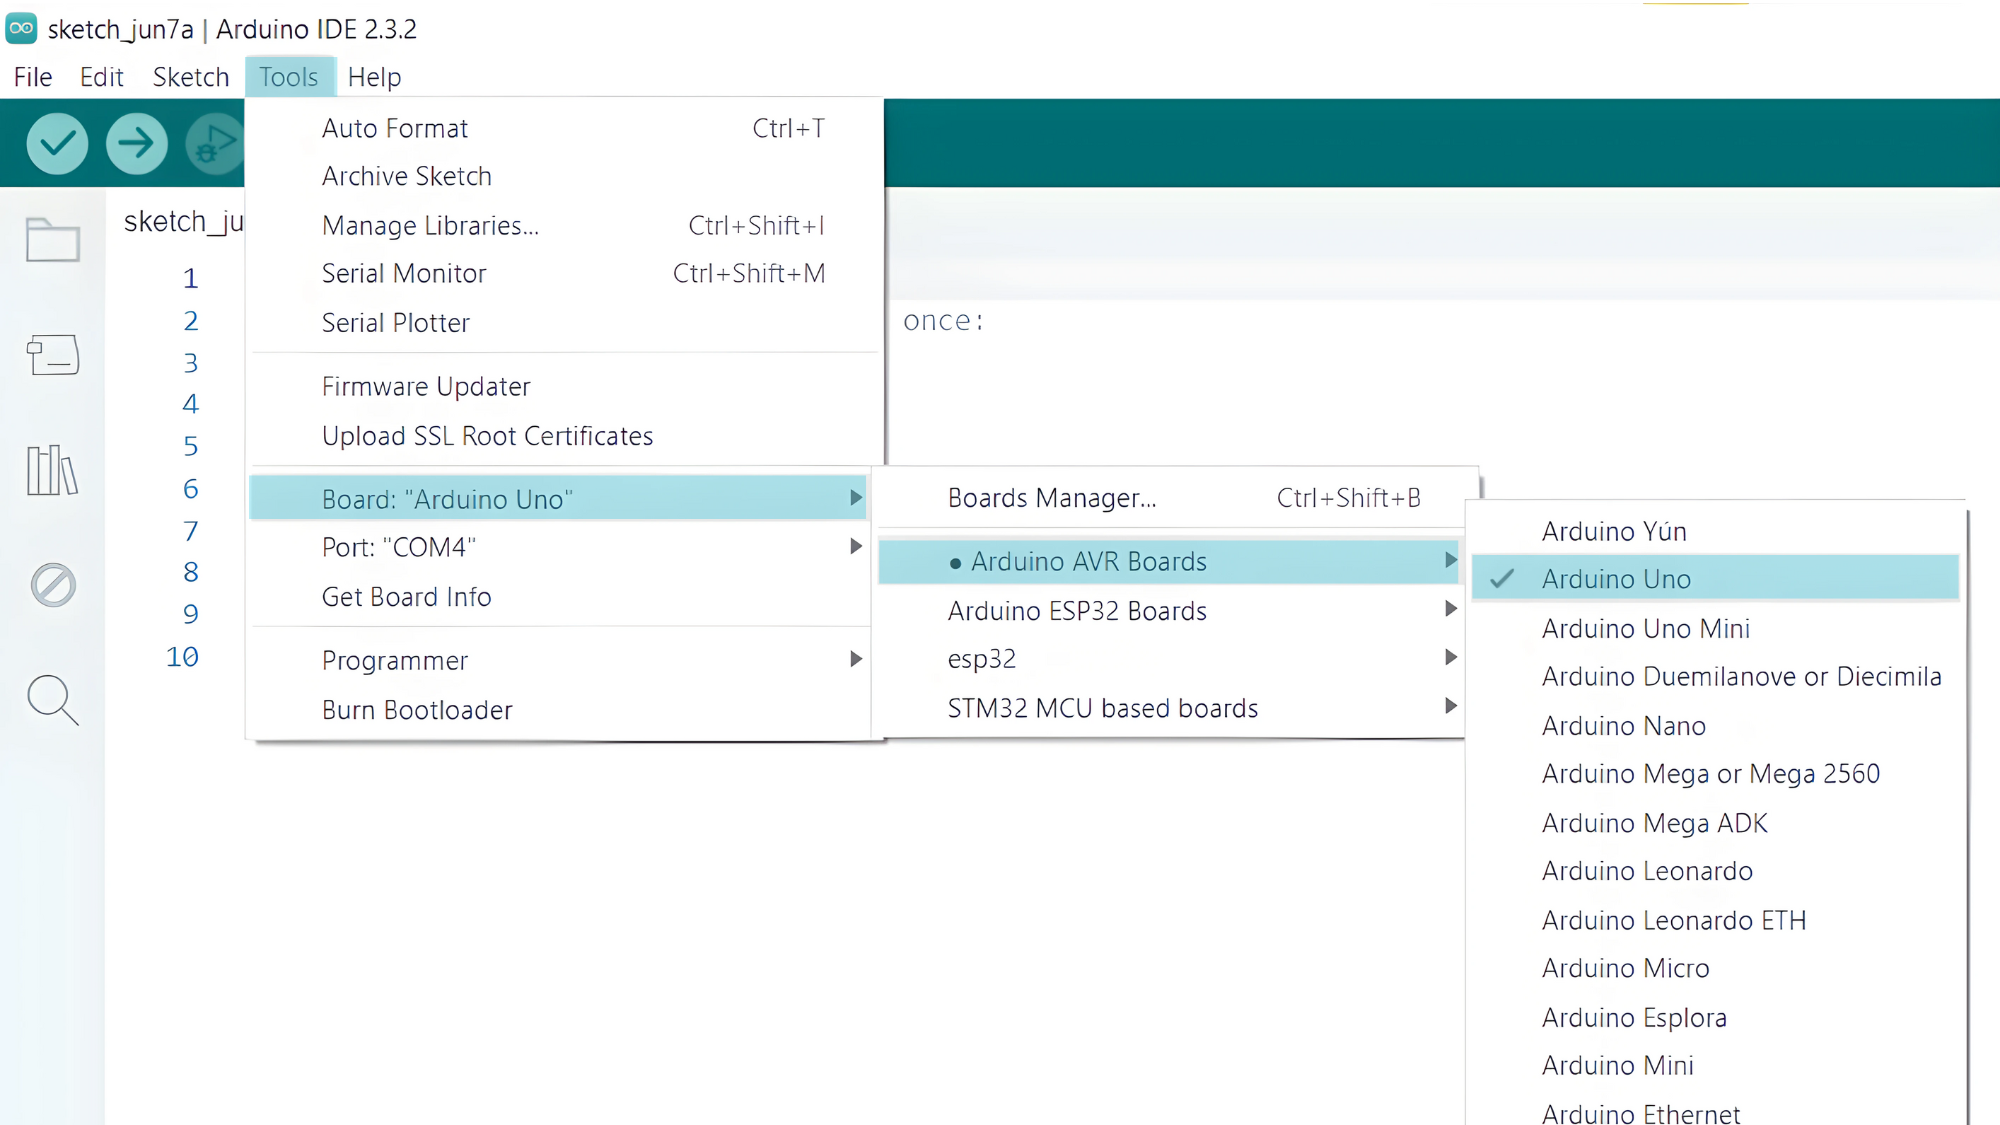
- Go to Tools > Port and select the port to which your Arduino is connected.

- Verify and upload the code to your Arduino board.
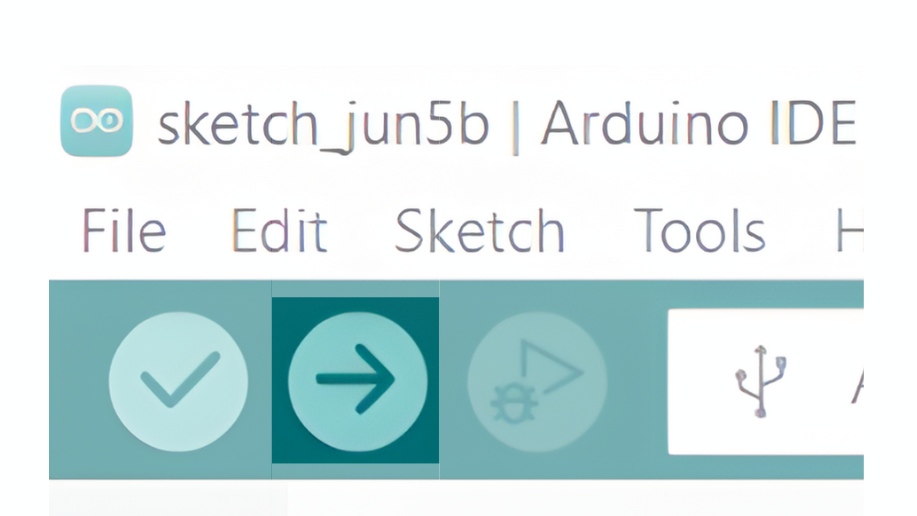
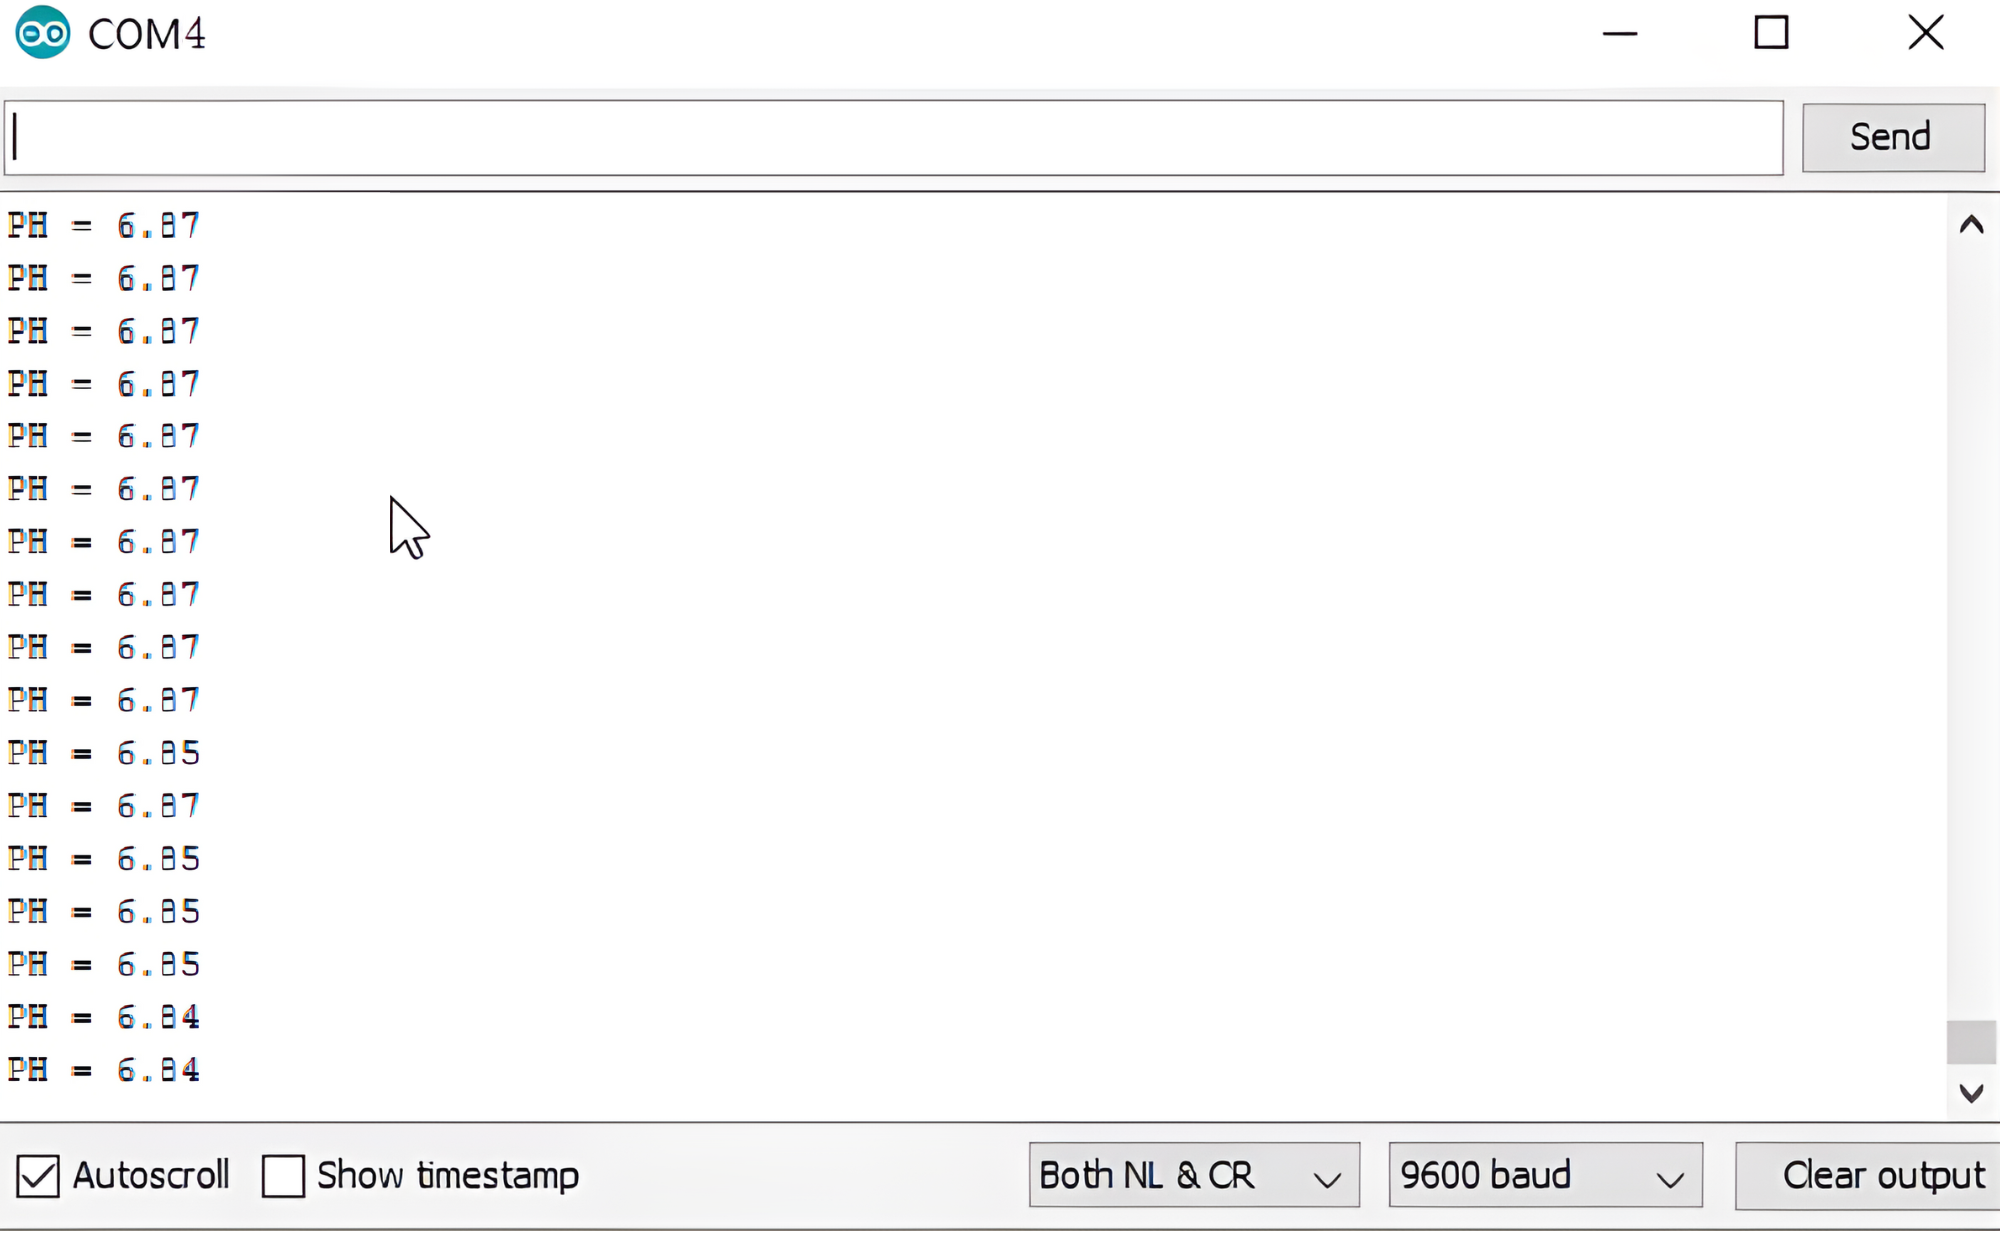
Step 3: Open Serial Monitor:
- Once the code is uploaded successfully, open the Serial Monitor in the Arduino IDE.
- Set the baud rate to 9600 baud.