Index
Introduction
The BMP180 is a popular digital barometric pressure sensor that is used to measure temperature and atmospheric pressure. This sensor is widely used in various electronic projects, such as weather stations, altitude measurement, and drones. In this blog, we will discuss what the BMP180 sensor is, how it works, its technical specifications, and how to interface it with an Arduino.
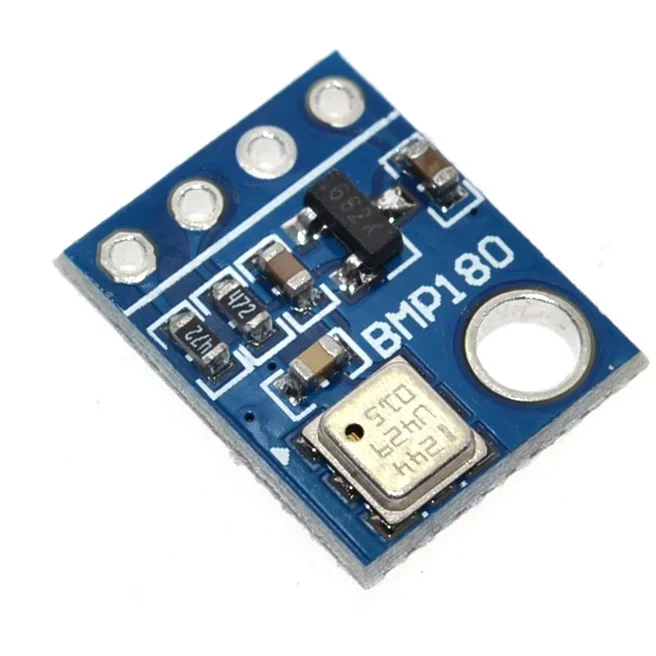
The BMP180 sensor is a small integrated circuit (IC) that measures temperature and barometric pressure. This sensor is designed to provide accurate pressure and temperature data, making it ideal for various applications, such as weather monitoring, altitude measurement, and drone navigation.
The BMP180 sensor works by using a microelectromechanical system (MEMS) to measure changes in pressure and temperature. The pressure sensor measures atmospheric pressure, and the temperature sensor measures the ambient temperature. These two measurements are combined to calculate the pressure and temperature.
Working Principle
- Pressure Sensing: It measures absolute pressure using a MEMS (Microelectromechanical Systems) sensor based on the piezoresistive effect, where pressure changes cause a tiny deformation in a silicon diaphragm, altering electrical resistance to generate digital pressure readings.
- Temperature Sensing: It includes a built-in temperature sensor to compensate for temperature variations that affect pressure measurements. This compensation ensures accurate pressure readings across different temperature conditions.
- Calibration: The BMP180 comes pre-calibrated from the factory with internal compensation coefficients stored in memory. These coefficients adjust sensor readings for temperature and manufacturing variations, improving measurement accuracy.
- Communication: The BMP180 communicates with microcontrollers via the I2C (Inter-Integrated Circuit) interface, allowing the microcontroller to request pressure and temperature data and receive digital readings.
- Output: It provides pressure readings in Pascals (Pa) or hectopascals (hPa) and temperature readings in degrees Celsius (°C) over the I2C interface.
Application
- Weather monitoring and forecasting.
- Altitude measurement and navigation systems.
- Indoor climate control and environmental monitoring.
- Industrial process monitoring.
- Research and development projects requiring precise pressure and temperature measurements.
Technical Specifications
1. Input voltage: 3.3V
2. Temperature range: -40°C to 85°C
3. Temperature resolution: 0.1°C
4. Pressure range: 300hPa to 1100hPa
5. Pressure resolution: 0.01hPa
6. Communication: I2C protocol
7. Dimensions: 20mm x 16.5mm x 1.6mm
Pinout
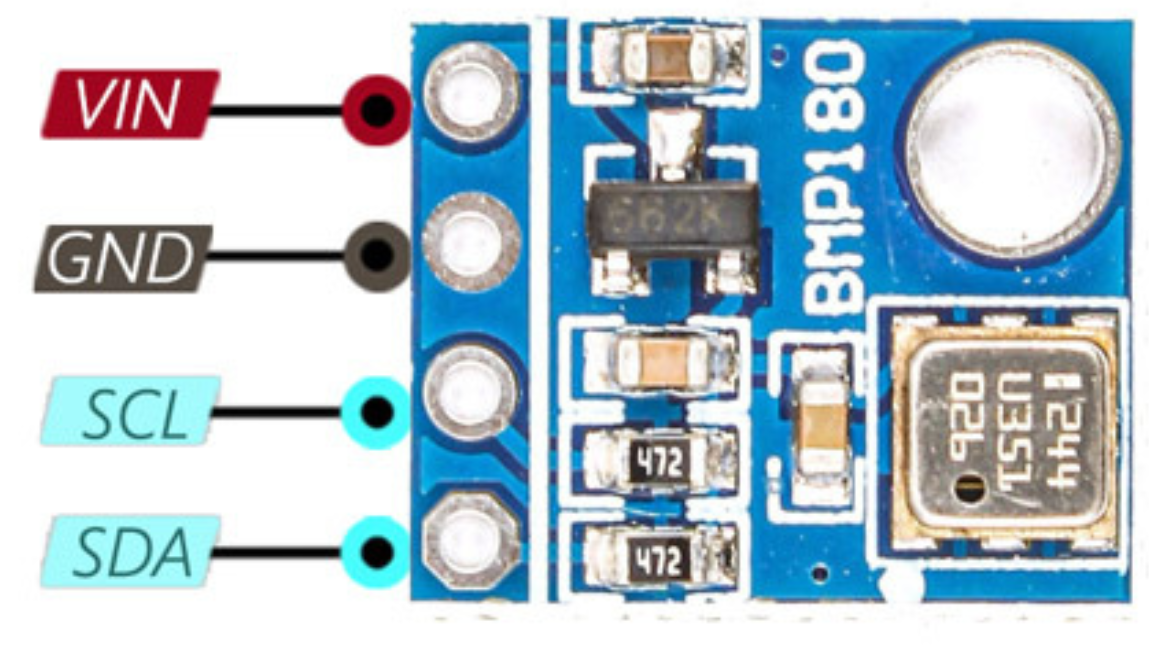
1. VCC: Power supply (3.3V)
2. GND: Ground
3. SCL: Serial clock line (I2C communication bus)
4. SDA: Serial data line (I2C communication bus)
Circuit Diagram
| BMP180 Pin | Arduino Pin |
| VCC | 5 V |
| GND | GND |
| SDA | Analog A4 |
| SCL | Analog A5 |

Programming With Arduino
Step 1: Install the Required Library
The Wire library is included by default with the Arduino IDE, so you do not need to install it separately.
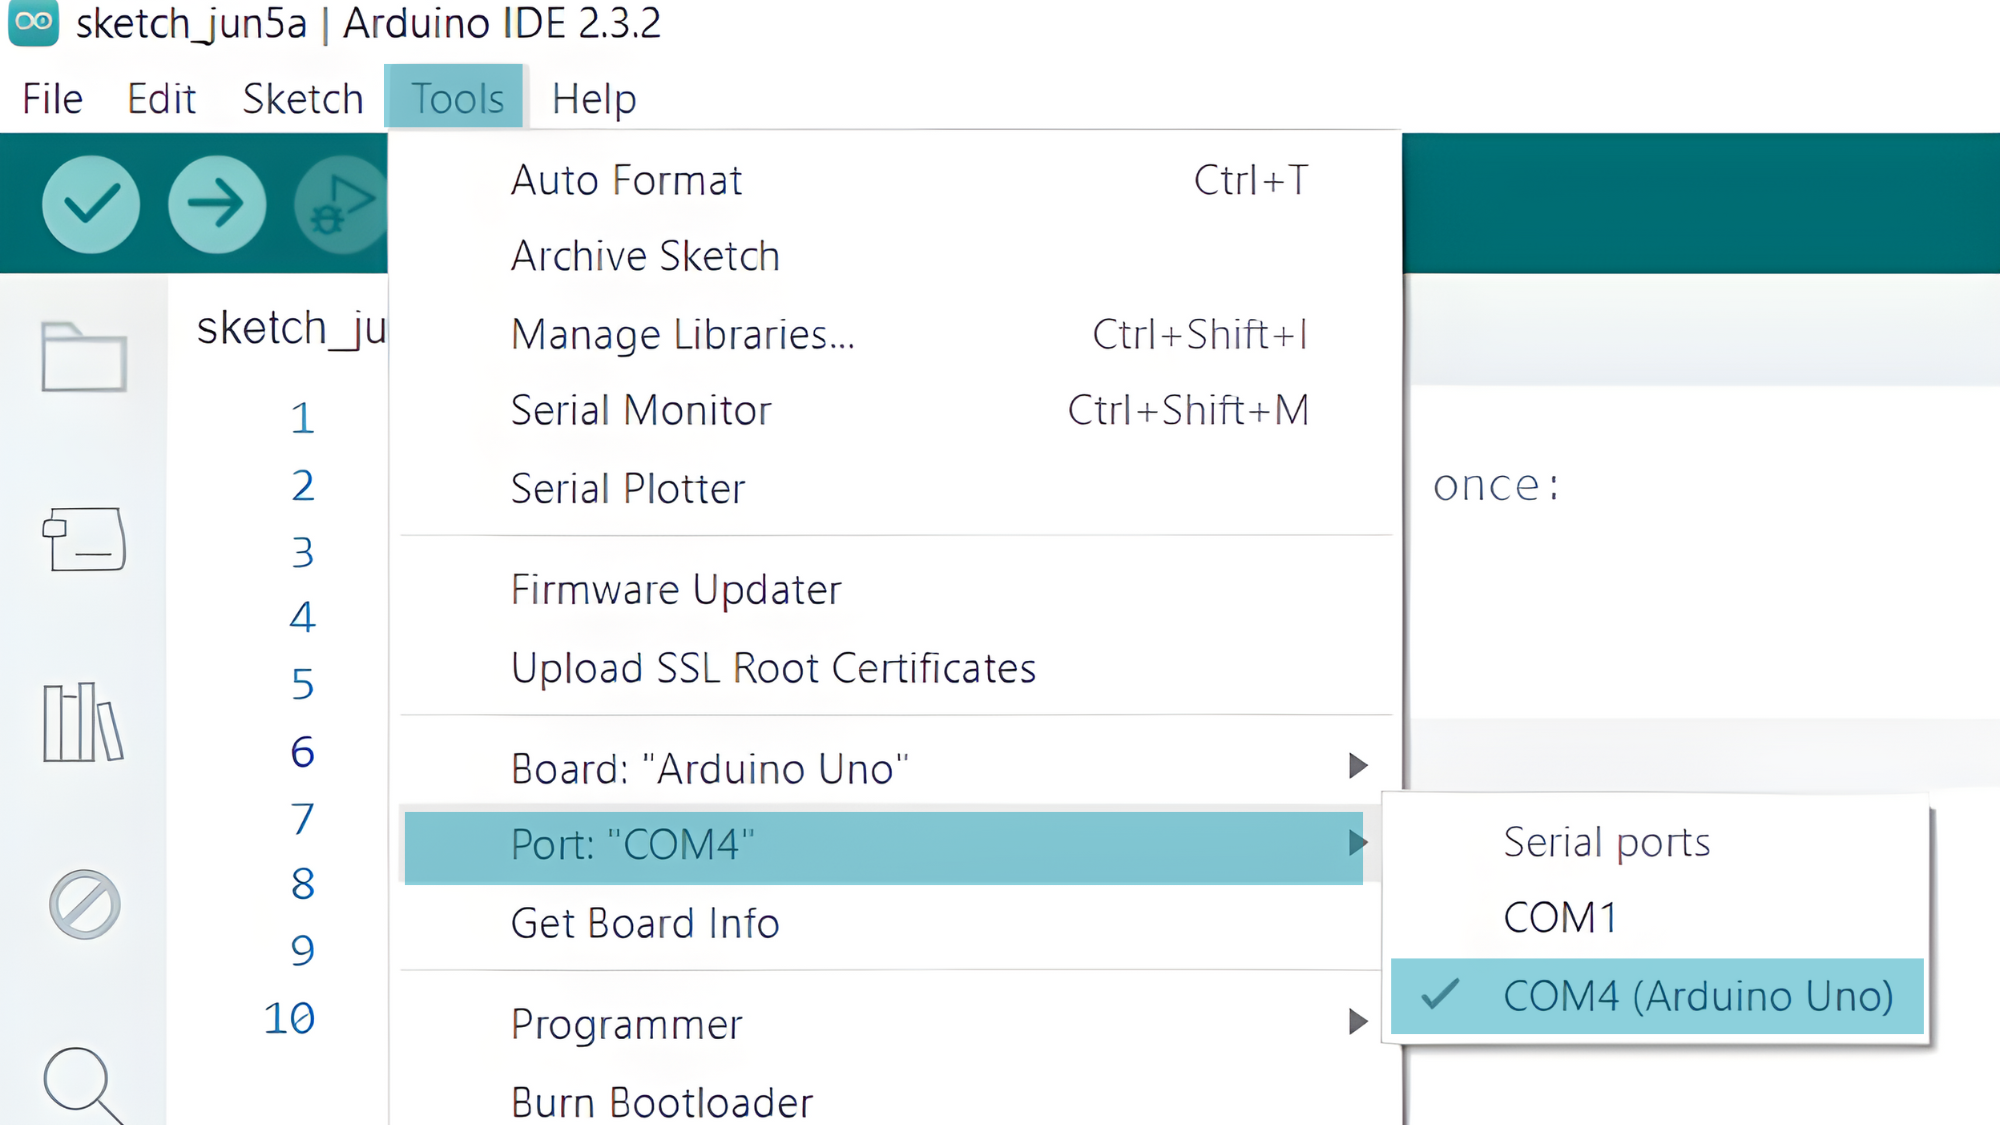
Step 2: Select the appropriate board and port
- Go to Tools > Board and select your Arduino board (e.g., Arduino Uno).
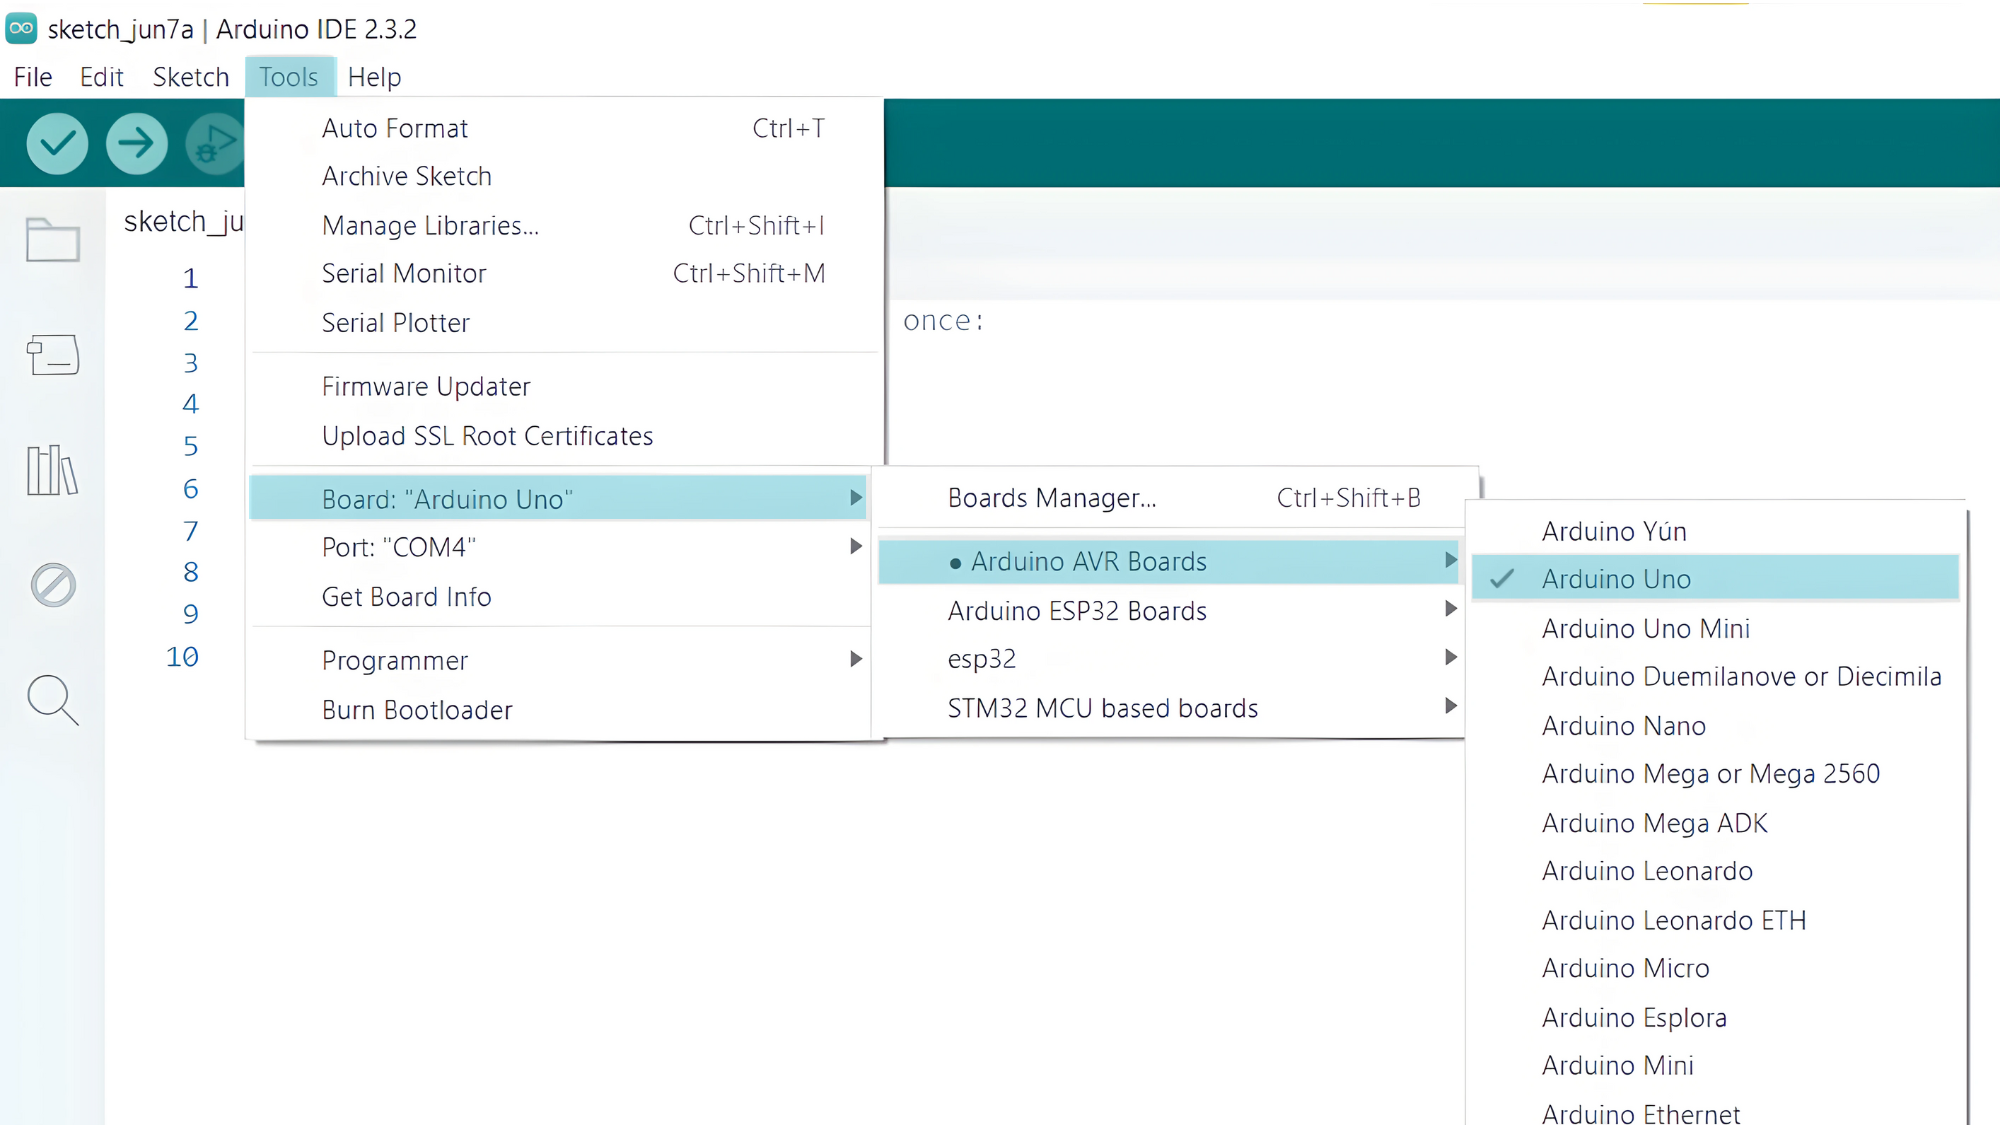
- Go to Tools > Port and select the port to which your Arduino is connected.
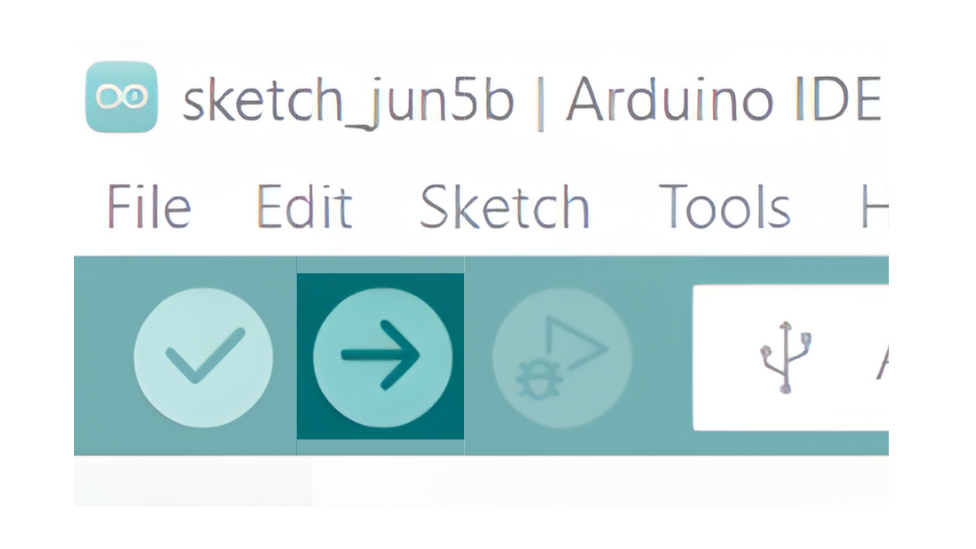
Step 3: Upload the Code
- Copy the provided code into your Arduino IDE.
#include <Wire.h>

#define BMP180_ADDRESS 0x77 // I2C address of BMP180 sensor

void setup() {
  Serial.begin(9600);
  Wire.begin(); // Initialize I2C communication
}

void loop() {
  // Start temperature measurement
  float temperature = readBMP180Temperature();

  // Start pressure measurement
  float pressure = readBMP180Pressure();

  // Display temperature and pressure readings
  Serial.print("Temperature: ");
  Serial.print(temperature);
  Serial.println(" °C");

  Serial.print("Pressure: ");
  Serial.print(pressure);
  Serial.println(" hPa");

  delay(2000); // Delay before next reading
}

float readBMP180Temperature() {
  // Request temperature measurement
  Wire.beginTransmission(BMP180_ADDRESS);
  Wire.write(0xF4); // Control register address for temperature measurement
  Wire.write(0x2E); // Start temperature measurement
  Wire.endTransmission();

  delay(5); // Wait for temperature measurement to complete (4.5 ms)

  // Read temperature data
  Wire.beginTransmission(BMP180_ADDRESS);
  Wire.write(0xF6); // Data register address for temperature data
  Wire.endTransmission();

  Wire.requestFrom(BMP180_ADDRESS, 2); // Request 2 bytes of data
  byte msb = Wire.read();
  byte lsb = Wire.read();

  // Calculate temperature in degrees Celsius
  int UT = (msb << 8) | lsb;
  int X1 = (UT - 32768) * 10 / 340;
  return X1 / 10.0;
}

float readBMP180Pressure() {
  // Request pressure measurement
  Wire.beginTransmission(BMP180_ADDRESS);
  Wire.write(0xF4); // Control register address for pressure measurement
  Wire.write(0x34); // Start pressure measurement (Oversampling setting: Ultra low power, 1 sample)
  Wire.endTransmission();

  delay(26); // Wait for pressure measurement to complete (25.5 ms for Ultra low power mode)

  // Read pressure data
  Wire.beginTransmission(BMP180_ADDRESS);
  Wire.write(0xF6); // Data register address for pressure data
  Wire.endTransmission();

  Wire.requestFrom(BMP180_ADDRESS, 3); // Request 3 bytes of data
  byte msb = Wire.read();
  byte lsb = Wire.read();
  byte xlsb = Wire.read();

  // Calculate pressure in hPa (hectopascals)
  long UP = ((long)msb << 16 | (long)lsb << 8 | (long)xlsb) >> (8 - 0); // Combine 3 bytes into a 20-bit value
  long B3 = 0x00000;
  long B6 = B5 - 4000;
  long X1 = (B2 * (B6 * B6 >> 12)) >> 11;
  long X2 = AC2 * B6 >> 11;
  long X3 = X1 + X2;
  long B4 = AC4 * (X3 + 32768) >> 15;
  long B7 = (UP - B3) * (50000 >> 0);
  if (B7 < 0x80000000) {
    long p = (B7 * 2) / B4;
  } else {
    long p = (B7 / B4) * 2;
  }
  X1 = (p >> 8) * (p >> 8);
  X1 = (X1 * 3038) >> 16;
  X2 = (-7357 * p) >> 16;
  p = p + ((X1 + X2 + 3791) >> 4);

  return p / 100.0; // Convert pressure to hPa
}
- Verify and upload the code to your Arduino board.
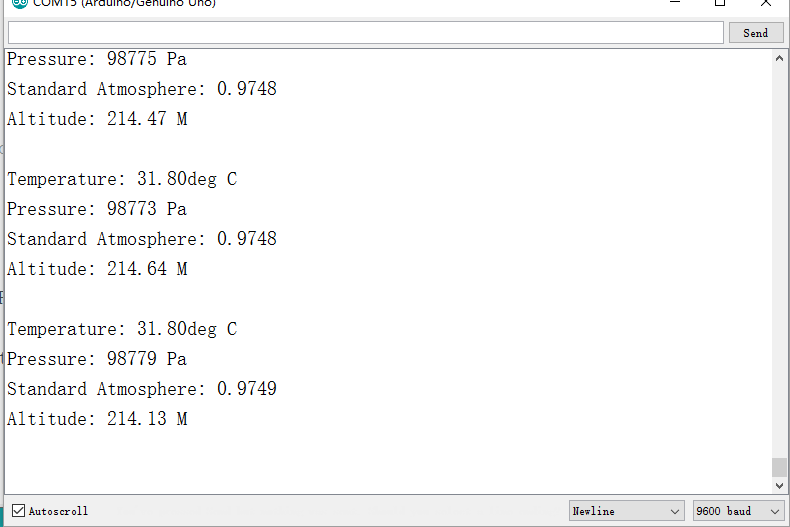
Step 4: Open the Serial Monitor
- Connect your Arduino to the computer and upload the code.
- Open the Serial Monitor in the Arduino IDE by going to Tools > Serial Monitor or pressing
Ctrl+Shift+M. - Set the baud rate to 9600 in the Serial Monitor.