Index
Introduction
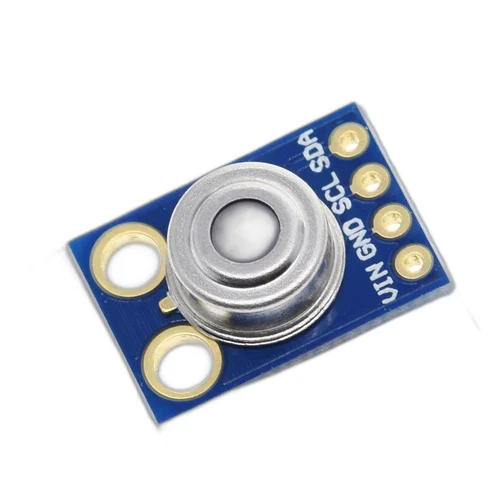
The MLX90614 is an infrared temperature sensor module manufactured by Melexis. It works based on the principle of detecting infrared radiation emitted by objects to measure their temperature without physical contact.
Hardware Overview
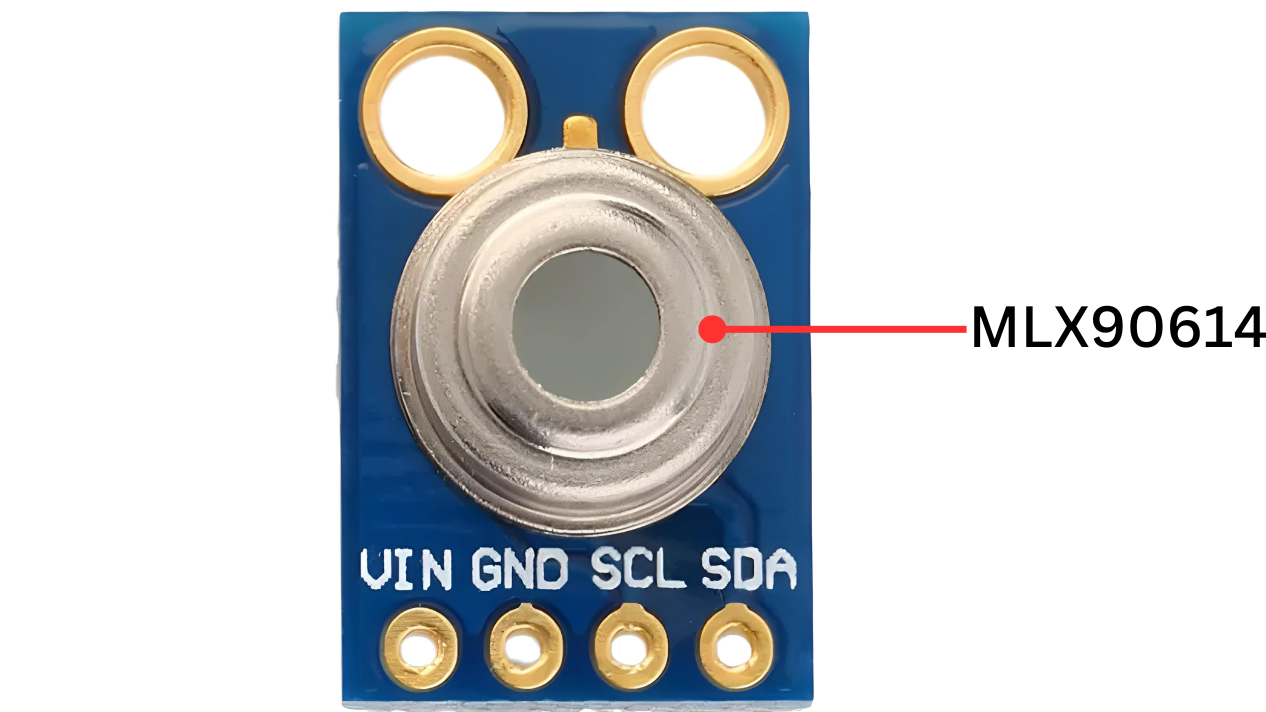
- MLX90614: At the heart of the module is a high precision non-contact infrared temperature sensor from Melexis – MLX90614. Unlike most temperature sensors, this sensor measures temperature without making physical contact. This can be very useful for monitoring the temperature of something moving, such as a spinning motor shaft or objects on a conveyor belt, for example. Simply point the sensor at what you want to measure, and it will detect the temperature by absorbing the emitted IR waves.
Working Principle
The MLX90614 sensor contains a thermopile detector chip that absorbs infrared radiation from the target object. The temperature of the object is determined by measuring the amount of infrared energy absorbed and converted into electrical signals by the thermopile.
Application
- Industrial: Monitoring temperature in manufacturing processes, machinery, and equipment.
- Medical: Non-contact temperature measurement in medical devices and diagnostics.
- Consumer Electronics: Smart home systems, HVAC control, and thermal cameras.
- Automotive: Engine temperature monitoring and climate control.
- Research: Experimental setups and scientific research requiring accurate temperature measurement.
Technical Specifications
- 3.3V to 5V input
- Module has power regulator IC built-in.
- The measurement resolution of 0.01C.
- adaptation for 8 to 16V applications.
- When measuring the temperature, please maintain a measuring distance of 1 cm.
- SMBus compatible digital interface for fast temperature readings and building sensor networks.
- Customizable PWM output for continuous reading.
Pinout
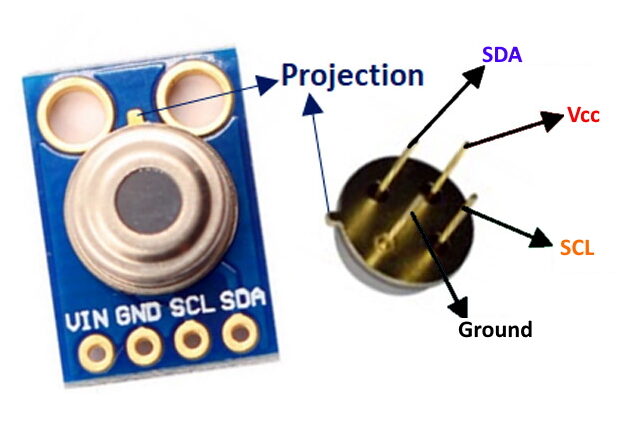
- VDD: Connect to the power supply (3.3V or 5V).
- GND: Connect to the ground (0V) of the power supply.
- SDA: Serial Data Line for I2C communication with microcontrollers.
- SCL: Serial Clock Line for I2C communication with microcontrollers.
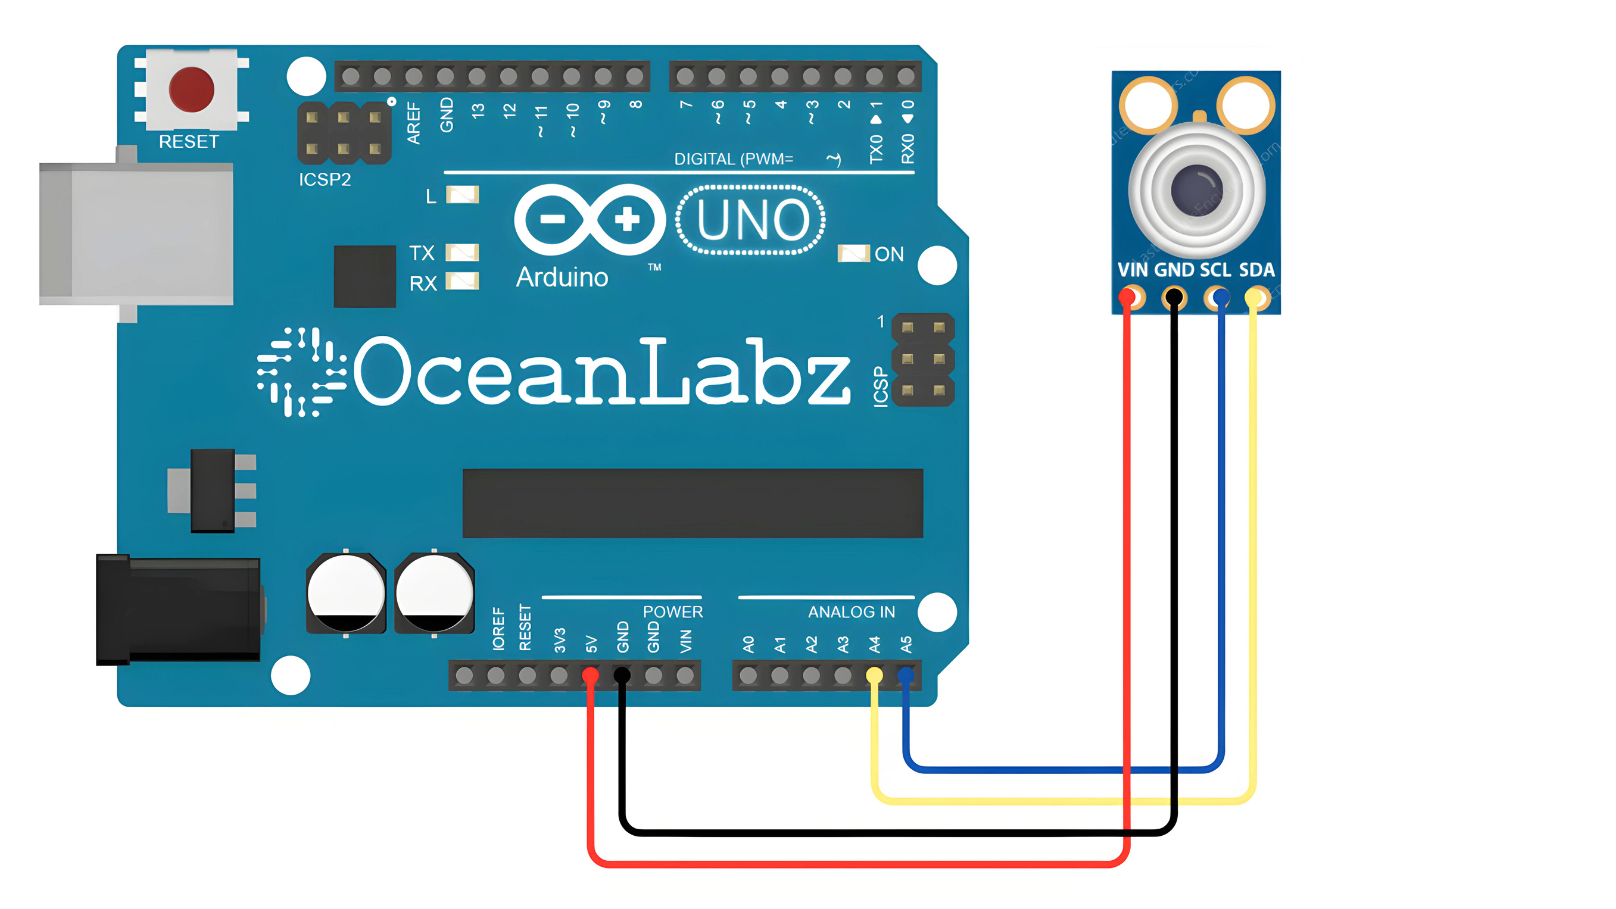
Circuit Diagram
| MLX90614 Pin | Arduino Pin |
| VCC | 5 V |
| GND | GND |
| SDA | Analog A4 |
| SCL | Analog A5 |
Programming With Arduino
Step 1: Open your first sketch
- Open the Arduino IDE.
- Copy and paste the provided code into a new sketch in the Arduino IDE:
#include <Wire.h>

#define MLX90614_ADDR 0x5A // I2C address of MLX90614 sensor

void setup() {
  Wire.begin(); // Initialize I2C communication
  Serial.begin(9600); // Initialize serial communication
}

void loop() {
  float ambientTemp, objectTemp;

  // Request ambient temperature data from MLX90614
  Wire.beginTransmission(MLX90614_ADDR);
  Wire.write(0x06); // Register address for ambient temperature data
  Wire.endTransmission(false);

  Wire.requestFrom(MLX90614_ADDR, 2); // Request 2 bytes of data
  if (Wire.available() == 2) {
    byte lowByte = Wire.read(); // Low byte
    byte highByte = Wire.read(); // High byte
    ambientTemp = (highByte << 8 | lowByte) * 0.02 - 273.15; // Calculate temperature in Celsius
  }

  // Request object temperature data from MLX90614
  Wire.beginTransmission(MLX90614_ADDR);
  Wire.write(0x07); // Register address for object temperature data
  Wire.endTransmission(false);

  Wire.requestFrom(MLX90614_ADDR, 2); // Request 2 bytes of data
  if (Wire.available() == 2) {
    byte lowByte = Wire.read(); // Low byte
    byte highByte = Wire.read(); // High byte
    objectTemp = (highByte << 8 | lowByte) * 0.02 - 273.15; // Calculate temperature in Celsius
  }

  // Print temperature values to Serial Monitor
  Serial.print("Ambient Temperature: ");
  Serial.print(ambientTemp);
  Serial.println(" °C");

  Serial.print("Object Temperature: ");
  Serial.print(objectTemp);
  Serial.println(" °C");

  delay(1000); // Delay for 1 second before next reading
}
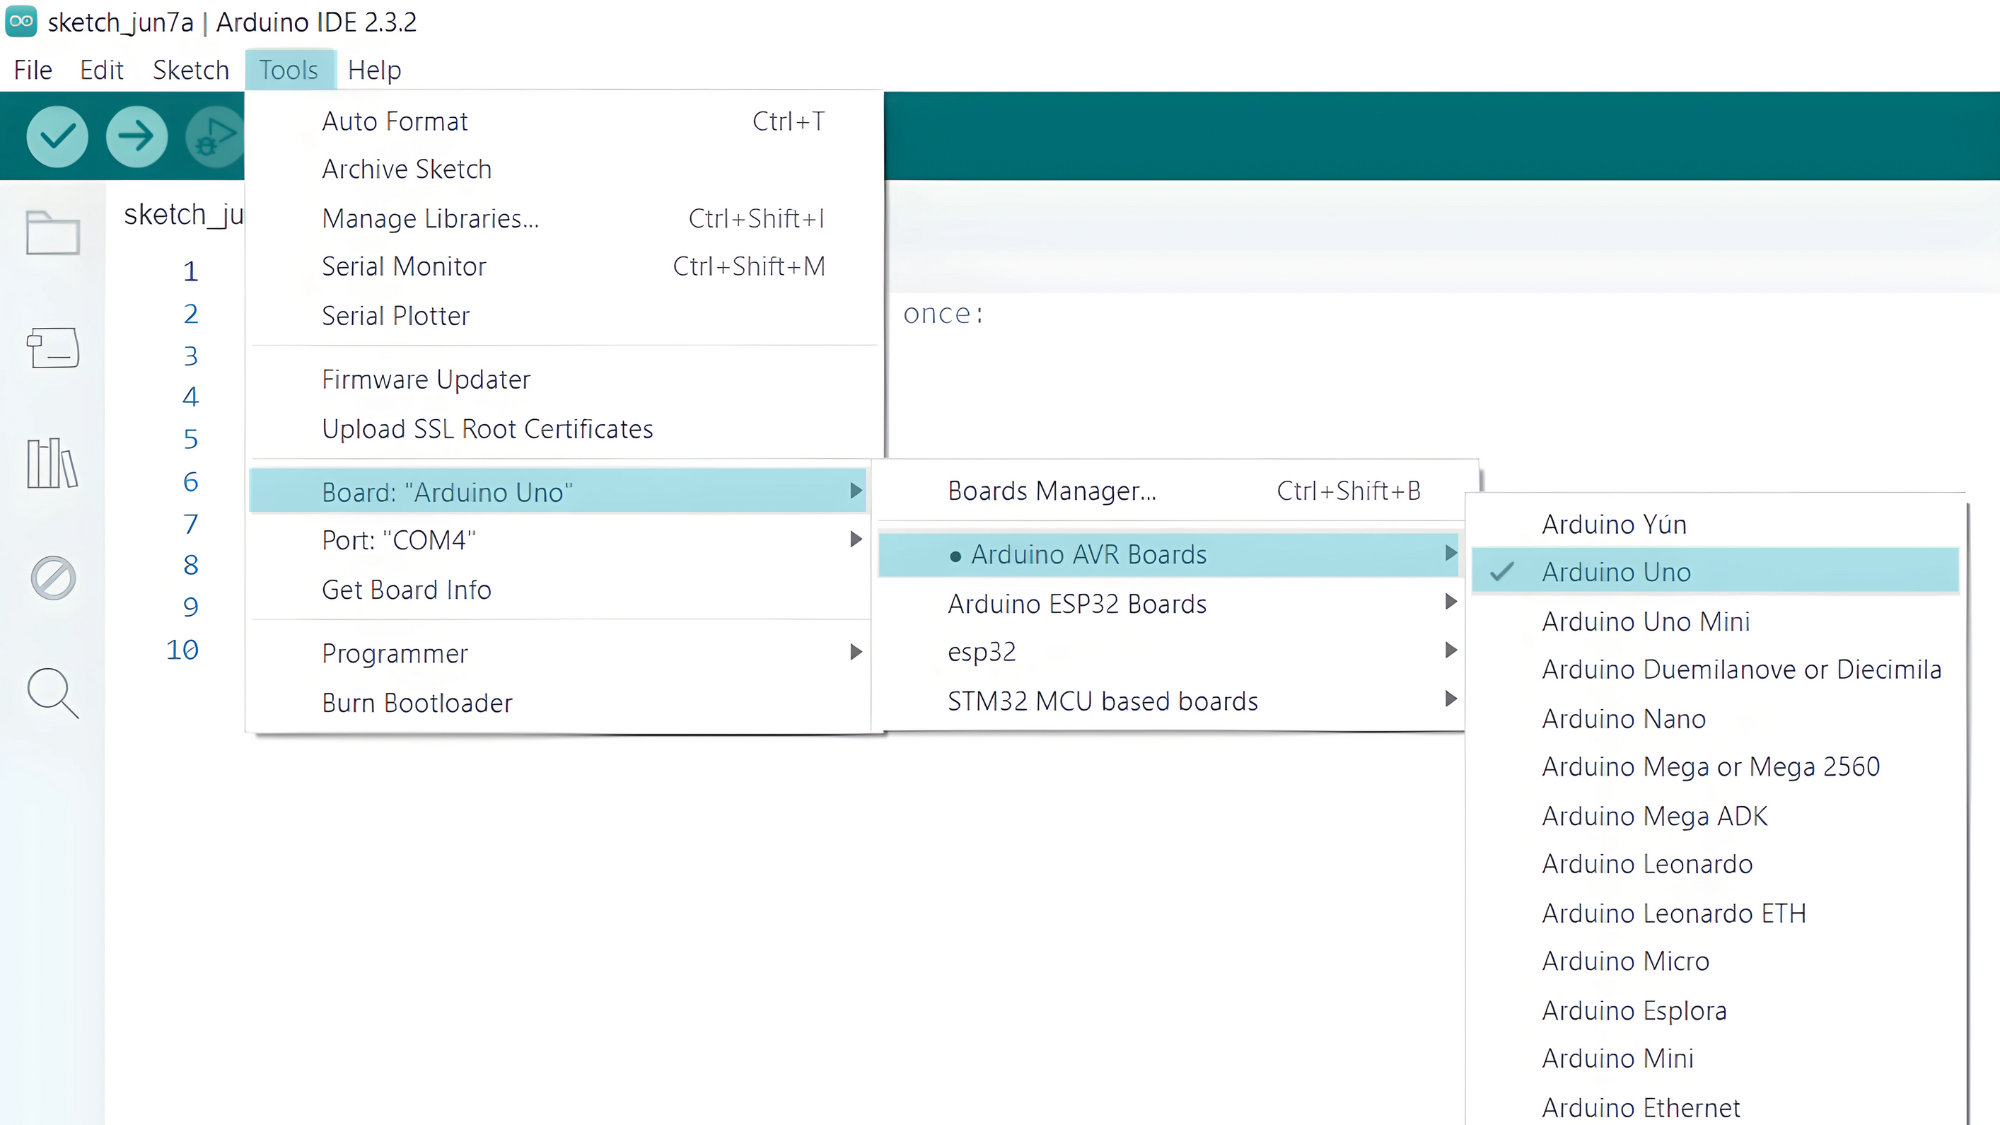
Step 2: Select your board type and port
- Go to Tools > Board and select your Arduino board (e.g., Arduino Uno).
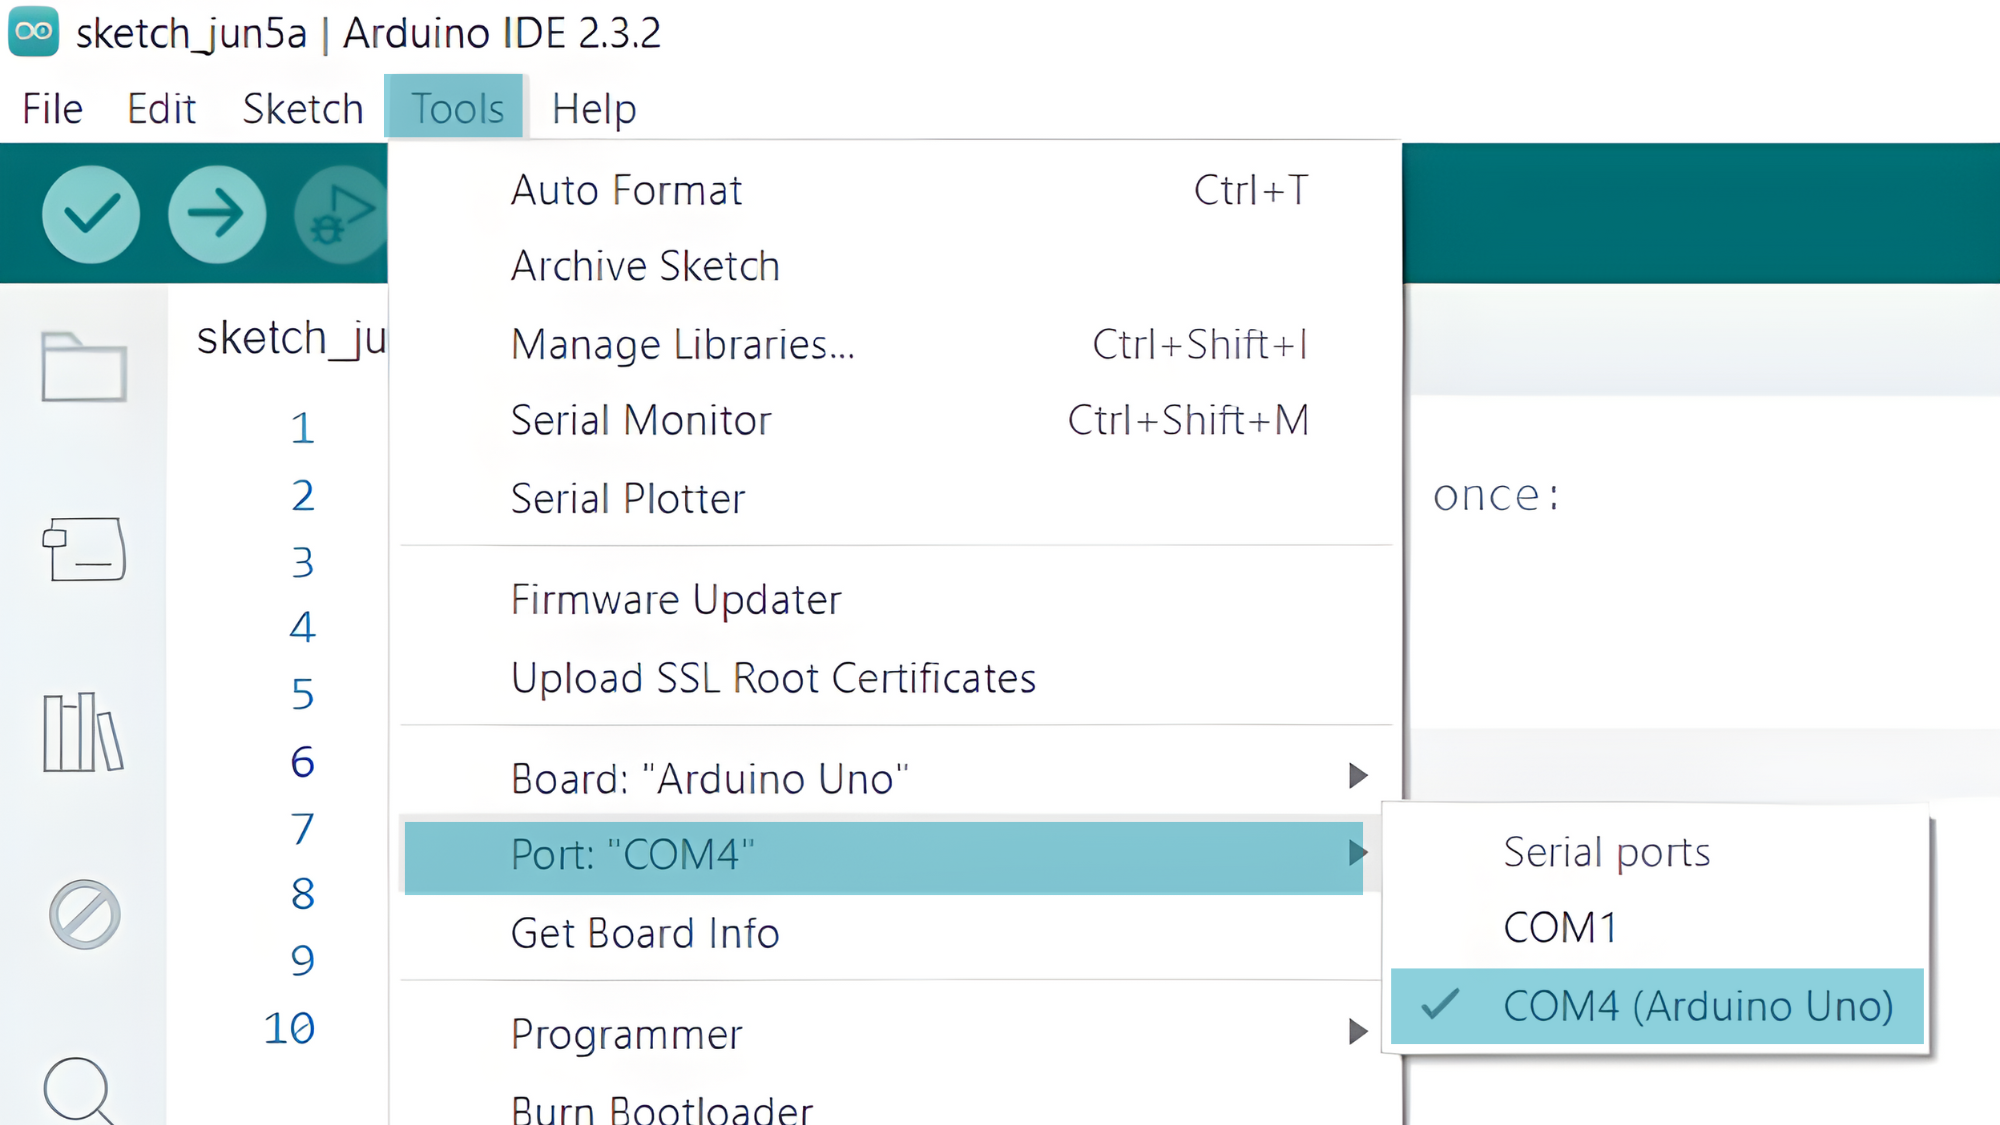
- Go to Tools > Port and select the port to which your Arduino is connected.
- Verify and upload the code to your Arduino board.

Step 3: Open Serial Monitor:
- Once the code is uploaded successfully, open the Serial Monitor in the Arduino IDE.
- Set the baud rate to 9600 baud.
