Index

Introduction
The OLED (Organic Light Emitting Diode) display module is an efficient and vibrant screen choice for Arduino projects. It offers superior contrast, wide viewing angles, and quick response times compared to traditional displays. This tutorial will cover connecting the OLED display to an Arduino and writing code to display text and graphics. Get ready to enhance your projects with this powerful visual output tool!
Required Components
- Arduino Board (e.g., Arduino Uno)
- OLED Graphic Display Module (typically 128×64)
- Jumper Wires
- Breadboard (optional)
Pinout

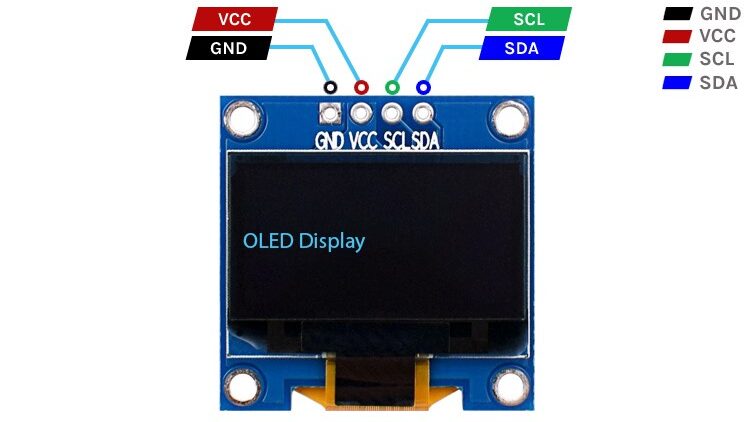
- GND: Ground pin
- VCC: Power supply pin (3.3V to 5V)
- SCL: Serial Clock pin for I2C communication
- SDA: Serial Data pin for I2C communication
Circuit Diagram / Wiring
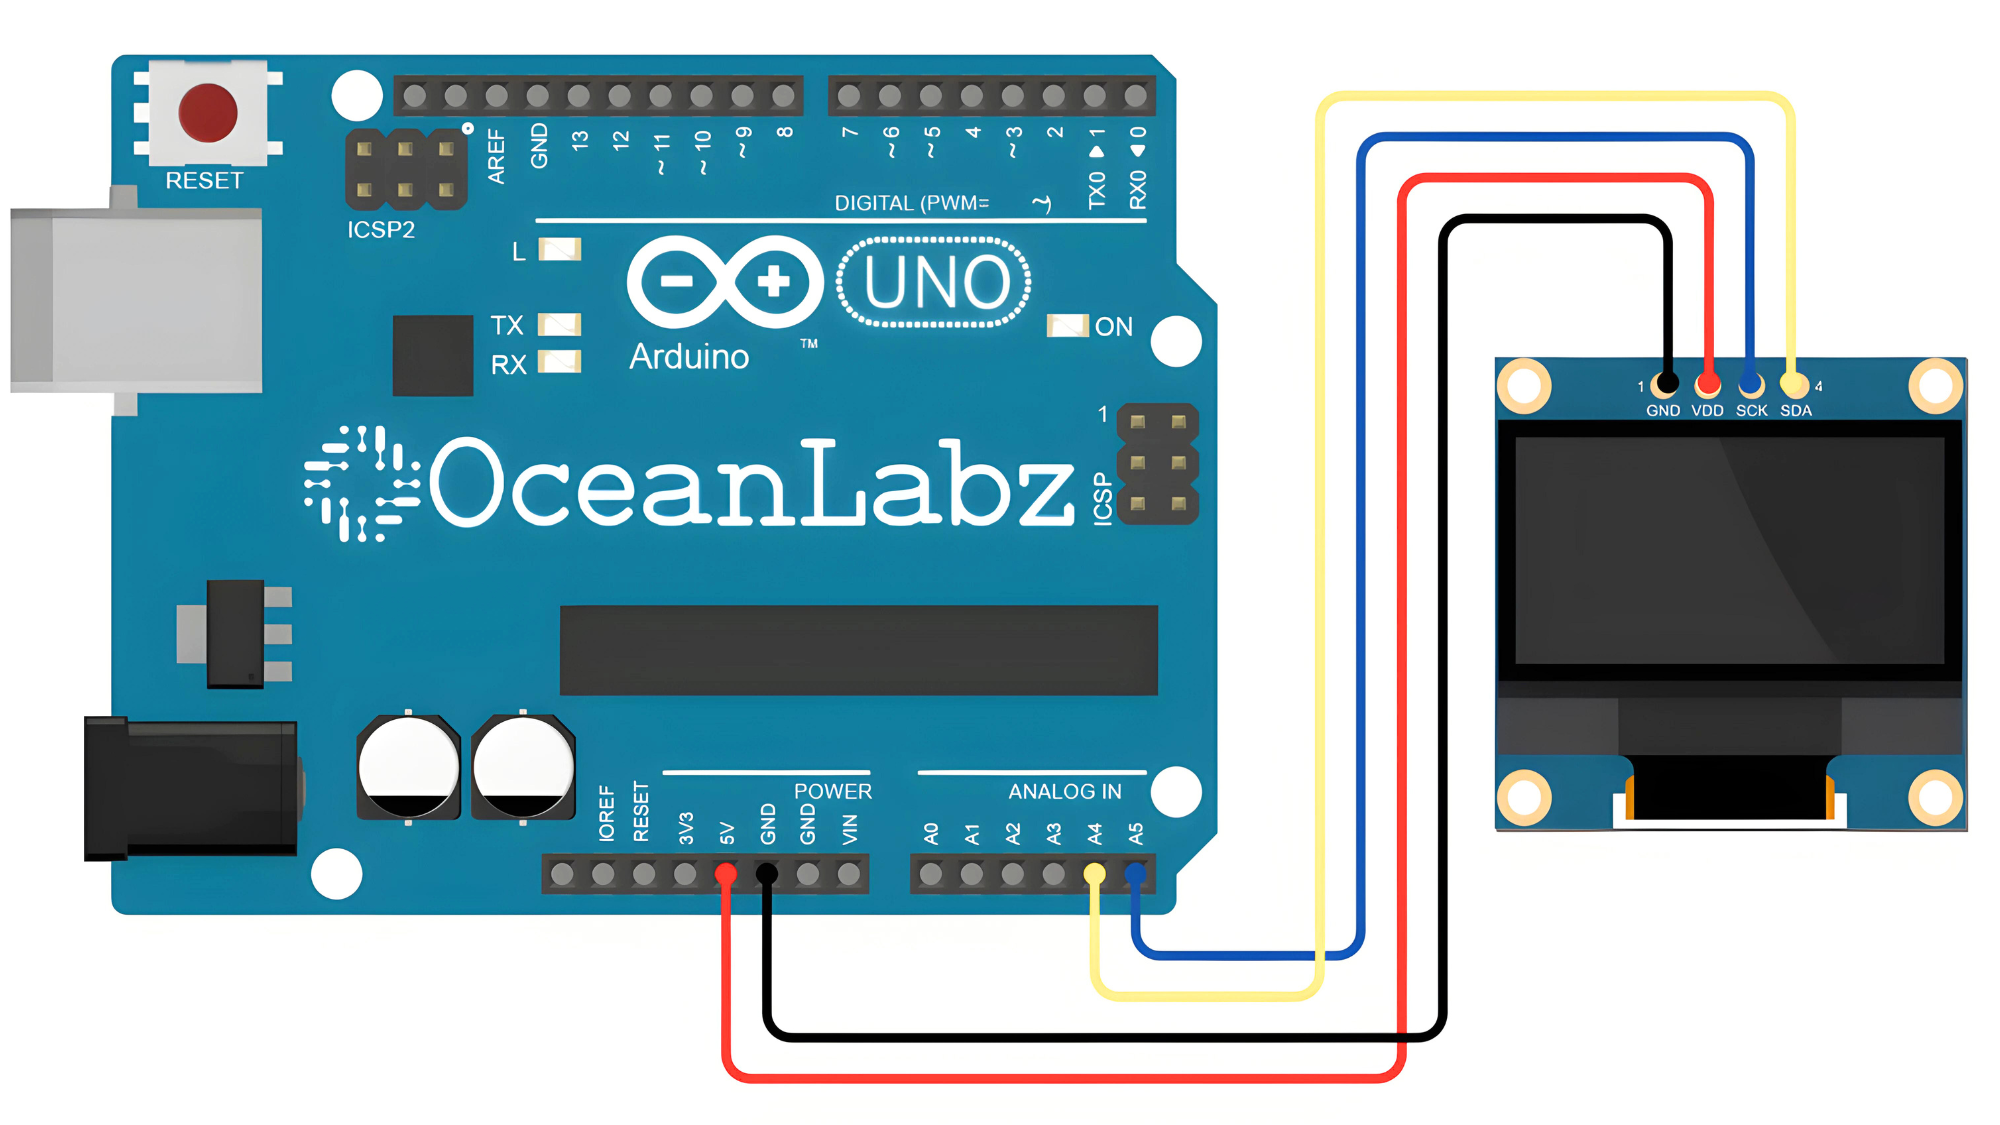
- OLED VCC → 5V (Arduino)
- OLED GND → GND (Arduino)
- OLED SDA → Pin A4 (Arduino)
- OLED SCK → Pin A5 (Arduino)

Programming With Arduino
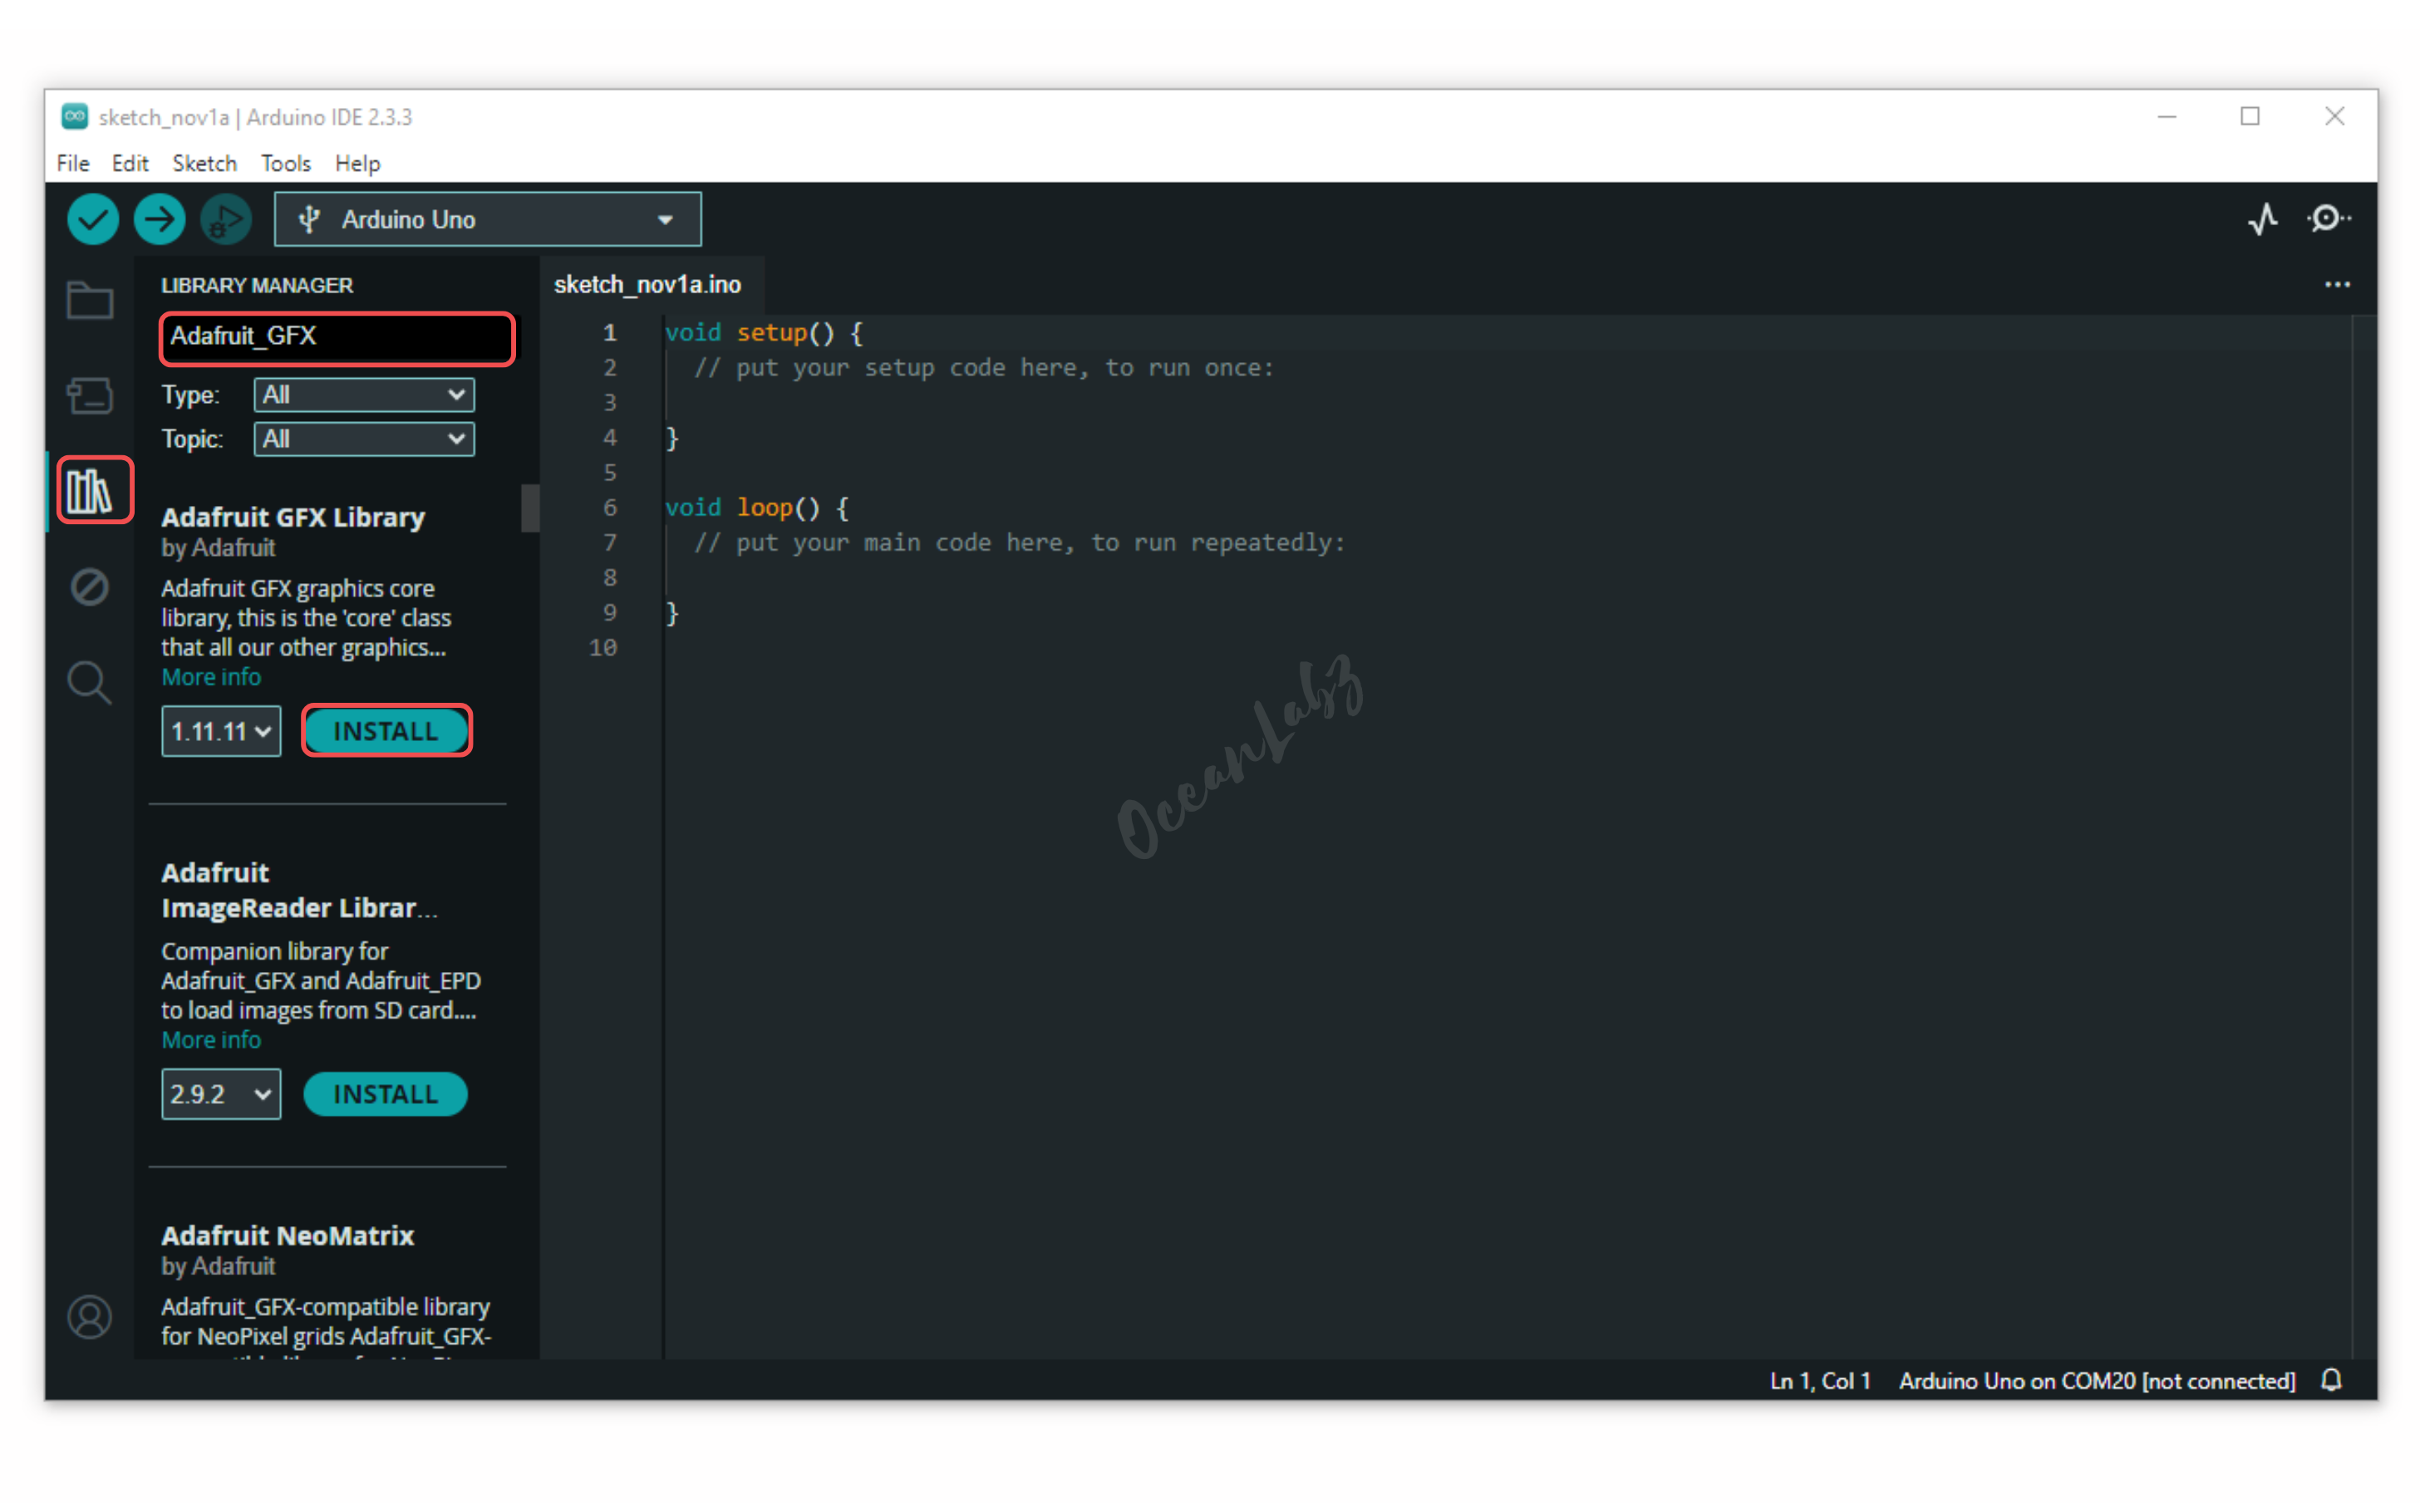
- Go to the “Libraries” tab on the left-hand side of the screen.
- Click on the “Library Manager” button (book icon) at the top of the Libraries tab.
- In the Library Manager window, type “Adafruit GFX” in the search bar, locate the library, and click on the “Install” button next to it.

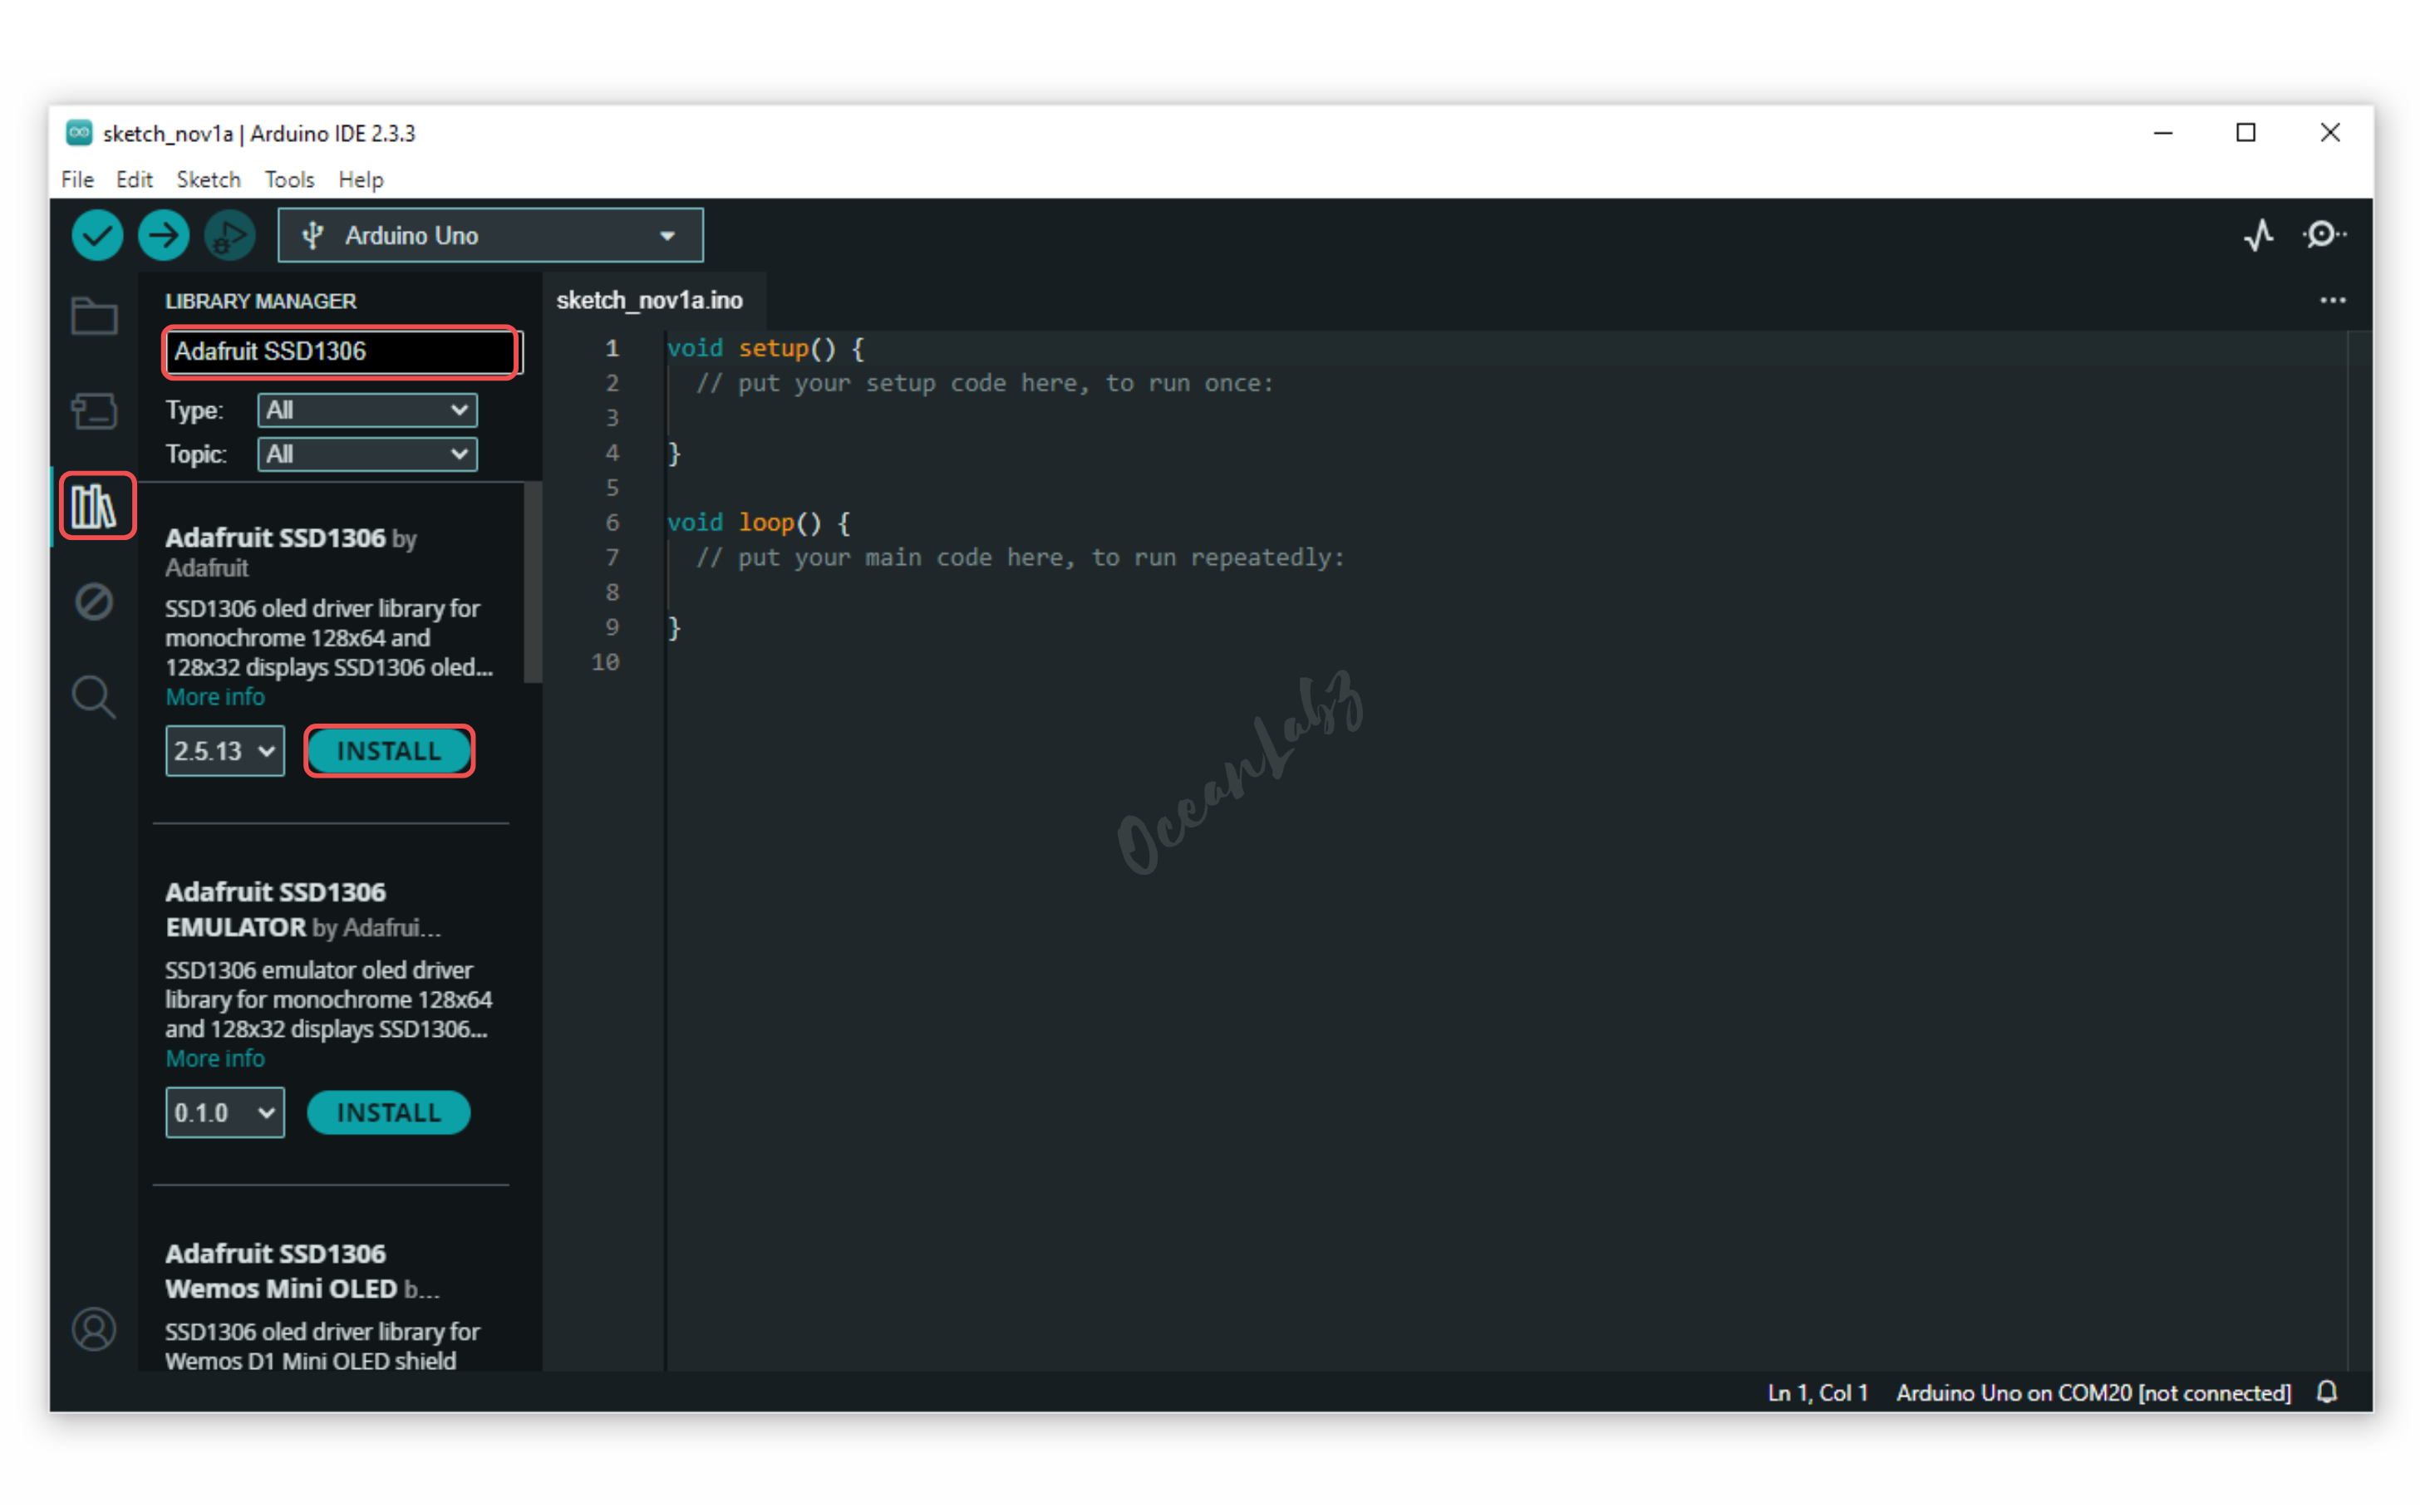
- Repeat the process for “Adafruit SSD1306” to install the SSD1306 library.

The Wire library is included by default, so no installation is needed.
- Copy the provided code into your Arduino IDE.
#include <Wire.h>
#include <Adafruit_GFX.h>
#include <Adafruit_SSD1306.h>

// Define the OLED display width and height
#define SCREEN_WIDTH 128
#define SCREEN_HEIGHT 64

// Create an instance of the SSD1306 display
Adafruit_SSD1306 display(SCREEN_WIDTH, SCREEN_HEIGHT, &Wire, -1);

void setup() {
  // Initialize the display with the I2C address 0x3C
  if (!display.begin(SSD1306_SWITCHCAPVCC, 0x3C)) {
    Serial.println(F("SSD1306 allocation failed"));
    for (;;); // Infinite loop if initialization fails
  }

  // Clear the display buffer initially
  display.clearDisplay();
  display.display();

  // Set text size and color
  display.setTextSize(2);
  display.setTextColor(SSD1306_WHITE);
}

void loop() {
  // Clear display and set cursor at starting position
  display.clearDisplay();
  display.setCursor(0, 20);

  // Define the text to display
  const char* text = "OceanLabz";

  // Typewriter animation - display one character at a time
  for (int i = 0; i < strlen(text); i++) {
    display.print(text[i]);  // Print the next character
    display.display();       // Update display with buffer content
    delay(200);              // Delay to control typing speed
  }

  delay(2000); // Pause for 2 seconds before restarting the animation

  // Clear the screen and pause before the next animation cycle
  display.clearDisplay();
  display.display();
  delay(500); // Small delay before restarting the loop
}
Explanation
- Character-by-Character Display: In the
forloop, we print one character at a time from thetextstring. - Typing Speed:
delay(200);controls the speed of the typing effect. Adjust this value for faster or slower typing. - Loop Delay: After displaying the text, a delay is added to pause the text for a moment before clearing and restarting the animation.
Testing and Troubleshooting
- Make sure your OLED display is connected properly (SDA, SCL, VCC, GND) to the Arduino.
- Open the Serial Monitor to see the initialization message if there’s an error.
- If the display does not show anything, double-check the wiring and ensure the I2C address is correct.


