Index

Introduction
The Momentary Tactile Push Button Module is a crucial component in many electronic projects, acting as an input device that can trigger actions when pressed. This tutorial will focus on the Momentary Tactile Push Button Module, which includes a built-in resistor, making it easy to connect directly to an Arduino. You’ll learn how to connect this module to an Arduino and program it to read its state.
Required Components
- Arduino UNO R3 SMD (or any compatible Arduino board)
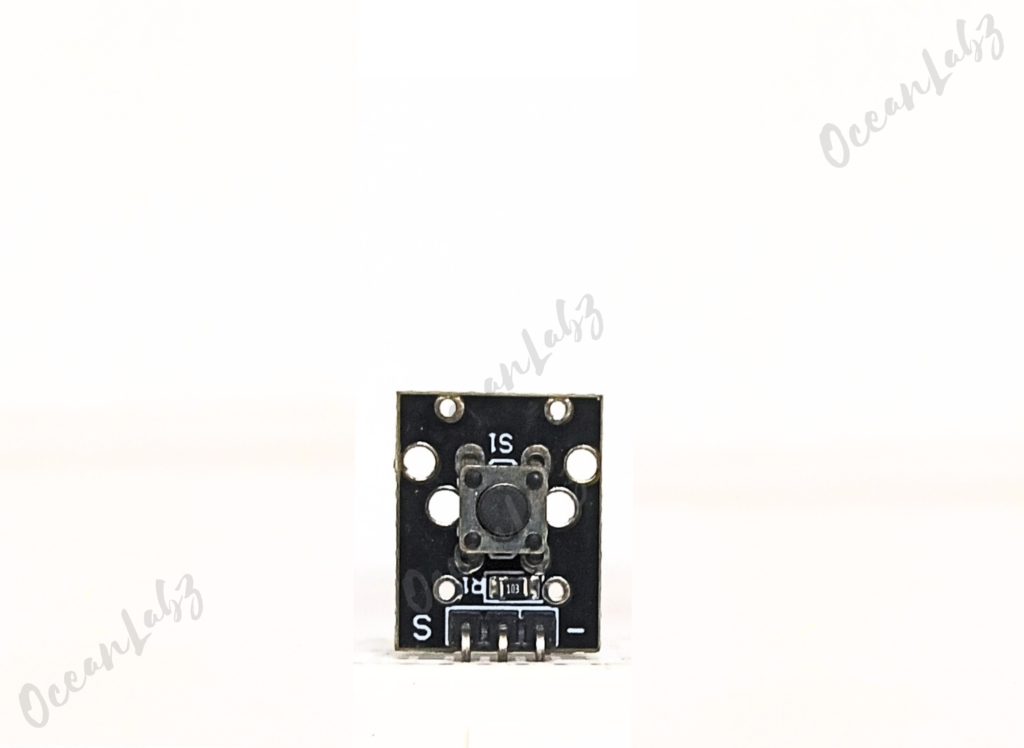
- Momentary Tactile Push Button Module (with built-in resistor)
- Jumper wires
- Breadboard (optional, for easier connections)
Pinout

Circuit Diagram / Wiring
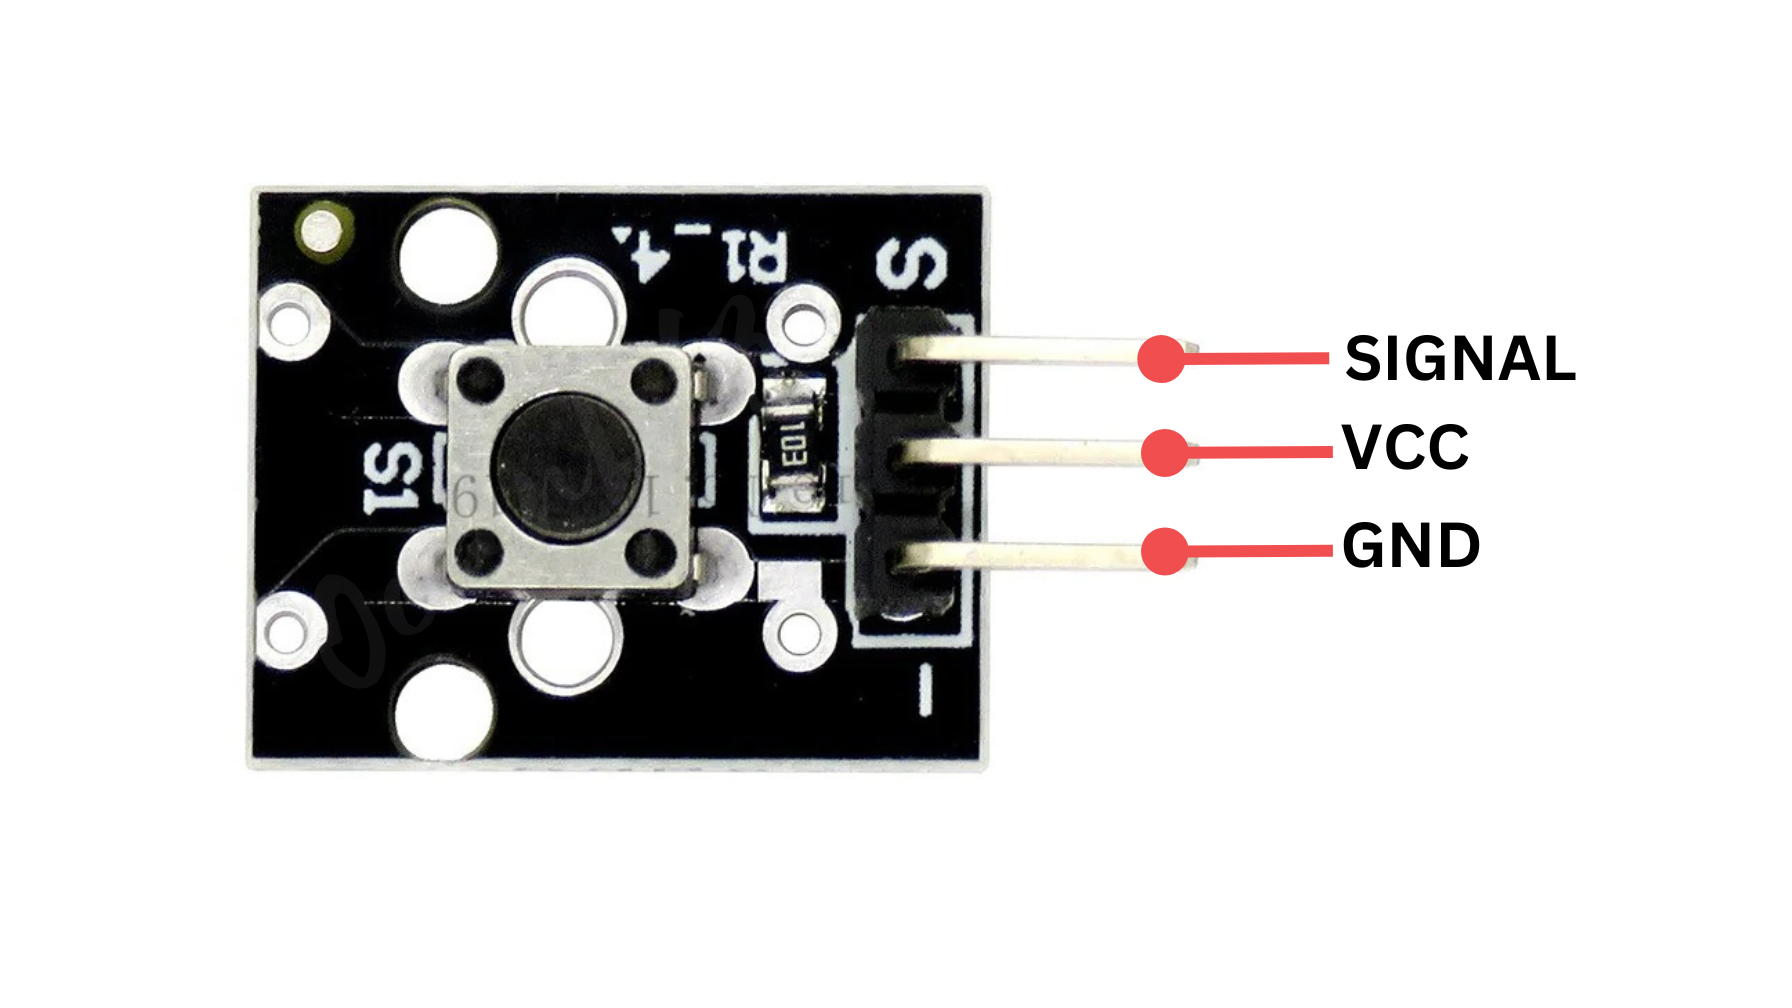
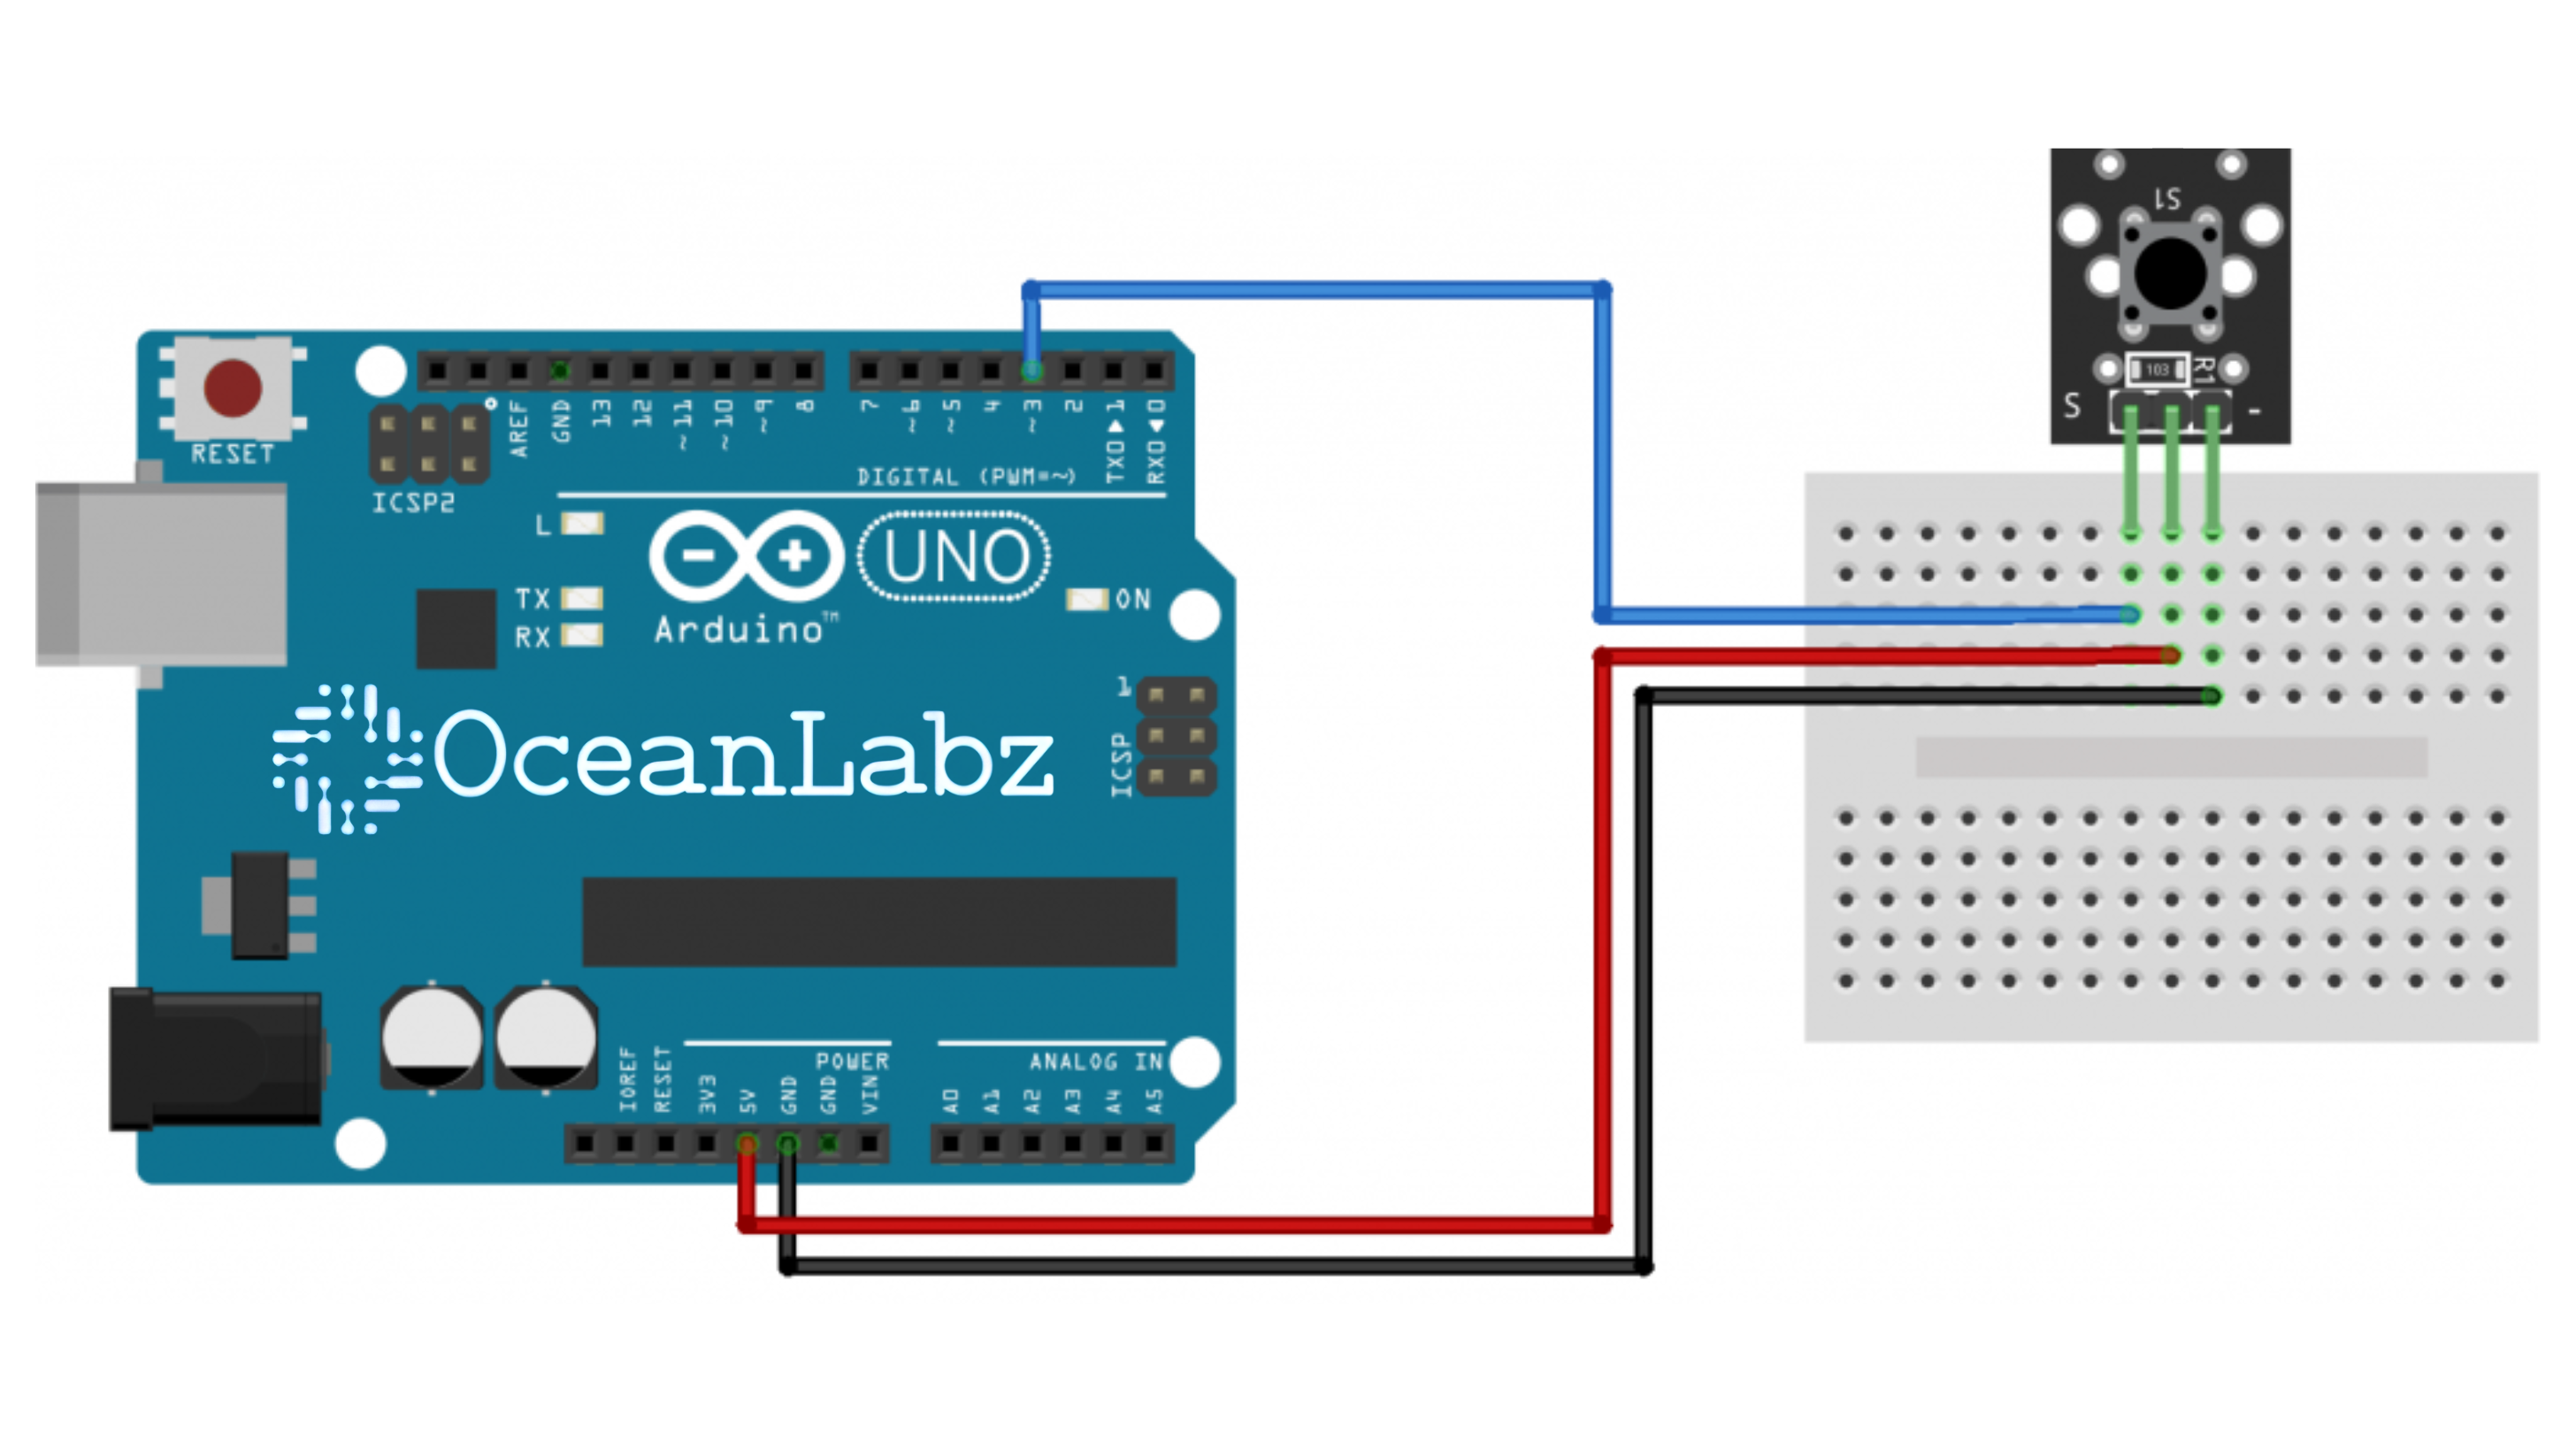
- Push Button VCC → 5V (Arduino)
- Push Button GND → GND (Arduino)
- Push Button SIGNAL → Pin D3 (Arduino)

Arduino Code / Programming
- Below is the code to read the state of push buttons:
// Pin definition for Momentary Tactile Push Button Module
#define BUTTON_MODULE_PIN 3 // Momentary Tactile Push Button Module

void setup() {
  pinMode(BUTTON_MODULE_PIN, INPUT_PULLUP); // Set module pin as input with internal pull-up
  Serial.begin(9600);                       // Start serial communication
}

void loop() {
  // Read the state of the momentary tactile push button module
  int moduleState = digitalRead(BUTTON_MODULE_PIN);

  // Check if the module button is pressed (LOW with pull-up configuration)
  if (moduleState == LOW) {
    Serial.println("Module Button Pressed!");
  }

  delay(100); // Small delay for stability
}
Explanation of the Code
- Setup: Configures the button pin with
INPUT_PULLUP, so it’s normally HIGH and goes LOW when pressed. - Loop: Checks the button state; if pressed (LOW), it prints “Module Button Pressed!” to the Serial Monitor.
- Delay: A short delay helps stabilize the reading.
Challenges
Challenge 1: LED Toggle with Debouncing
Problem Statement:
- Use the switch to toggle the LED on or off. Each press should change the LED’s state (on if it was off, and off if it was on).
- Implement debounce handling to ensure the LED responds only to intentional presses, avoiding multiple triggers from a single press.
Code:
const int ledPin = 13;
const int switchPin = 3;

int ledState = LOW;
int switchState;
int lastSwitchState = LOW;
unsigned long lastDebounceTime = 0;
unsigned long debounceDelay = 50;

void setup() {
  pinMode(ledPin, OUTPUT);
  pinMode(switchPin, INPUT);
}

void loop() {
  int reading = digitalRead(switchPin);

  // Check if the switch state has changed
  if (reading != lastSwitchState) {
    lastDebounceTime = millis();
  }

  if ((millis() - lastDebounceTime) > debounceDelay) {
    // Only toggle the LED when the switch state changes to HIGH
    if (reading != switchState) {
      switchState = reading;
      if (switchState == HIGH) {
        ledState = !ledState;
        digitalWrite(ledPin, ledState);
      }
    }
  }

  lastSwitchState = reading;
}
Challenge 2: Press-and-Hold LED Brightness Control
Problem Statement:
- Gradually increase the LED’s brightness if the switch is held down, and reset the brightness if the switch is released.
- Use
analogWrite()for PWM control to simulate brightness levels from dim to bright.
Code:
const int ledPin = 9;
const int switchPin = 2;

int brightness = 0;
bool buttonPressed = false;

void setup() {
  pinMode(ledPin, OUTPUT);
  pinMode(switchPin, INPUT);
}

void loop() {
  if (digitalRead(switchPin) == HIGH) {
    buttonPressed = true;
    brightness += 5;
    if (brightness > 255) brightness = 255;
    analogWrite(ledPin, brightness);
    delay(100);
  } else {
    if (buttonPressed) {
      brightness = 0;
      analogWrite(ledPin, brightness);
      buttonPressed = false;
    }
  }
}
Challenge 3: Long Press vs. Short Press Control
Problem Statement:
- Implement two different LED behaviors: one for a short press (turn LED on/off) and another for a long press (blink LED three times).
- A short press is defined as holding the button for less than 1 second, while a long press is holding it for over 1 second.
Code:
const int ledPin = 13;
const int switchPin = 2;

unsigned long pressStartTime;
bool isLongPress = false;

void setup() {
  pinMode(ledPin, OUTPUT);
  pinMode(switchPin, INPUT);
}

void loop() {
  if (digitalRead(switchPin) == HIGH) {
    pressStartTime = millis();
    isLongPress = false;

    while (digitalRead(switchPin) == HIGH) {
      if (millis() - pressStartTime > 1000) {
        isLongPress = true;
        break;
      }
    }

    if (isLongPress) {
      blinkLED(3);
    } else {
      digitalWrite(ledPin, !digitalRead(ledPin));  // Toggle LED state
    }
  }
}

void blinkLED(int count) {
  for (int i = 0; i < count; i++) {
    digitalWrite(ledPin, HIGH);
    delay(200);
    digitalWrite(ledPin, LOW);
    delay(200);
  }
}
More Challenges
Challenge 1: Memory Game – Progressive Pattern Recognition
Problem Statement:
- The LED blinks a sequence that grows by one blink each time, starting with a single blink.
- The user must press the button to replicate the exact sequence immediately after it’s shown.
- For example, the LED blinks once; if the user presses the button once, the sequence increases to two blinks. If the user fails to match the sequence exactly, the game restarts at one blink.
Testing and Troubleshooting
- Check Connections: Ensure that all connections are secure and that the Arduino is powered on.
- Monitor Serial Output: Open the Serial Monitor in the Arduino IDE (set the baud rate to 9600) to see the button press messages. If you do not see the expected messages, check the wiring and ensure the buttons are functioning properly.
- Use Correct Resistor: For the standalone button, ensure you are using a pull-down resistor to avoid floating pin readings when the button is not pressed.


