Index
Introduction
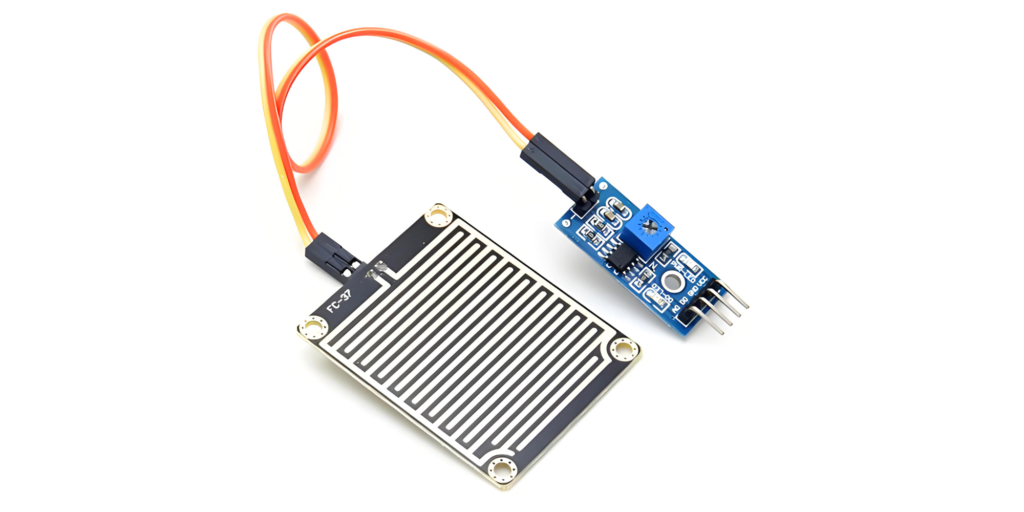
Raindrop Sensor is a tool used for sensing rain. It consists of two modules, a rain board that detects the rain and a control module, which compares the analog value, and converts it to a digital value. The raindrop sensors can be used in the automobile sector to control the windshield wipers automatically, in the agriculture sector to sense rain and it is also used in home automation systems.
Hardware Overview
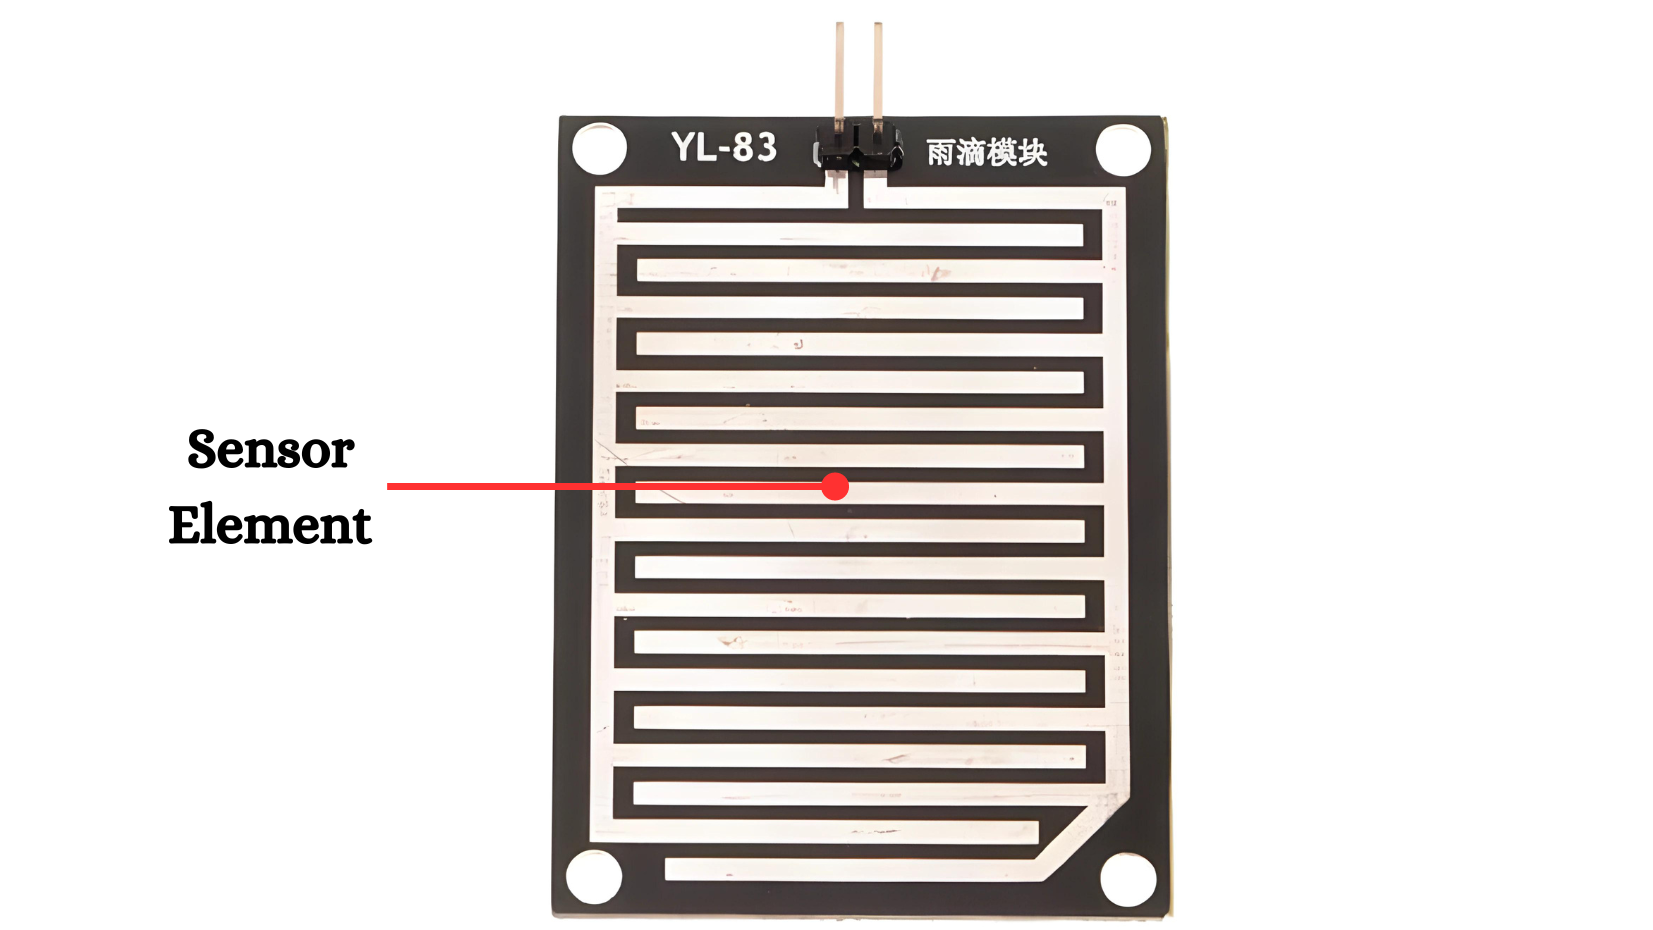
Raindrop Detection Elements:
- Typically made of conductive materials that change resistance when raindrops fall on them.
- These elements are usually in the form of thin metallic traces or sensors that create a conductive path when wet.
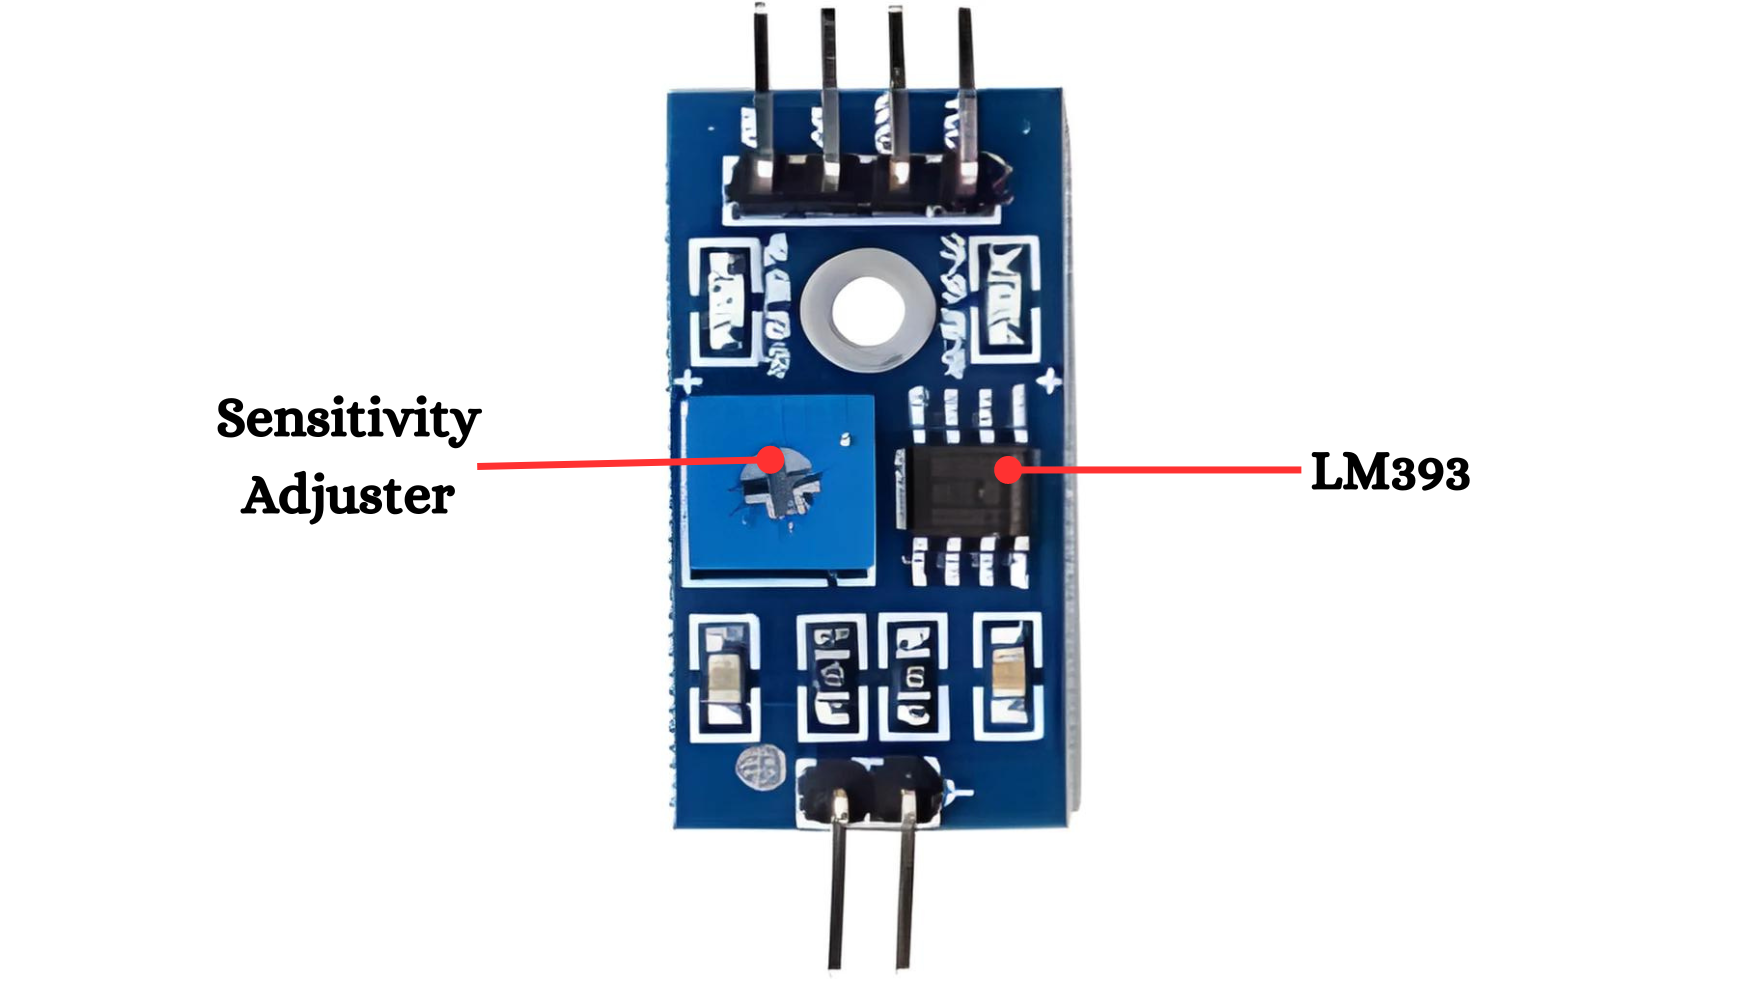
Sensitivity Adjuster: Most commonly, a potentiometer is used to adjust sensitivity. It allows manual tuning of the resistance, which in turn adjusts the voltage threshold for triggering the sensor.Calibration Knob: This knob is typically accessible for easy adjustments, enabling users to set the desired sensitivity level.
LM393 IC: The LM393 compares two input voltages and outputs a high or low signal based on which input is higher. It is commonly used for voltage level detection, zero-crossing detection, and in sensor systems.
Working Principle
The sensing pad with series of exposed copper traces, together acts as a variable resistor (just like a potentiometer) whose resistance varies according to the amount of water on its surface.
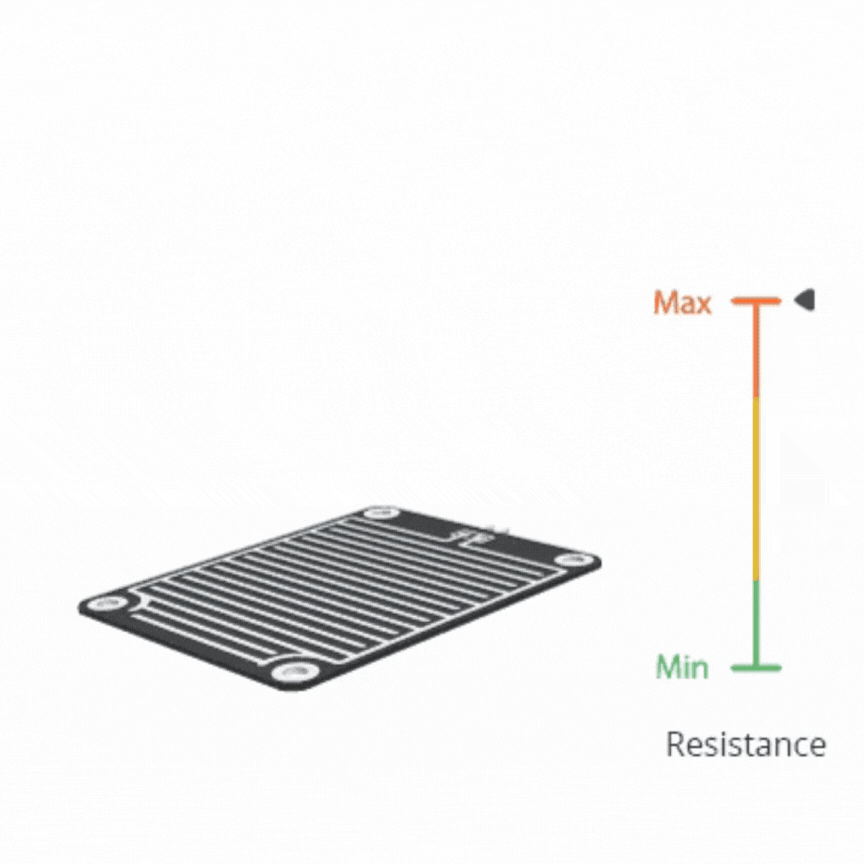
This resistance is inversely proportional to the amount of water:
- The more water on the surface means better conductivity and will result in a lower resistance.
- The less water on the surface means poor conductivity and will result in a higher resistance.
The sensor produces an output voltage according to the resistance, which by measuring we can determine whether it’s raining or not.
Application
- Weather Monitoring: Detects rainfall for weather stations and environmental monitoring systems.
- Automatic Wipers: Triggers windshield wipers in vehicles when it starts raining.
- Smart Irrigation Systems: Pauses or adjusts irrigation based on rainfall to conserve water.
- Home Automation: Automatically closes windows or retracts awnings when rain is detected.
- Outdoor Equipment Protection: Activates covers or enclosures to protect sensitive equipment from rain.
Technical Specification
- Operating Voltage (VDC) : 3.3 ~ 5
- The LM393, use of the wide voltage comparator
- Provide both digital and analog output
- Output LED indicator
- Compatible with Arduino
- TTL Compatible
- The sensor uses the high-quality FR – 04 double material, the large area of 5.5 * 4.0 CM
- Treatment of nickel plating and surface, have fight oxidation, electrical conductivity, and life has more superior performance
Pinout

- VCC: Connects to the power supply (3.3V or 5V)
- GND: Connects to ground
- AO: Analog output for variable moisture readings
- DO: Digital output for binary moisture detection
Circuit Diagram
| Rain Drop Pin | Arduino Pin |
| VCC | 3.3~5 V |
| GND | GND |
| AO | Analog A0 |
| DO | D2 |

Programming With Arduino
Step 1: Open your first sketch
- Open the Arduino IDE.
- Copy and paste the provided code into a new sketch in the Arduino IDE:
// Define sensor pins
const int analogPin = A0; // Analog output pin from the sensor
const int digitalPin = 2; // Digital output pin from the sensor

void setup() {
  // Start the serial communication
  Serial.begin(9600);

  // Set the digital pin as input
  pinMode(digitalPin, INPUT);
}

void loop() {
  // Read the analog value from the sensor
  int analogValue = analogRead(analogPin);

  // Read the digital value from the sensor
  int digitalValue = digitalRead(digitalPin);

  // Print the analog value to the Serial Monitor
  Serial.print("Analog Value: ");
  Serial.print(analogValue);

  // Print the digital value to the Serial Monitor
  Serial.print(" | Digital Value: ");
  Serial.println(digitalValue);

  // Wait for a second before taking the next reading
  delay(1000);
}
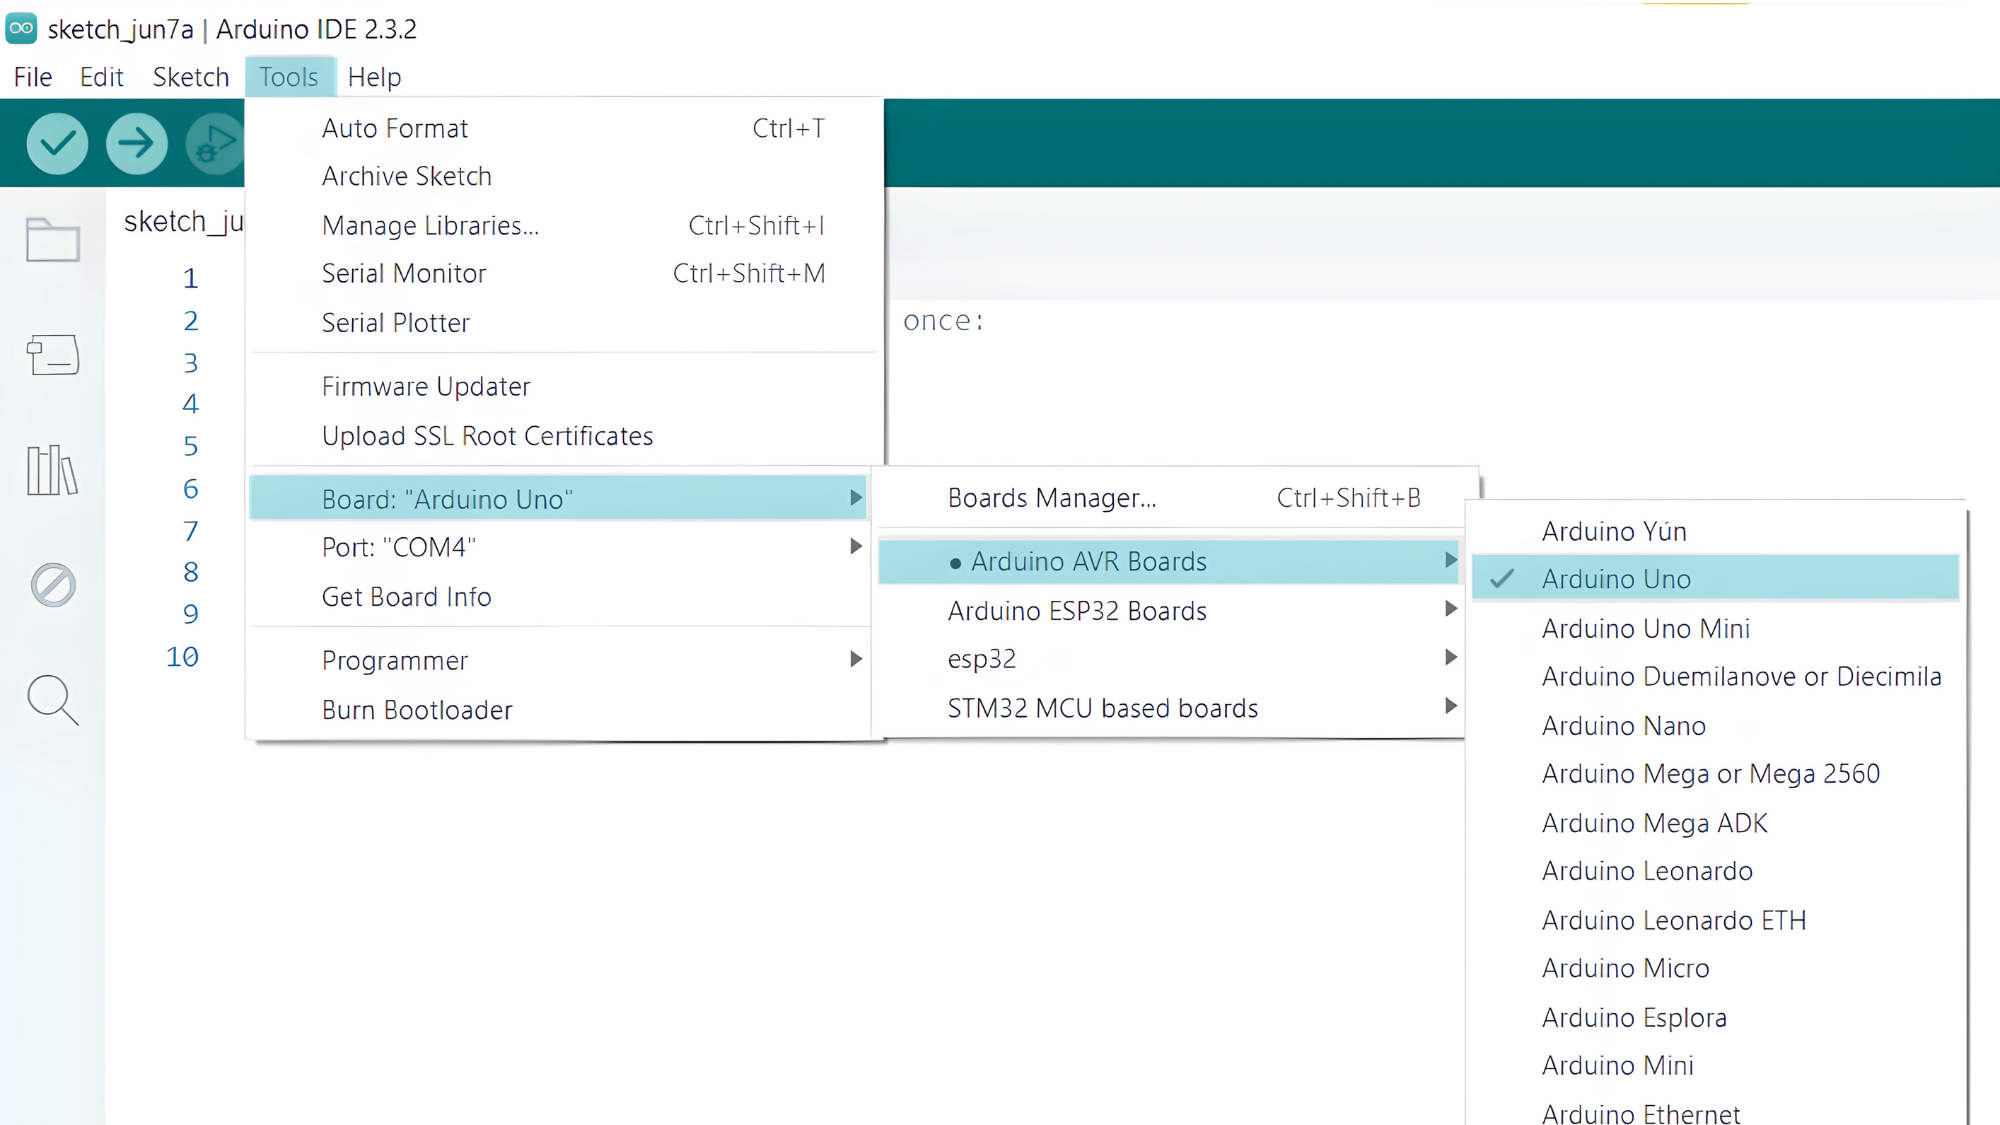
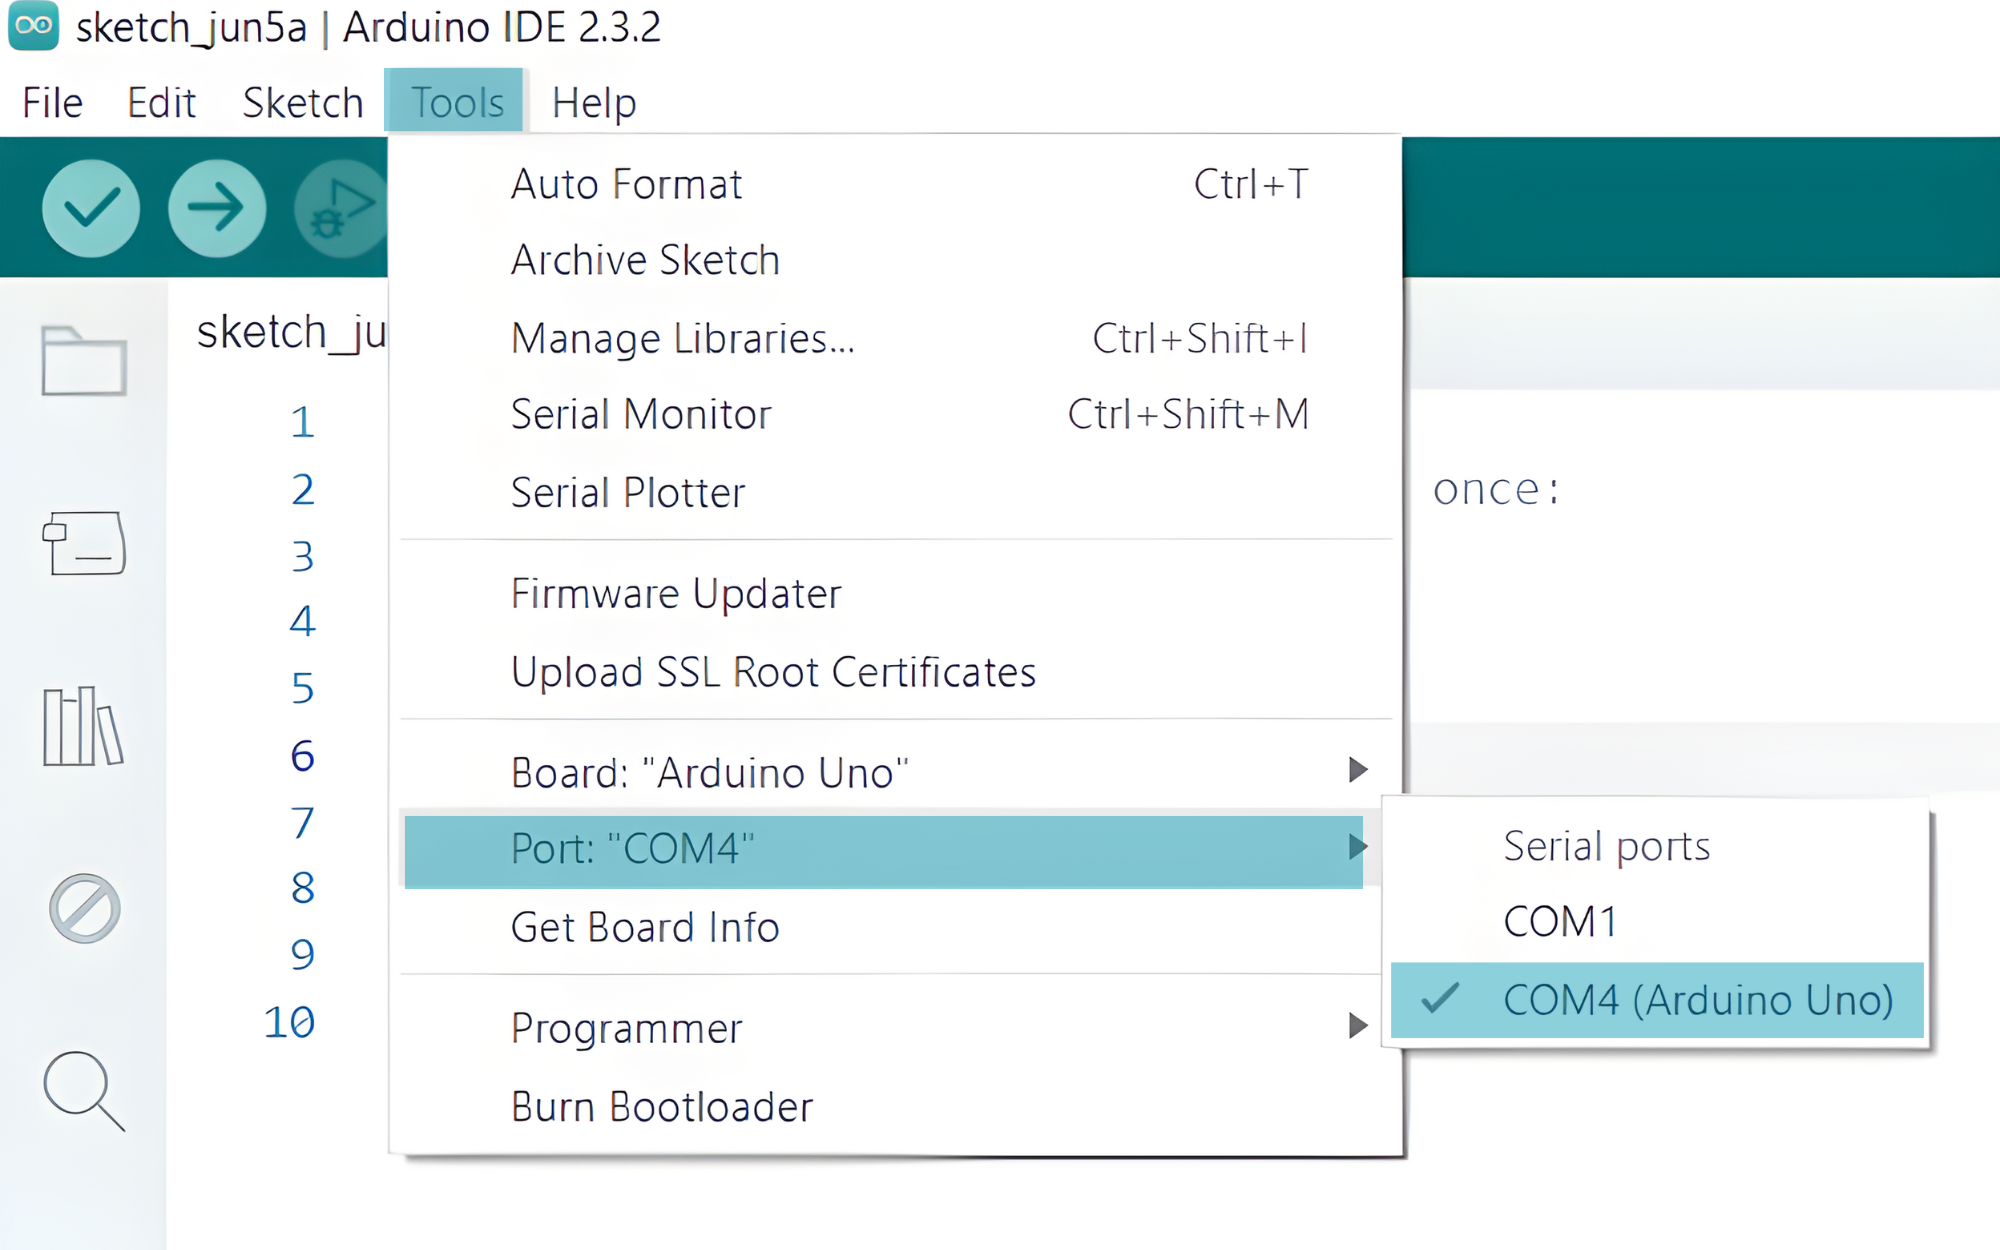
Step 2: Select your board type and port
- Go to Tools > Board and select your Arduino board (e.g., Arduino Uno).
- Go to Tools > Port and select the port to which your Arduino is connected.
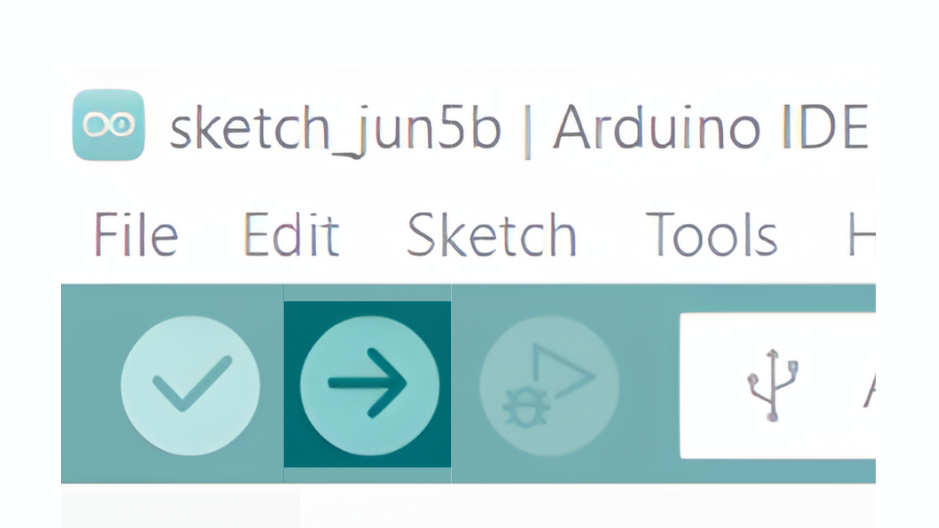
- Verify and upload the code to your Arduino board.
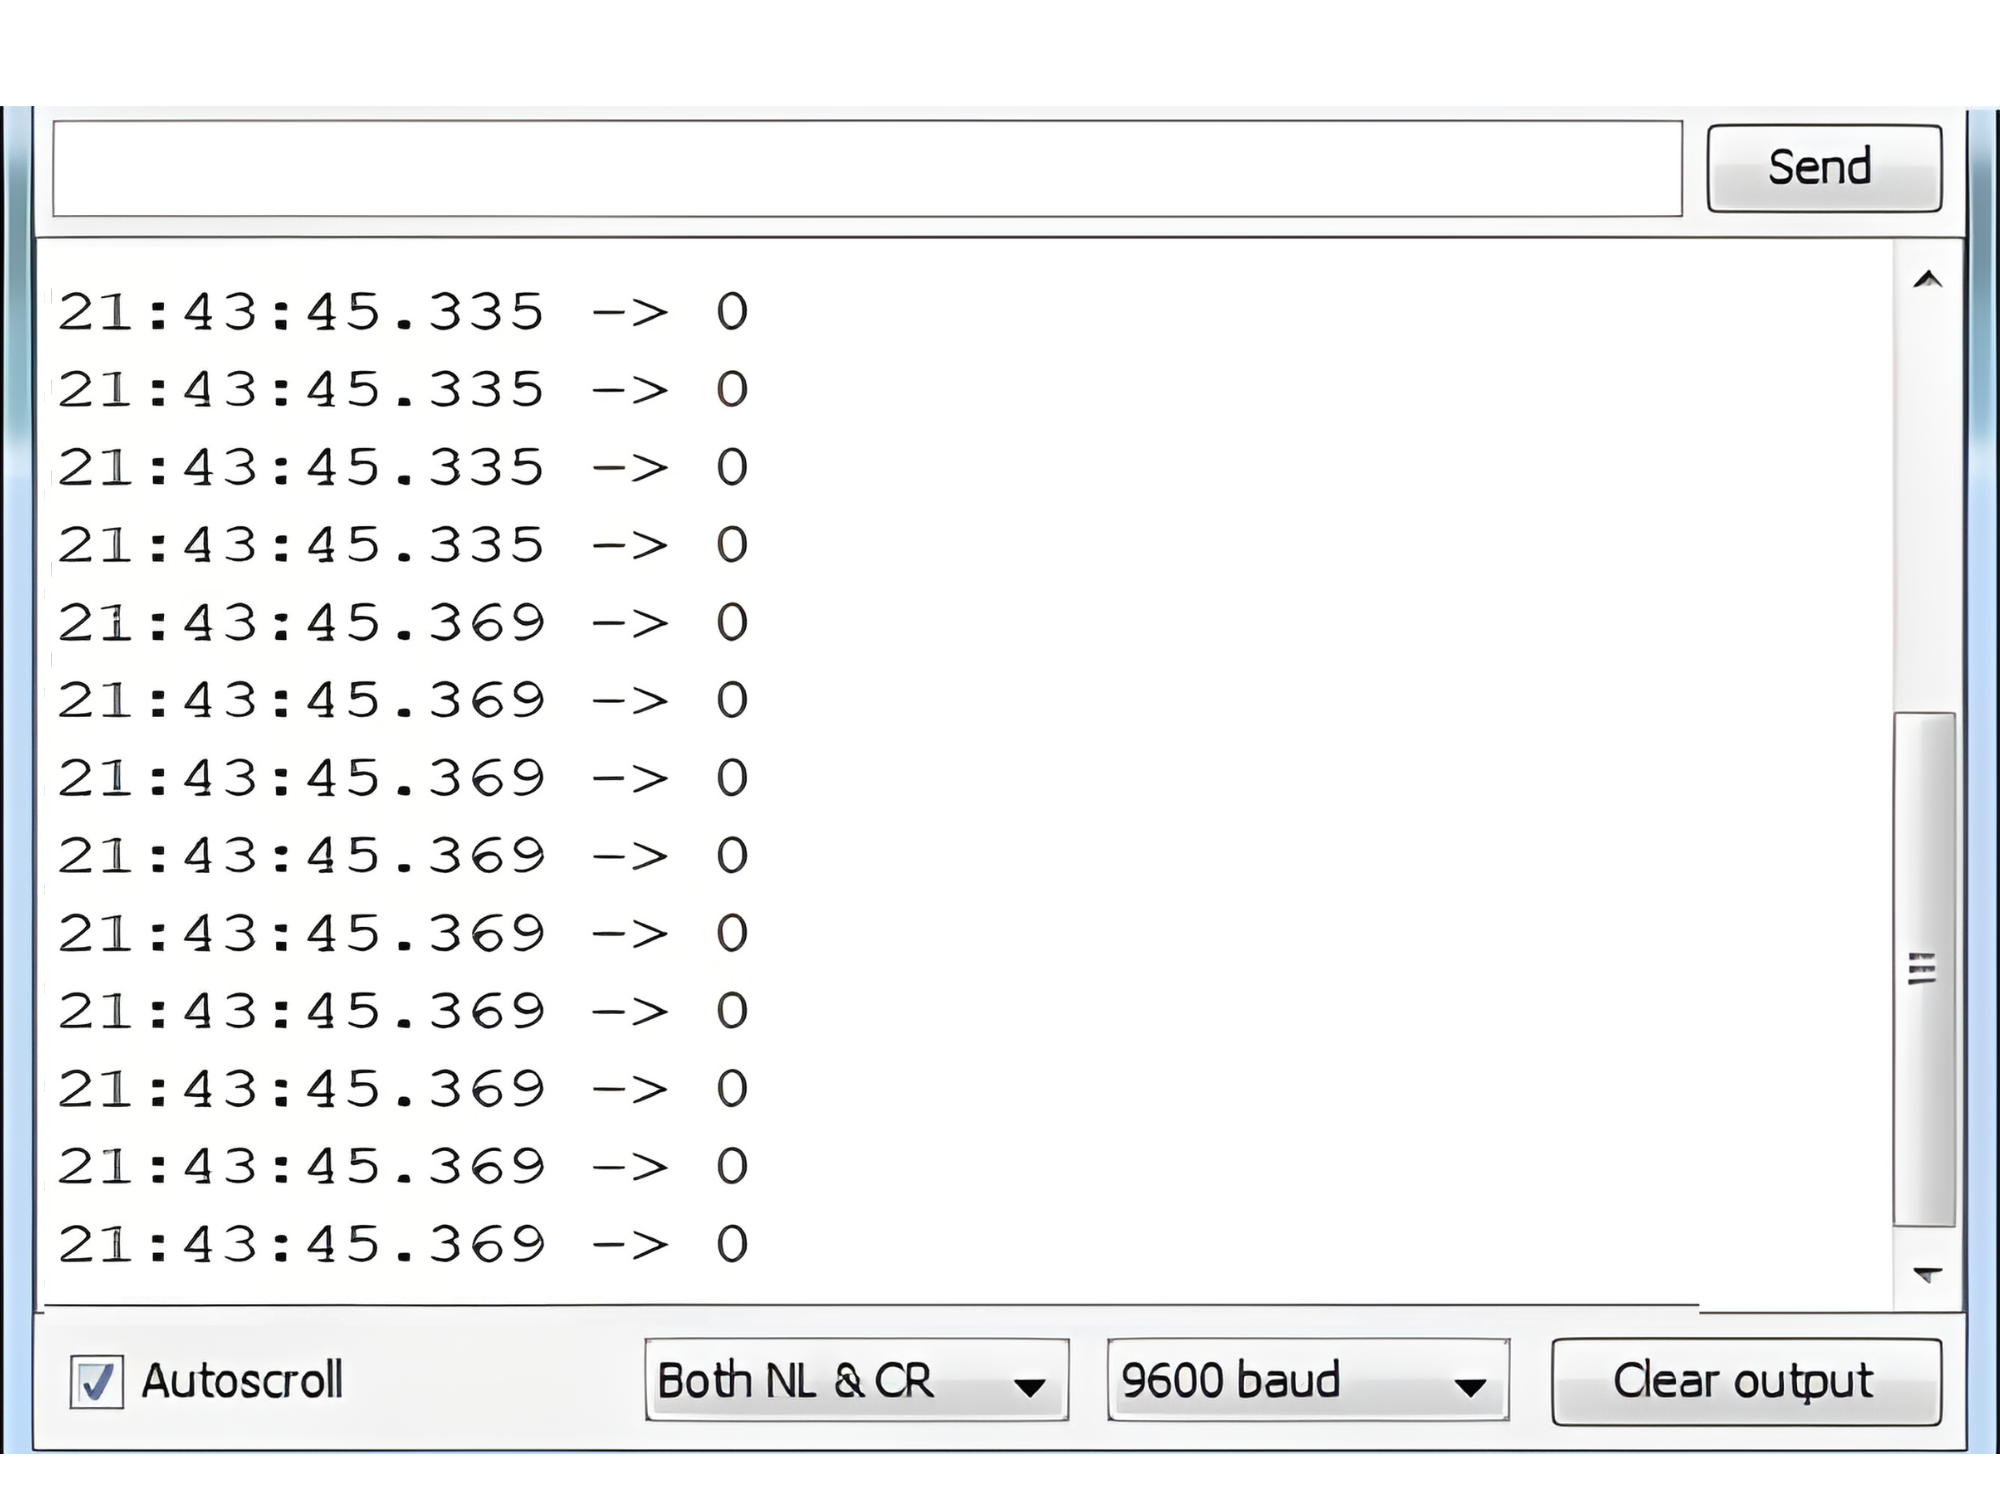
Step 3: Open Serial Monitor:
- Once the code is uploaded successfully, open the Serial Monitor in the Arduino IDE.
- Set the baud rate to 9600 baud.