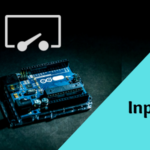
Lesson-02 Output Pins

Introduction

Imagine you’re the captain of a spaceship, traveling through the vast expanse of space. You have a control panel in front of you with dozens of Indicators, sensors and switches. Each sensor and switch represents a different function that you can control on your ship – things like turning on the engines, firing weapons, or deploying solar panels.

But there’s a problem – the sensors, Indicators and switches are all mixed up, and there’s no way to tell which one does what! That’s where the output pins on an Arduino Uno come in.

Think of the output pins on the Arduino Uno as Indicators that you can control with your computer. By sending signals through these pins, you can activate different functions on your ship. For example, you might connect an LED to one of the output pins and use it as a signal light to indicate when certain systems are active.

But it’s not just about controlling lights – output pins can also be used to control motors, sensors, and other devices that are critical for the operation of your ship. By sending signals through these pins, you can control the speed and direction of motors, read data from sensors, and even communicate with other spacecraft.

So the next time you’re exploring the galaxy, just remember – the output pins on your Arduino Uno are the keys to unlocking the full power of your ship!

Output Pins in Ardino

Different Arduino boards have different numbers and types of output pins. Here are some examples:

  1. Arduino Uno: The Arduino Uno has a total of 14 digital input/output pins, labeled from 0 to 13, and 6 analog input pins. The digital pins can be configured as either input or output pins, and they can also be used for PWM (Pulse Width Modulation) output. The analog pins can only be used for analog input.
  2. Arduino Mega: The Arduino Mega has a total of 54 digital input/output pins, labeled from 0 to 53, and 16 analog input pins. Like the Uno, the digital pins can be configured as either input or output pins, and they can also be used for PWM output. The analog pins can be used for both analog input and PWM output.
  3. Arduino Nano: The Arduino Nano has a total of 22 digital input/output pins, labeled from D0 to D13 and A0 to A5, and 8 analog input pins. The digital pins can be configured as either input or output pins, and they can also be used for PWM output. The analog pins can be used for both analog input and PWM output.
  4. Arduino Due: The Arduino Due has a total of 54 digital input/output pins, labeled from 0 to 53, and 12 analog input pins. In addition, the Due also has a number of other specialized pins, including 12 PWM outputs, 2 DAC (Digital-to-Analog Converter) outputs, and 4 UART (Universal Asynchronous Receiver/Transmitter) pins. The digital pins can be configured as either input or output pins, and they can also be used for PWM output. The analog pins can be used for both analog input and PWM output.

In general, the number and type of output pins on an Arduino board depend on the specific model and its intended use. However, most Arduino boards have a range of digital and analog output pins that can be used to control a variety of external devices.

Example

Here’s an example of how to use an output pin on the Arduino Uno to blink an LED at pin no 13:

void setup() {
  pinMode(8, OUTPUT); // Configure pin 8 as an output pin
}

void loop() {
  digitalWrite(8, HIGH); // Turn the LED on
  delay(1000); // Wait for one second
  digitalWrite(8, LOW); // Turn the LED off
  delay(1000); // Wait for one second
}

Step by Step Explanation

  • In the setup() function, the pinMode() function is used to configure pin 8 as an output pin. This means that the Arduino will be able to send a signal through this pin to control an external device.
pinMode(8, OUTPUT); // Configure pin 8 as an output pin
  • In the loop() function, the digitalWrite() function is used to send a signal to pin 8 to turn on an LED connected to the pin. The first digitalWrite() statement sets the voltage of pin 8 to HIGH, which turns on the LED connected to the pin.
digitalWrite(8, HIGH); // Turn the LED on
  • The delay() function is used to pause the program for one second before executing the next statement. In this case, the delay allows the LED to remain on for one second before turning off.
delay(1000); // Wait for one second
  • The next digitalWrite() statement sets the voltage of pin 8 to LOW, which turns off the LED connected to the pin.
digitalWrite(8, LOW); // Turn the LED off
  • Another delay() function is used to pause the program for one second before starting the loop over again. This creates a repeating cycle where the LED turns on for one second and then turns off for one second.
delay(1000); // Wait for one second

The loop() function repeats continuously, creating a blinking effect on the LED connected to pin 8.

Inbuilt Functions

  1. pinMode(pin, mode): This function is used to set the mode of a pin as either an input or an output. The first argument is the pin number, and the second argument is the mode (INPUT or OUTPUT).
  2. digitalWrite(pin, value): This function is used to set the voltage of a digital output pin. The first argument is the pin number, and the second argument is the value (HIGH or LOW).
  3. analogWrite(pin, value): This function is used to set the voltage of an analog output pin using pulse width modulation (PWM). The first argument is the pin number, and the second argument is a value between 0 and 255 that represents the duty cycle of the PWM signal.
  4. shiftOut(dataPin, clockPin, bitOrder, value): This function is used to shift out a byte of data to a shift register. The first argument is the data pin, the second argument is the clock pin, the third argument is the bit order (LSBFIRST or MSBFIRST), and the fourth argument is the data value to be shifted out.
  5. tone(pin, frequency): This function is used to generate a square wave tone on a digital output pin. The first argument is the pin number, and the second argument is the frequency in hertz.
  6. noTone(pin): This function is used to stop the generation of a tone on a digital output pin. The argument is the pin number.

These built-in functions make it easy to control outputs on the Arduino Uno and interact with external devices.

    Leave a Reply

    Your email address will not be published.

    Need Help?