Index
Introduction
The MPR121 V12 Proximity Capacitive Touch Sensor is an advanced integrated circuit designed to detect touch and proximity without physical contact. It uses capacitive sensing technology, which detects changes in capacitance caused by touching or approaching conductive objects like a human finger.
This sensor offers up to 12 touch-sensitive channels that can be configured to detect touch or proximity. It communicates with microcontrollers or other devices using the I2C protocol, providing flexibility and easy integration into various electronic systems.
Common applications of the MPR121 V12 sensor include touch-sensitive controls in consumer electronics, industrial human-machine interfaces, interactive installations, IoT devices, medical equipment, and automotive electronics.
Working Principle
This sensor utilizes capacitive sensing technology, where each electrode on the sensor can detect changes in the surrounding electric field caused by the presence of conductive objects like a human finger.
- Capacitive Sensing: Each electrode generates an electric field around it. When a conductive object (such as a finger) approaches or touches the electrode, it alters the electric field, resulting in a change in capacitance.
- Capacitance Change Detection: The sensor measures these changes in capacitance, which occur due to the proximity or touch of an object.
- Digital Output: Based on the detected changes in capacitance, the sensor provides digital output signals that indicate touch or proximity events on specific channels or electrodes.
- Communication with Microcontroller: It communicates with a microcontroller using the I2C (Inter-Integrated Circuit) protocol, allowing the microcontroller to receive and process the touch or proximity data.
Application
- Consumer electronics (e.g., appliances, gadgets, touchscreens)
- Industrial controls (human-machine interfaces, machinery controls)
- Interactive installations (exhibits, kiosks, public displays)
- IoT devices (smart home devices, wearables)
- Medical equipment (touch-sensitive controls)
- Automotive interfaces (infotainment systems, controls)
Technical Specifications
- Sensor: MPR121 V12
- Interface: I2C
- Channels: Up to 12 touch/proximity sensing channels
- Operating Voltage: 3.3V or 5V DC
- Features: Integrated touch and proximity sensing, adjustable sensitivity, low power consumption
- Applications: Touch-sensitive interfaces, interactive displays, proximity detection systems
- Compatibility: Various microcontrollers supporting I2C
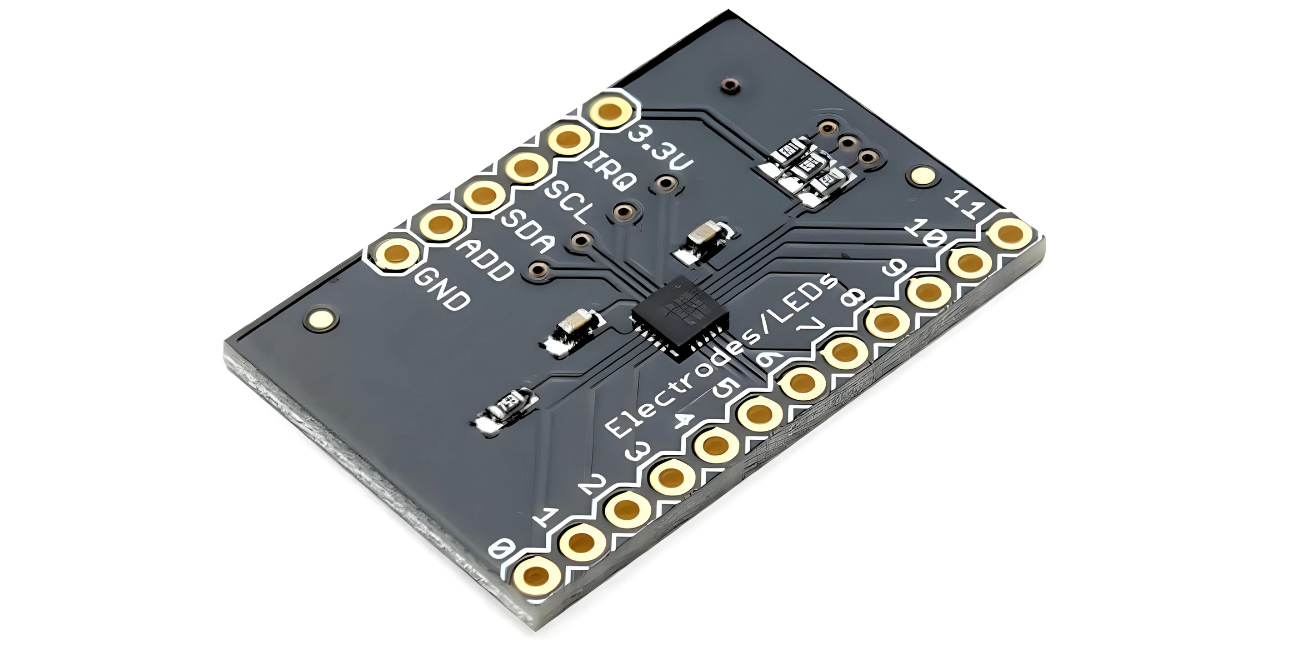
Pinout
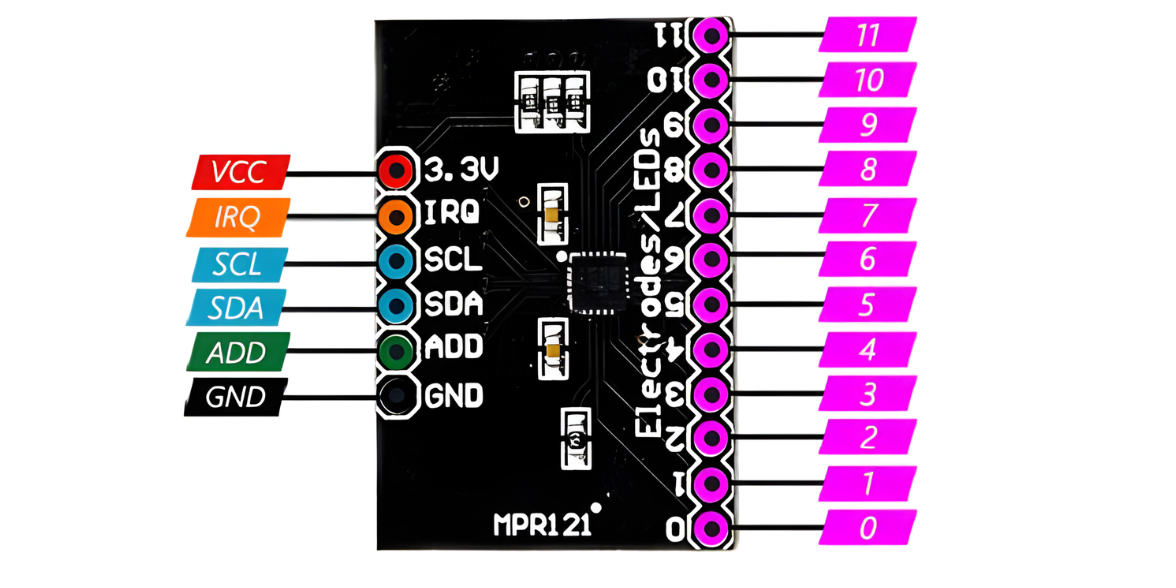
- VDD: Connect to the positive supply voltage (typically 3.3V or 5V).
- GND: Connect to the ground (0V) of the power supply.
- SDA: Serial Data line for I2C communication.
- SCL: Serial Clock line for I2C communication.
- IRQ: Interrupt request output (optional, used to indicate touch events).
Circuit Diagram
| MPR121 Pin | Arduino Pin |
| VCC | 5 V |
| GND | GND |
| SDA | Analog A4 |
| SCL | Analog A5 |

Programming With Arduino
Step 1: Open your first sketch
- Open the Arduino IDE.
- Copy and paste the provided code into a new sketch in the Arduino IDE:
#include <Wire.h>

#define MPR121_ADDR 0x5A  // I2C address of the MPR121 sensor

void setup() {
  Serial.begin(9600);  // Initialize serial communication
  Wire.begin();        // Initialize I2C communication

  // Configure MPR121 sensor settings
  configureMPR121();
}

void loop() {
  // Read touch status from the MPR121 sensor
  uint16_t touchStatus = readTouchStatus();

  // Check each electrode for touch or proximity
  for (int i = 0; i < 12; i++) {
    if (touchStatus & (1 << i)) {
      Serial.print("Electrode ");
      Serial.print(i);
      Serial.println(" touched or in proximity");
    }
  }

  delay(100);  // Delay for stability
}

void configureMPR121() {
  // Set MPR121 settings for touch and proximity detection
  Wire.beginTransmission(MPR121_ADDR);
  Wire.write(0x5C);  // MPR121 control register address
  Wire.write(0x00);  // Set to default settings (no filtering, 12 electrodes enabled)
  Wire.endTransmission();
}

uint16_t readTouchStatus() {
  // Request touch status from the MPR121 sensor
  Wire.beginTransmission(MPR121_ADDR);
  Wire.write(0x00);  // MPR121 touch status register address
  Wire.endTransmission(false);

  // Read 2 bytes (touch status) from the MPR121 sensor
  Wire.requestFrom(MPR121_ADDR, 2);
  uint16_t touchStatus = Wire.read();
  touchStatus |= (Wire.read() << 8);

  return touchStatus;
}
Step 2: Install the Required Library
- The Wire library is included by default with the Arduino IDE, so you do not need to install it separately..
Select the appropriate board and port
- Go to Tools > Board and select your Arduino board (e.g., Arduino Uno).

- Go to Tools > Port and select the port to which your Arduino is connected.
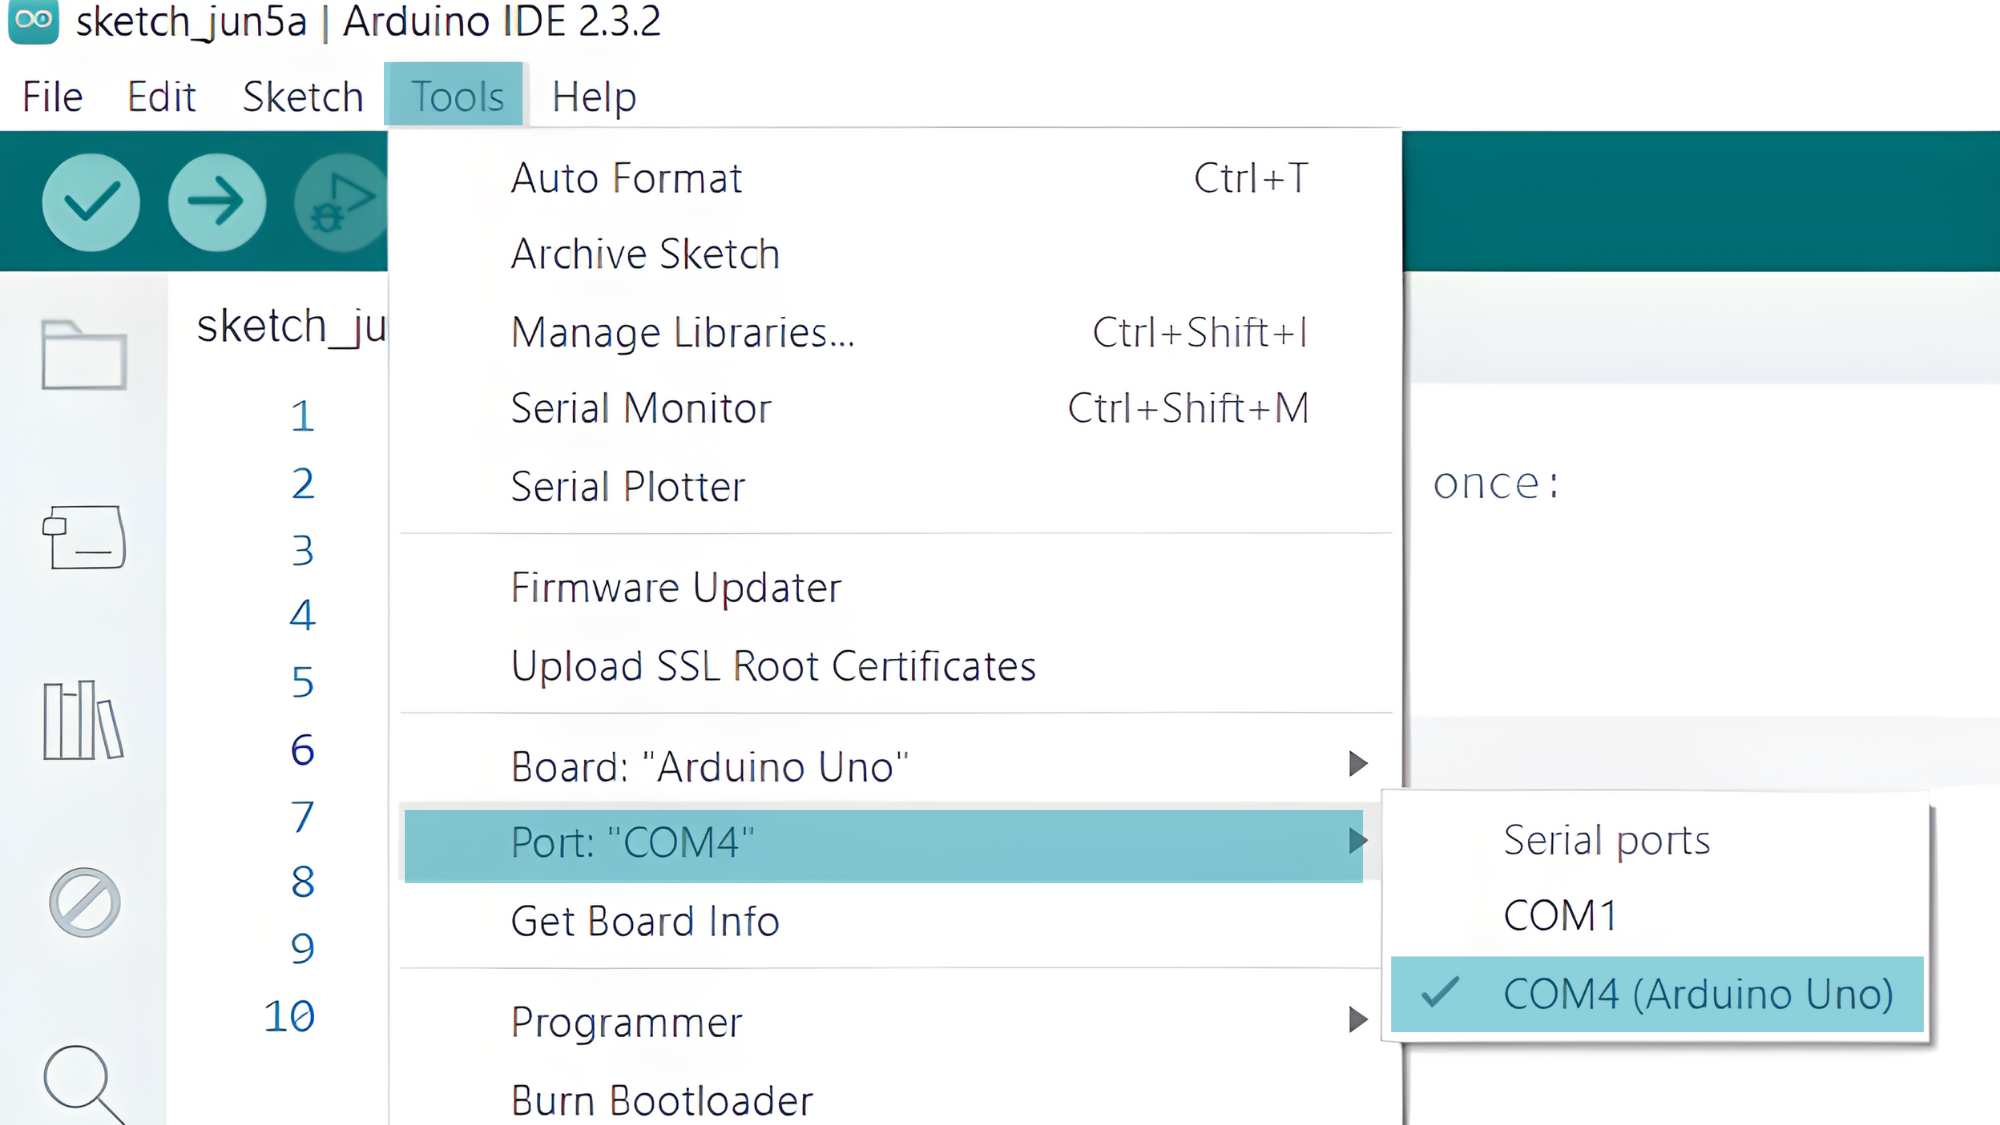
- Verify and upload the code to your Arduino board.

Step 4: Open the Serial Monitor
- Connect your Arduino to the computer and upload the code.
- Open the Serial Monitor in the Arduino IDE by going to Tools > Serial Monitor or pressing
Ctrl+Shift+M. - Set the baud rate to 9600 in the Serial Monitor.

