Index
Introduction
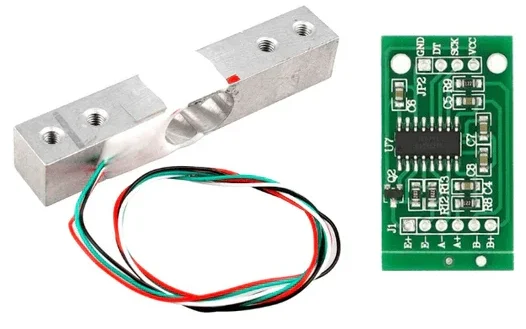
- Load Cell: A load cell is a transducer that converts a force or weight acting on it into an electrical signal. Load cells are typically used in scales and other weighing systems to measure force or weight accurately. They operate on the principle of deformation of a material (such as strain gauges) under the applied load, which changes the electrical resistance, capacitance, or voltage output.
- HX711 Amplifier Module: The HX711 is a precision analog-to-digital converter (ADC) designed specifically for weigh scale applications in combination with load cells. It amplifies the small electrical signal output from the load cell and converts it into a digital format that can be read by a microcontroller. The HX711 also performs signal conditioning, offset compensation, and gain adjustment to ensure accurate and stable measurements.
Working Principle
- Load Cell: The load cell is a sensor that converts applied force or weight into a small electrical signal by utilizing strain gauge deformation. It typically consists of multiple strain gauges arranged in a Wheatstone bridge configuration to enhance sensitivity and compensate for environmental factors.
- HX711 Amplifier Module: The HX711 amplifier module is designed to work with load cells by amplifying and digitizing the small electrical signal output from the load cell. It includes an Analog-to-Digital Converter (ADC) to convert the analog signal into a digital format with high resolution (up to 24-bit), ensuring accurate weight measurements.
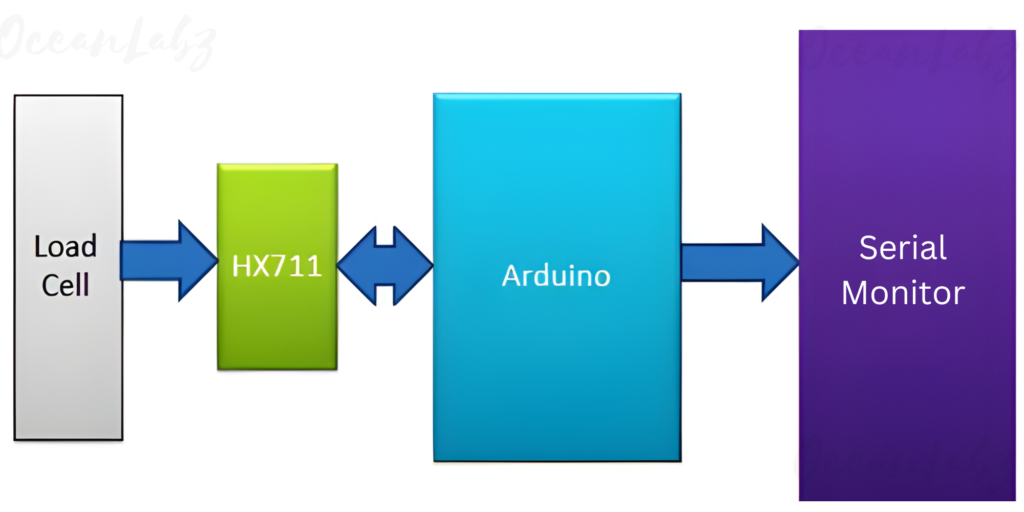
In this project, we have used Arduino to control whole the process. Load cell senses the weight and supplies an electrical analog voltage to HX711 Load Amplifier Module. HX711 is a 24bit ADC, which amplifies and digitally converts the Load cell output. Then this amplified value is fed to the Arduino. Now Arduino calculates the output of HX711 and converts that into the weight values in grams and shows it on serial monitor. A push-button is used for calibrating the system. We have written an Arduino program for the whole process.
Application
- Digital Scales:
- Industrial Systems:
- Smart Agriculture:
- Robotics:
- Healthcare:
- Automated Systems:
- Vehicle Weighing:
- Aerospace:
Technical Specifications
HX711 Amplifier Module:
- Operating Voltage: 2.7V to 5VDC
- Operating current: <10 mA
- Output Sensitivity: 1.0 ± 0.1 mV / V.
- Two selectable differential input channels.
- On-chip active low noise PGA with the selectable gain of 32, 64 and 128.
- On-chip oscillator requiring no external component with optional external crystal.
- On-chip power-on-reset.
- Data accuracy: 24 bit (24 bit A / D converter chip.)
- Refresh frequency: 10/80 Hz
Load Cell:
- Operating Voltage: 2.7V to 5VDC
- Differential input voltage: ±40mV (Full-scale differential input voltage is ± 40mV)
- Data accuracy: 24 bit (24 bit A / D converter chip.)
- Refresh frequency: 10/80 Hz
- Operating current: <10 mA
- 5kg Load Cell Measuring Range
Pinout
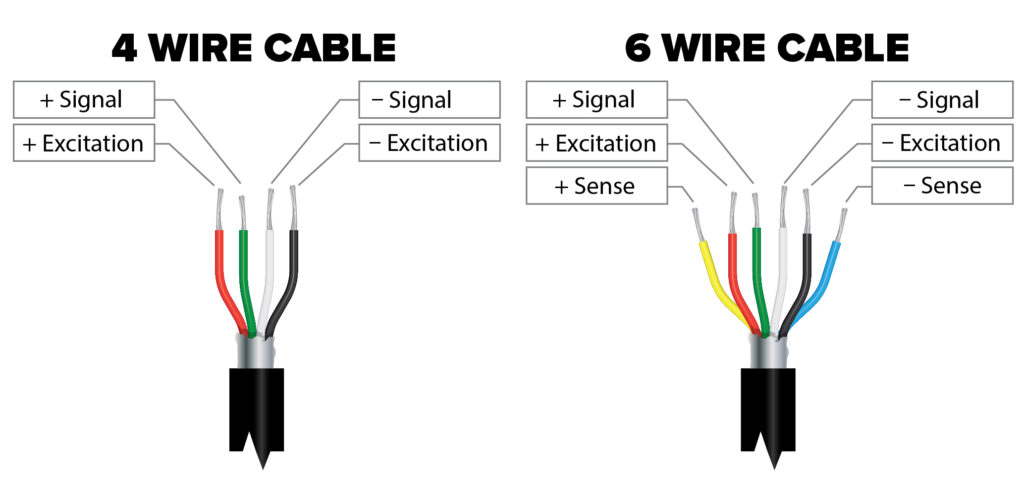
- Excitation+ (E+): Connect to a positive voltage supply (typically +5V).
- Excitation- (E-): Connect to ground (GND).
- Signal+ (A+): Connect to the positive input of the HX711 module.
- Signal- (A-): Connect to the negative input of the HX711 module.

- VCC: Connect to a positive voltage supply (typically +5V).
- GND: Connect to ground (GND).
- DT (Data): Connect to a digital input pin on the microcontroller (e.g., Arduino).
- SCK (Clock): Connect to a digital input pin on the microcontroller.
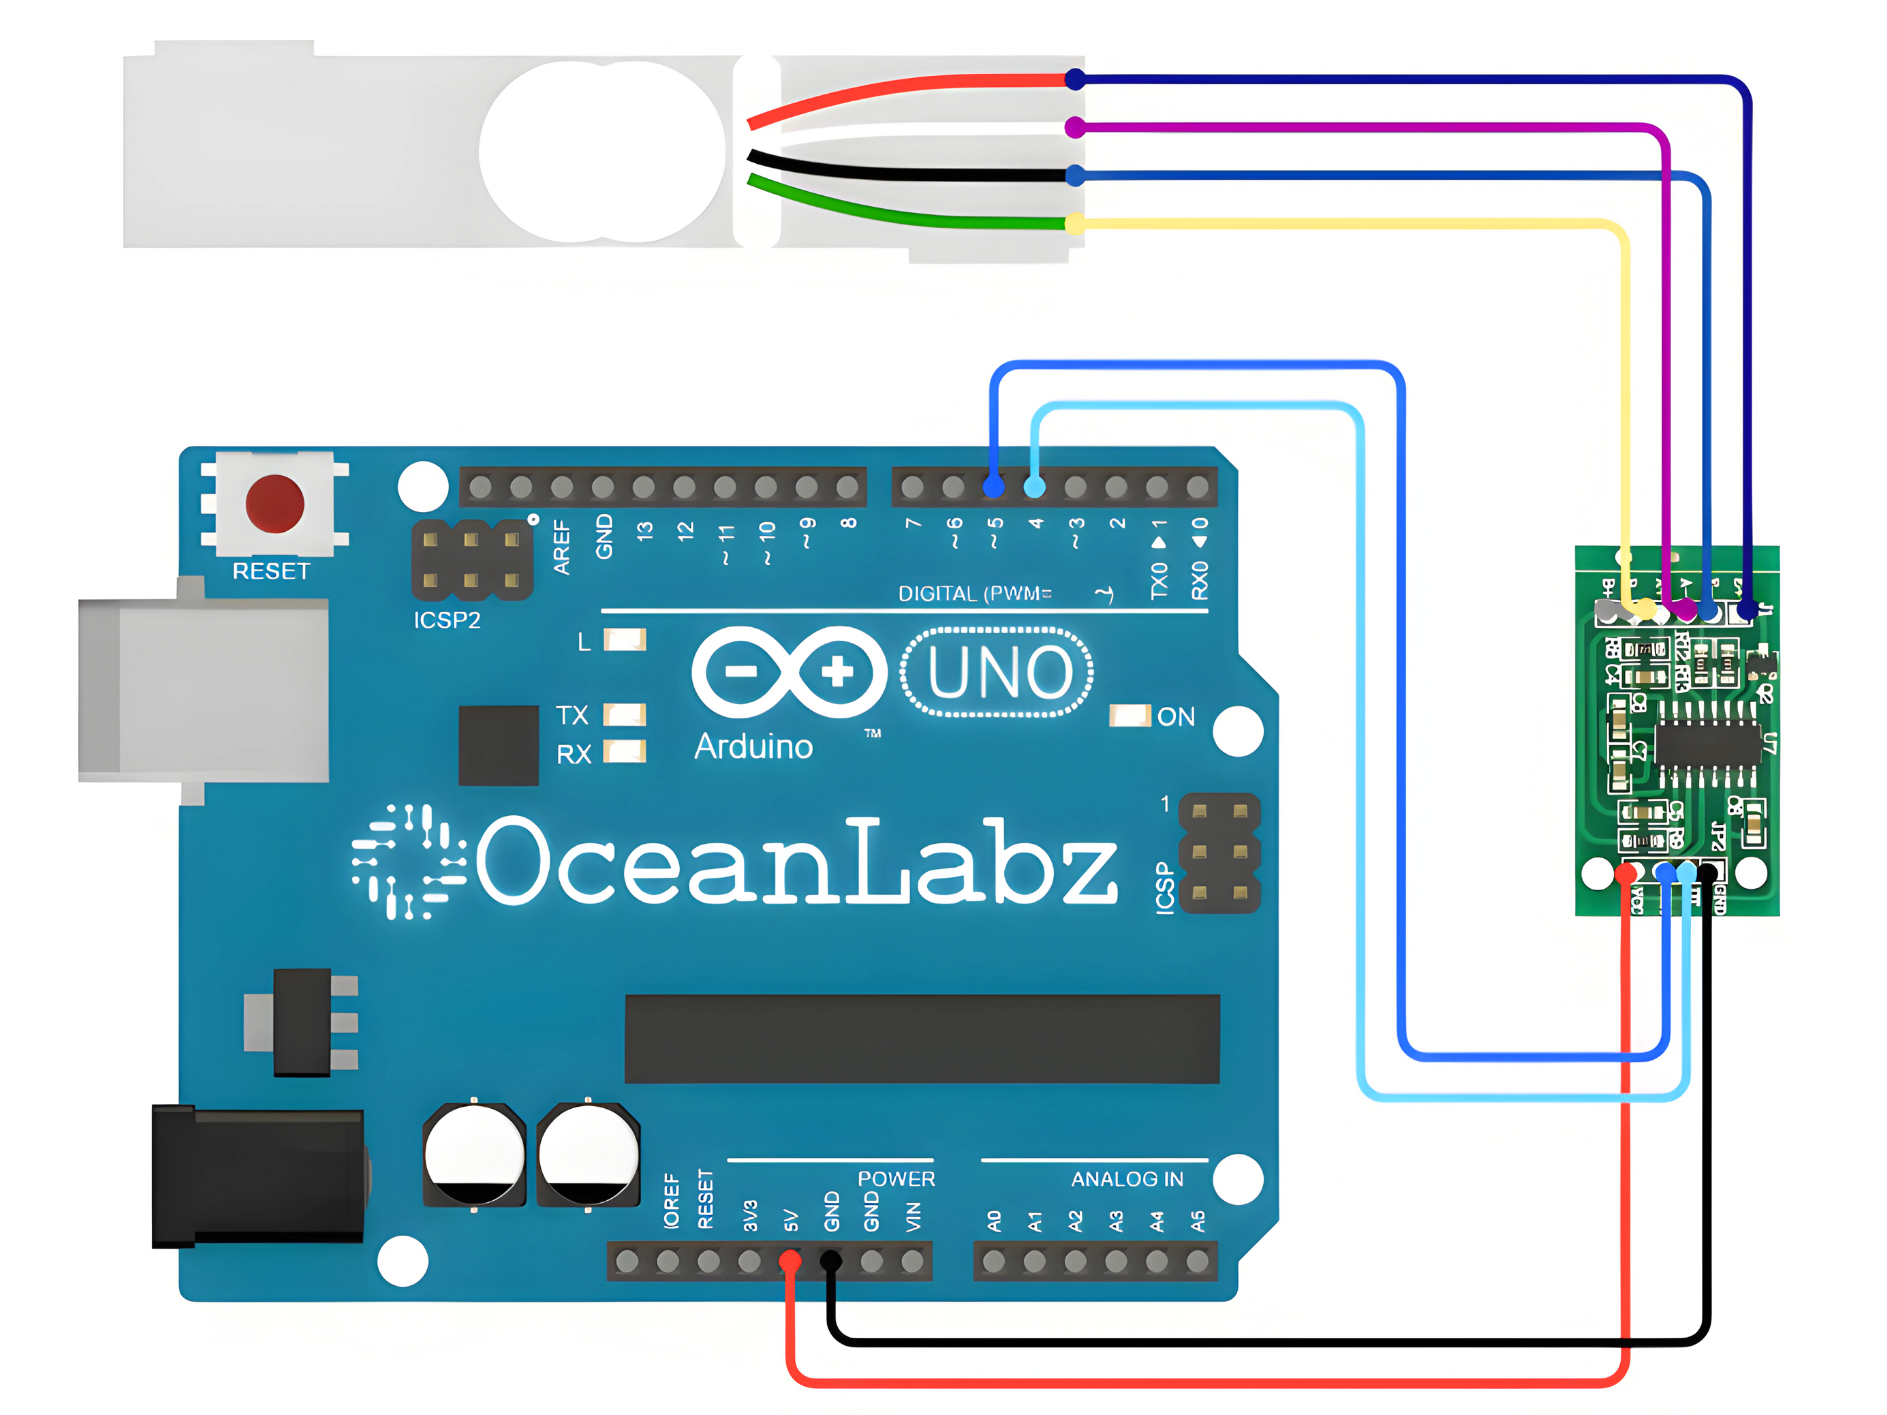
Circuit Diagram
| Load Cell Wire | HX711 Pin |
| Excitation+ | E+ |
| Excitation- | E- |
| Signal+ | A+ |
| Signal- | A- |
| HX711 Pin | Arduino Pin |
| VCC | 5 V |
| GND | GND |
| DT (Data) | D4 |
| SCK | D5 |
Programming With Arduino
Step 1: Install the Required Library
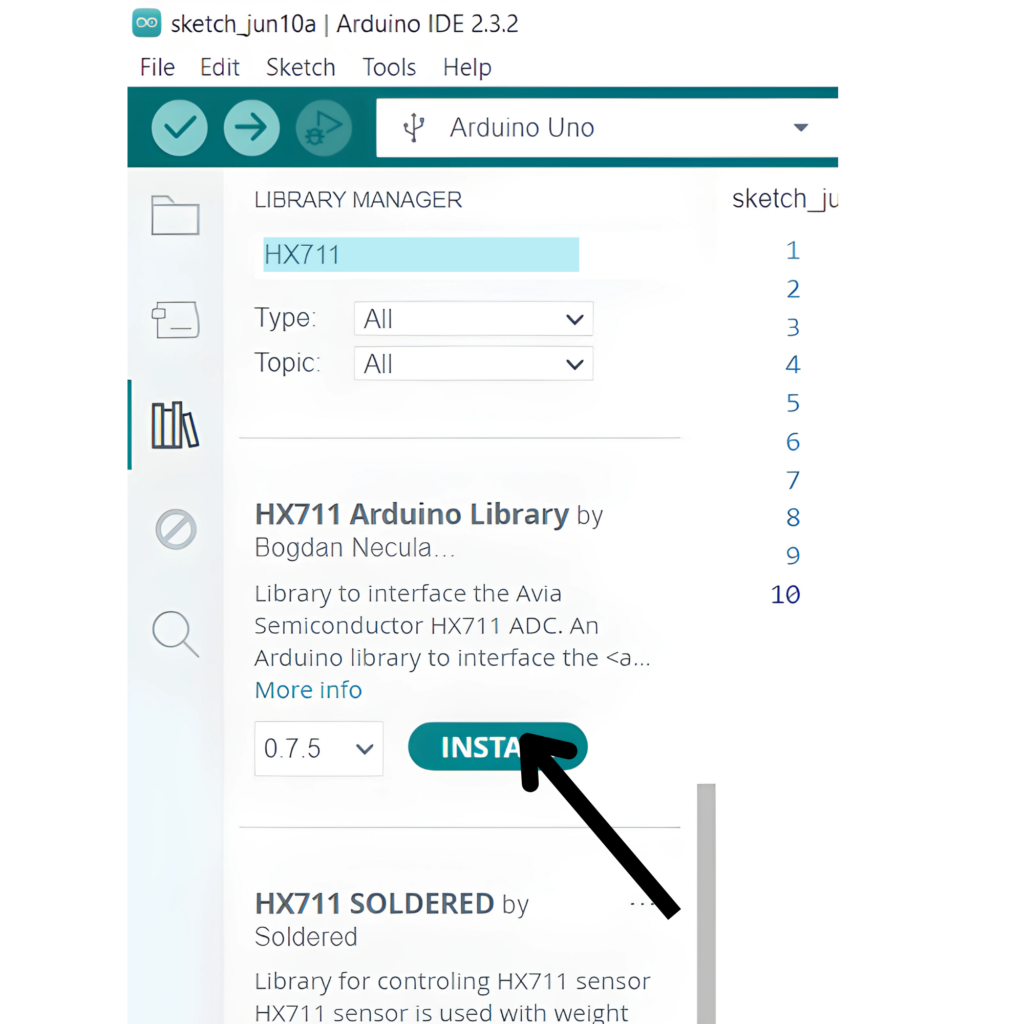
- Open the Arduino IDE.
- Go to Sketch > Tools > Manage Libraries.
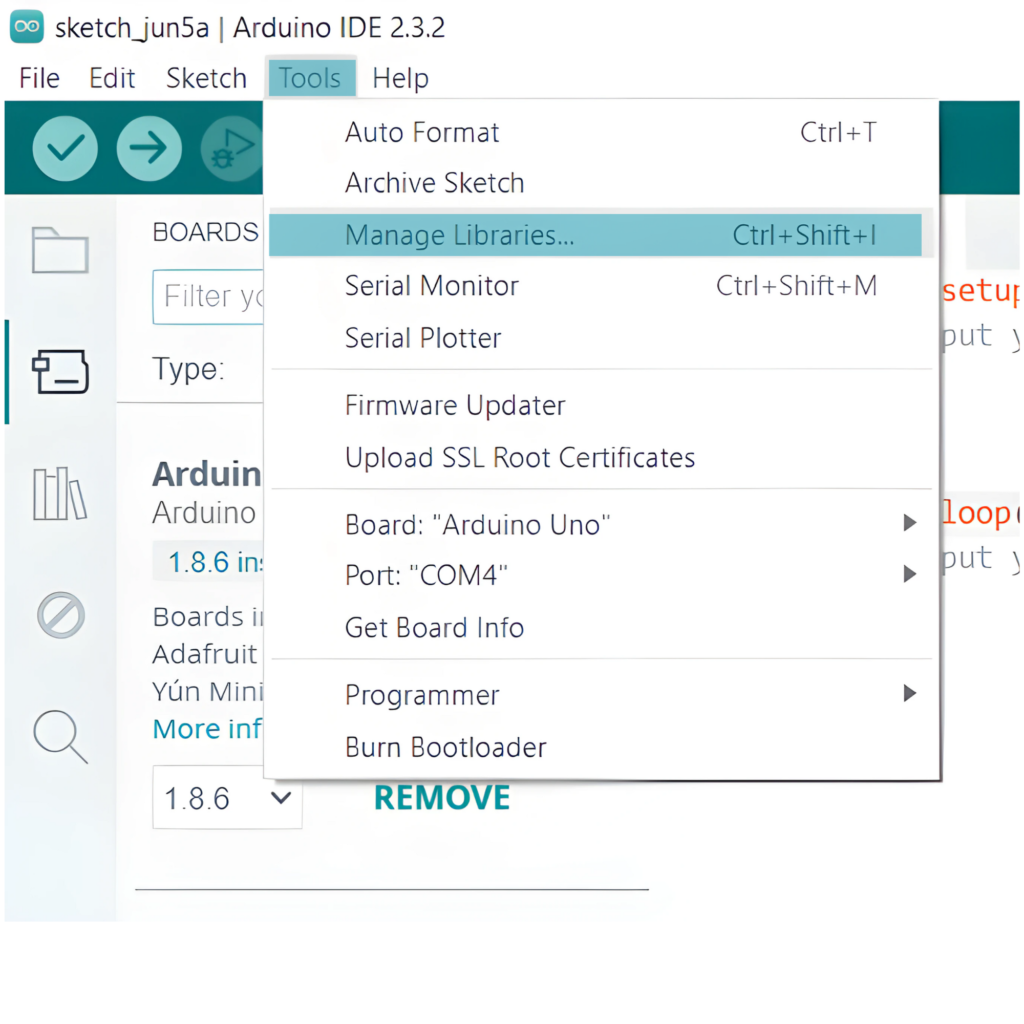
- Search for HX711 and install the library by Bogdan Necula.
Step 2: Select the appropriate board and port
- Go to Tools > Board and select your Arduino board (e.g., Arduino Uno).
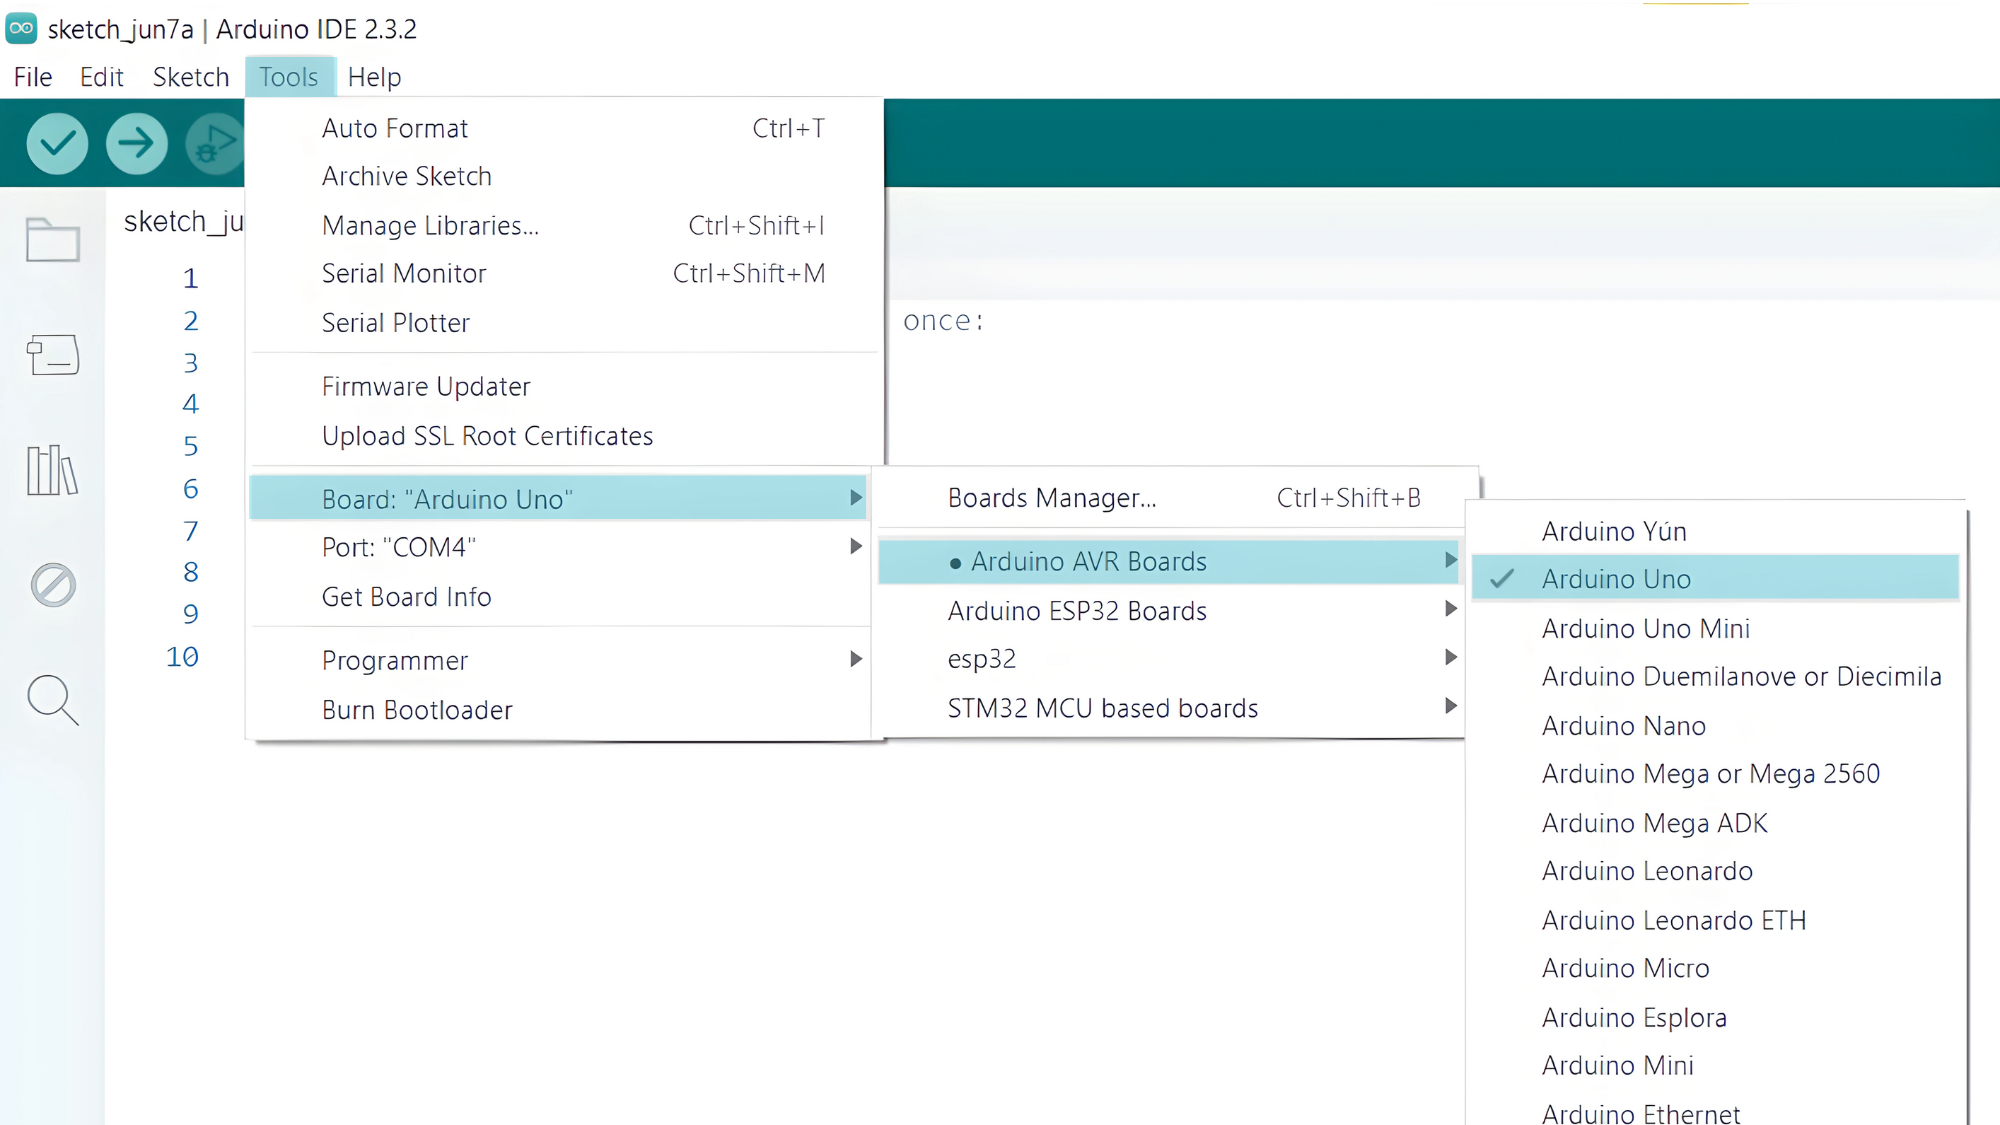
- Go to Tools > Port and select the port to which your Arduino is connected.

Step 3: Upload the Code
- Copy the provided code into your Arduino IDE.
#include "HX711.h"

const int DT_pin = 4;
const int SCK_pin = 5;

HX711 scale;

void setup() {
  Serial.begin(9600);
  scale.begin(DT_pin, SCK_pin);
}

void loop() {
  if (scale.is_ready()) {
    long weight = scale.read();
    Serial.print("Weight: ");
    Serial.print(weight);
    Serial.println(" grams");
  } else {
    Serial.println("Error reading weight");
  }

  delay(1000);
}
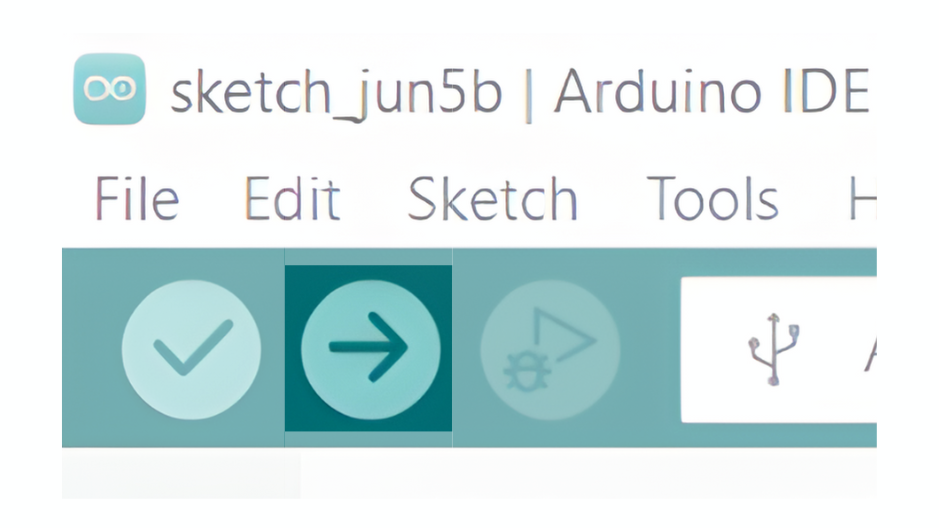
- Verify and upload the code to your Arduino board.
Step 4: Open the Serial Monitor
- Connect your Arduino to the computer and upload the code.
- Open the Serial Monitor in the Arduino IDE by going to Tools > Serial Monitor or pressing
Ctrl+Shift+M. - Set the baud rate to 9600 in the Serial Monitor.


